About the Layout
The Layout object defines a query on an existing multidimensional Data model. It specifies what (Cubes, Entities and calculated fields) and how (the aggregation level) data should be retrieved from an existing Board Data model.
A Layout can be associated with a data visualization Object - such as a Data View, a Chart, a Gauge and others - or it can be a step in a Procedure.
In the first case, from the Layout configuration interface you'll be able to simultaneously define a data set and where to view it in the associated Object.
When a Layout is executed, the retrieved data set is dynamically filtered by multiple layers of filters: the user security profile selection, the screen Select, the Pagers and Selectors selections and the Layout Select. First the selection filters are applied, then the query is executed and the data is retrieved from the Data model.
See About the Select for more details.
Whenever a Screen is opened, both in Design and Play mode, all Layouts associated with Objects on the Screen get refreshed. This happens also when a Data Entry action is performed and the "Refresh on Data entry" option is enabled under Screen Properties. If that option is disabled, only the Layout associated with the Object affected by the Data Entry action is executed.
The "Refresh Screen" procedure step and the "Refresh" button in the Top Menu refresh all Layouts, too.
Layout editor
Depending on the Object the Layout is associated with, the Layout editor may have slightly different features and configurations available. These differences are highlighted in the documentation of each Object.
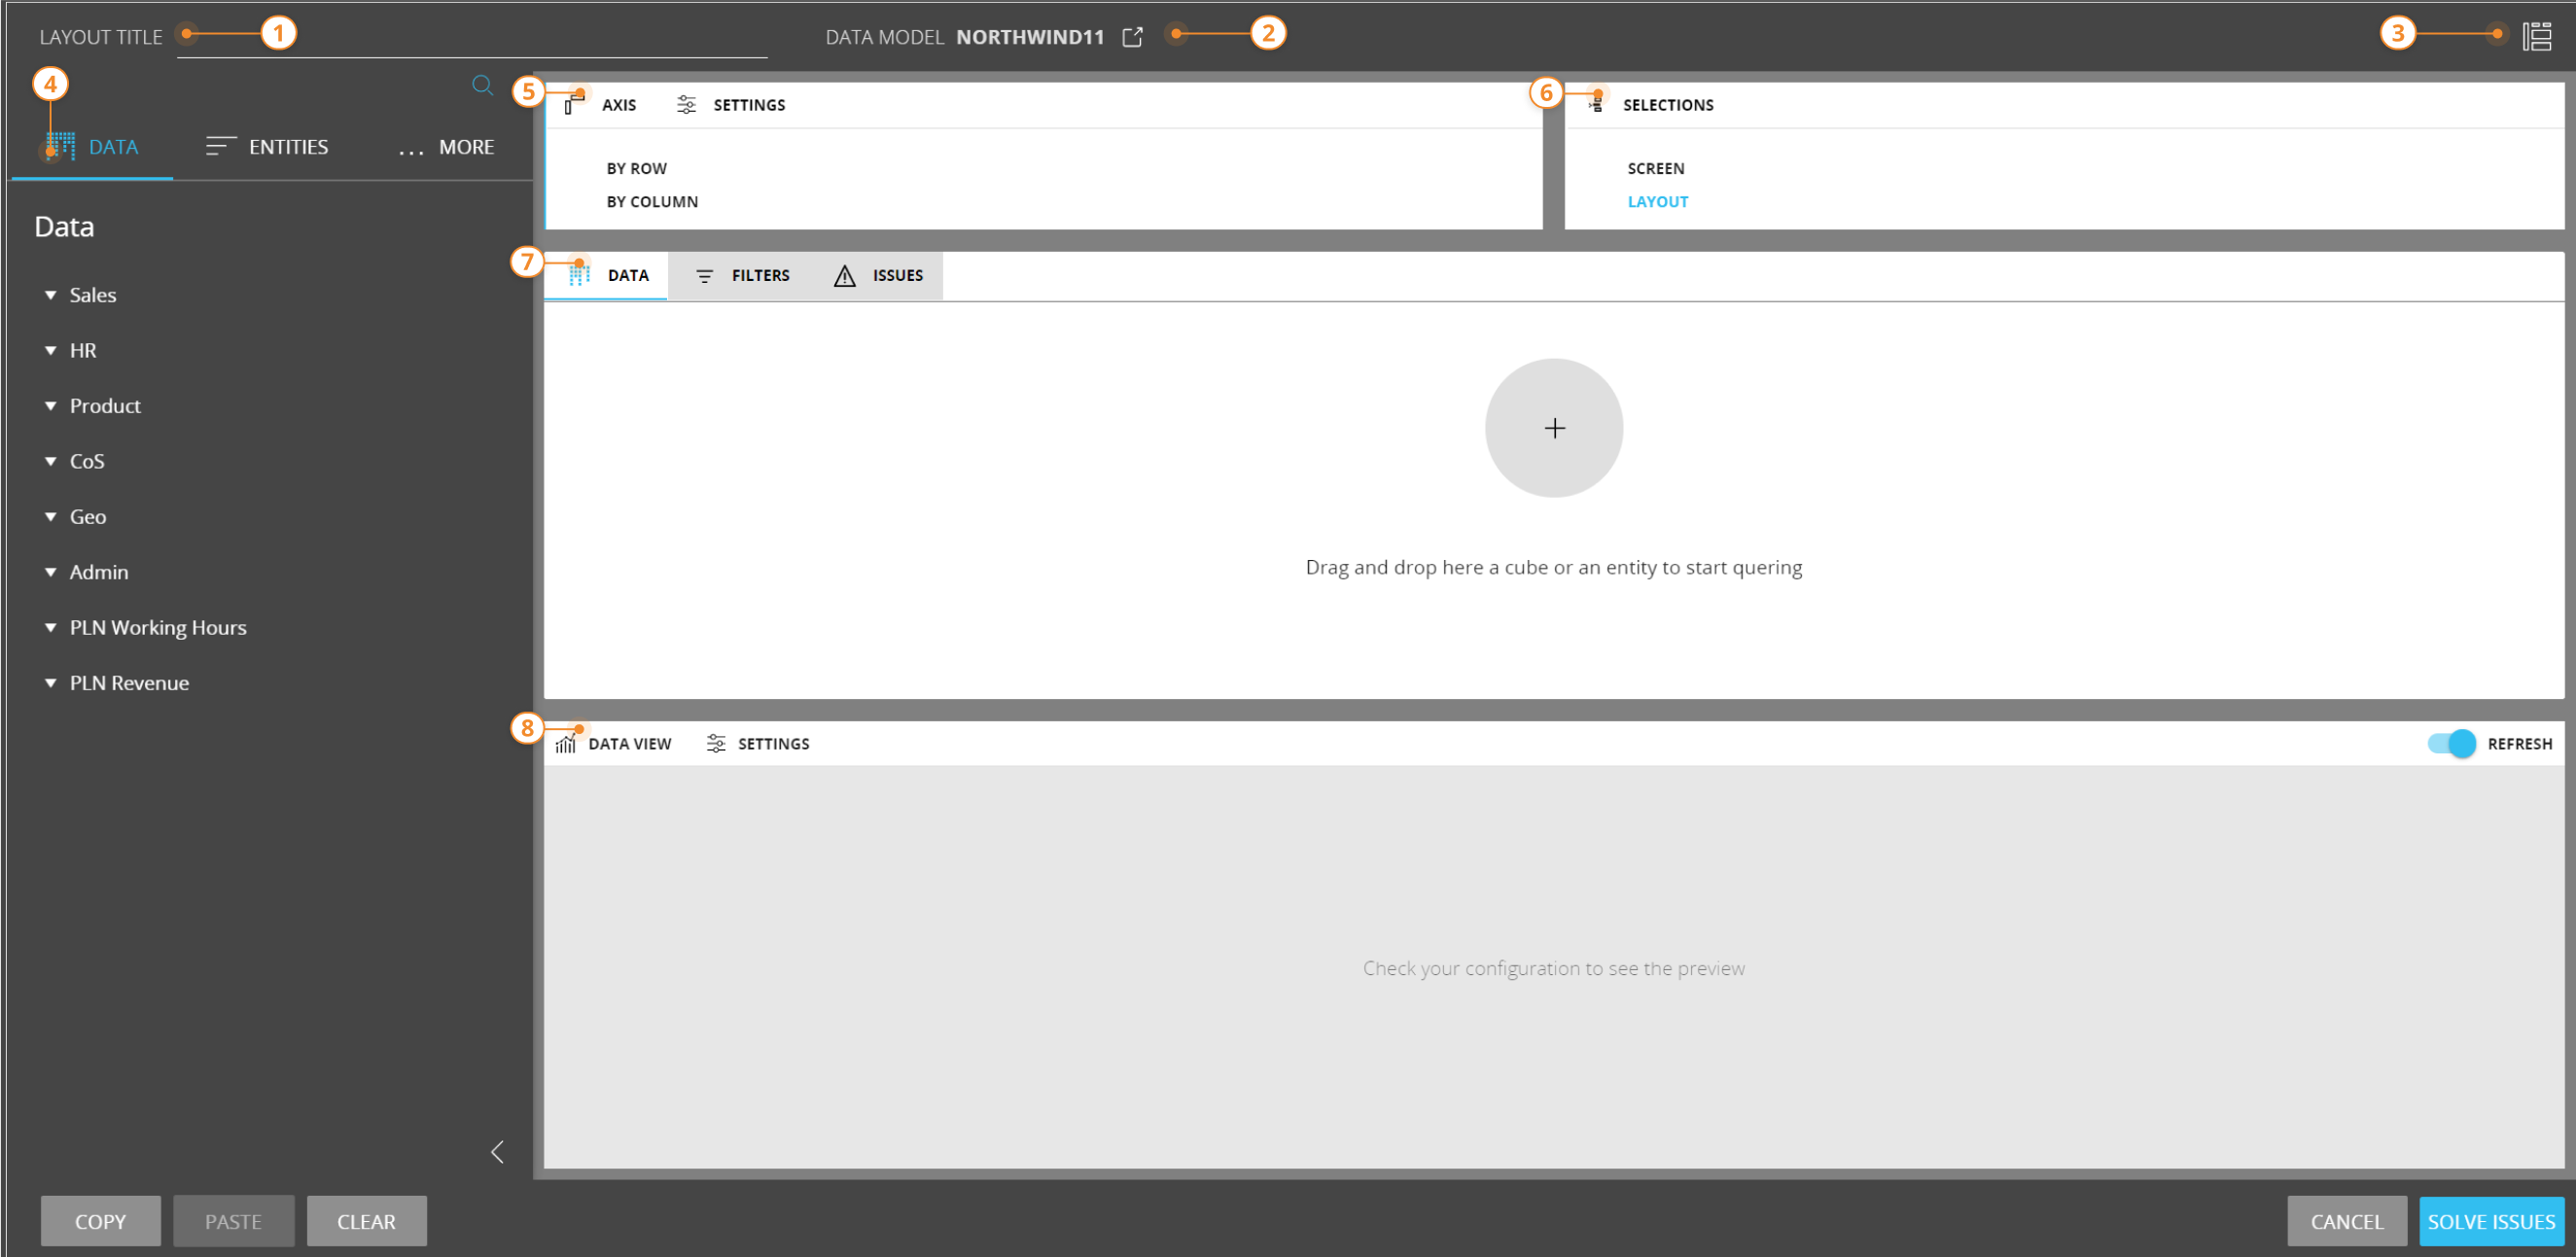
Here's a breakdown of all main elements of the Layout editor interface:
- Layout Title. It's good practice to give your Layout a title, as this information is used in Substitution formulas and is showed in certain Objects
- Data model. Shows the Data model on which the Layout is executed. In case the multiple Data models mode is enabled in the Screen Properties, a dropdown menu will allow you to select a Data model among those existing in the Platform
- View selector. Through the View selector in the top right corner of the page, you'll be able to switch between the following views:
- Analytical view. This view has no Object preview pane, suggested for advanced Board users
- Split view. Combines the Analytical view with the Graphical view. This is the default Layout view and it's recommended for most users
- Graphical view. This view shows a preview of the Screen Object defined by the Layout in a dedicated Object preview pane at the bottom of the page
- Data panel. The dark panel on the left contains all elements that can be used to define the Layout query.
A tabbed menu on the top of the panel gives you access to the following sub-pages, showing:-
Data. A list of available Cubes from the selected Data model
-
Entities: A list of available Entities from the selected Data model
-
More: A list of rules from the selected Data model, ranking functions and an Algorithm placeholder
You can configure the Layout query by dragging and dropping elements from the data panel onto the Data area, the Axis area or the Object preview pane (if enabled). When you drag an element from the data panel, all areas where you can drop it will start blinking.
Dragging and dropping the Algorithm placeholder allows you to create a data block calculated with a formula based on other data blocks of the Layout.
-
- The Axis area. Here you can define the aggregation level of the Layout query and set the Entities that will be displayed in rows and columns. You can also configure additional Axis-related properties
- The Layout Selections area. Here you can define a Selection that applies only to the Layout you're configuring
- The Data area. Here you can define the Data Blocks (or columns) of the Layout. It accepts Cubes, column algorithms, rules, ranking function, Entities and Relationships.
The "FILTERS" button lets you access additional sorting and filtering settings based on Data Block values.
Once this area is populated, a cog icon ( ) will appear beside the "FILTERS" button. Click on it to access information about Cube structures, Cube versions and Layout performance.
 - The Object preview pane. Shows a preview of the Screen Object defined by the Layout. The preview will update every time the Layout configuration is changed.
From here, you can also configure additional Object properties and settings by clicking on "SETTINGS".
The "REFRESH" toggle on the right lets you turn on and off the automatic update of the Object preview. If activated, this option will refresh the Layout with each change made to the data set.If you're working with huge data sets, it is advisable to turn off the automatic update of the Object preview in order to avoid slowdowns during the Layout configuration.
It is also possible to drag and drop objects from the Data panel to the Object preview pane: in that case, Board will automatically put Entities in the "BY ROW" field of the Axis area, while Cubes, ranking functions and rules will be added to the Data area.
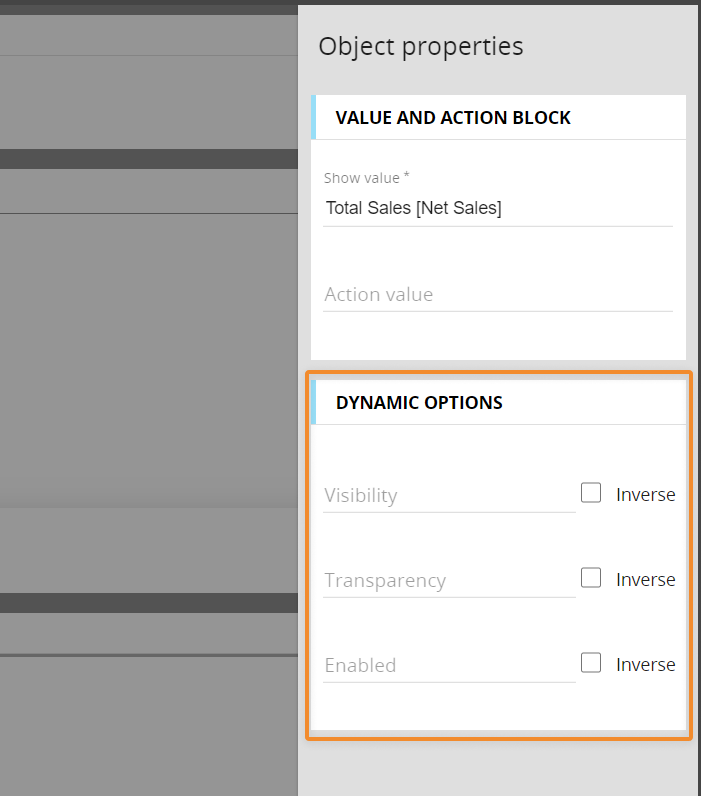
Object Properties
From The Object preview pane, you can access the Object properties panel which allows you to configure additional options and settings for each Screen Object.
In that panel, under the Dynamic Options menu, you can dynamically define some format and interaction options.
These are always found in the Layout editor and are the following:
- Visibility: if the Block value is zero (0) the Object disappears
- Transparency: a number between 0 and 100 determine the transparency rate of the Object. A lower value creates a higher transparency
- Enabled: if the Block value is zero (0) the Object can’t execute any Action.
These behaviours can be inverted by checking the Inverse option.
These behaviours can be combined.
For those options to work properly, be sure to deselect the Hide zeroes property for the Data Block in the Block settings panel.
Other interactive elements of the Layout editor
The buttons at the bottom left corner of the Layout editor will allow you to:
- Copy the Layout in the clipboard
- Paste a previously copied Layout configuration in the current Layout
- Clear the Layout
The "SOLVE ISSUES" button at the bottom right corner of the page will appear if the Layout has been configured incorrectly. Click on it to receive further information.
When you create at least one data block or edit an existing Layout, an additional "APPLY" button will be available at the bottom right corner of the page: click on it to apply changes without refreshing the Layout.

Click on "SAVE" to apply all changes. The Layout editor will close and the Layout is refreshed to immediately reflect the changes.
Learn how to:
- Configure a Layout
- Add Blocks
- Configure Blocks
- Configure Axis area settings
- Use Layout filters
- Use the Select in a Layout