Entity editor in ATO
The Entity editor object in an ATO management environment allows you to create Entity members and manage their relationships with other Entity members. It also allows users to change the description of an existing Entity member and modify its relationships with members of other Entities: to do that, select the desired member using the code and description searchable fields.
To search for an existing Entity member, start typing in the code field or in the description field: search results will appear automatically below the field as you type.
If there are other Objects in the ATO management environment, the Entity editor acts as a Pager and filters all data displayed in the environment as a member is selected or created.
Layouts associated with other Objects in the ATO management environment (the Screen or the Container) will only show data once a selection on all available Entity editors has been made.
Example of a full-featured Entity editor in an ATO management environment:

The Entity editor offers the following options:
- Filter (
 ): allows to make a selection on a parent Entity in order to reduce the amount of members displayed in the Entity editor
 - Reset selection (
 ): clears the current selection
 - Insert new member (
 ): allows to create a new Entity member. Click the insert icon to bring up the new member configuration window shown below:
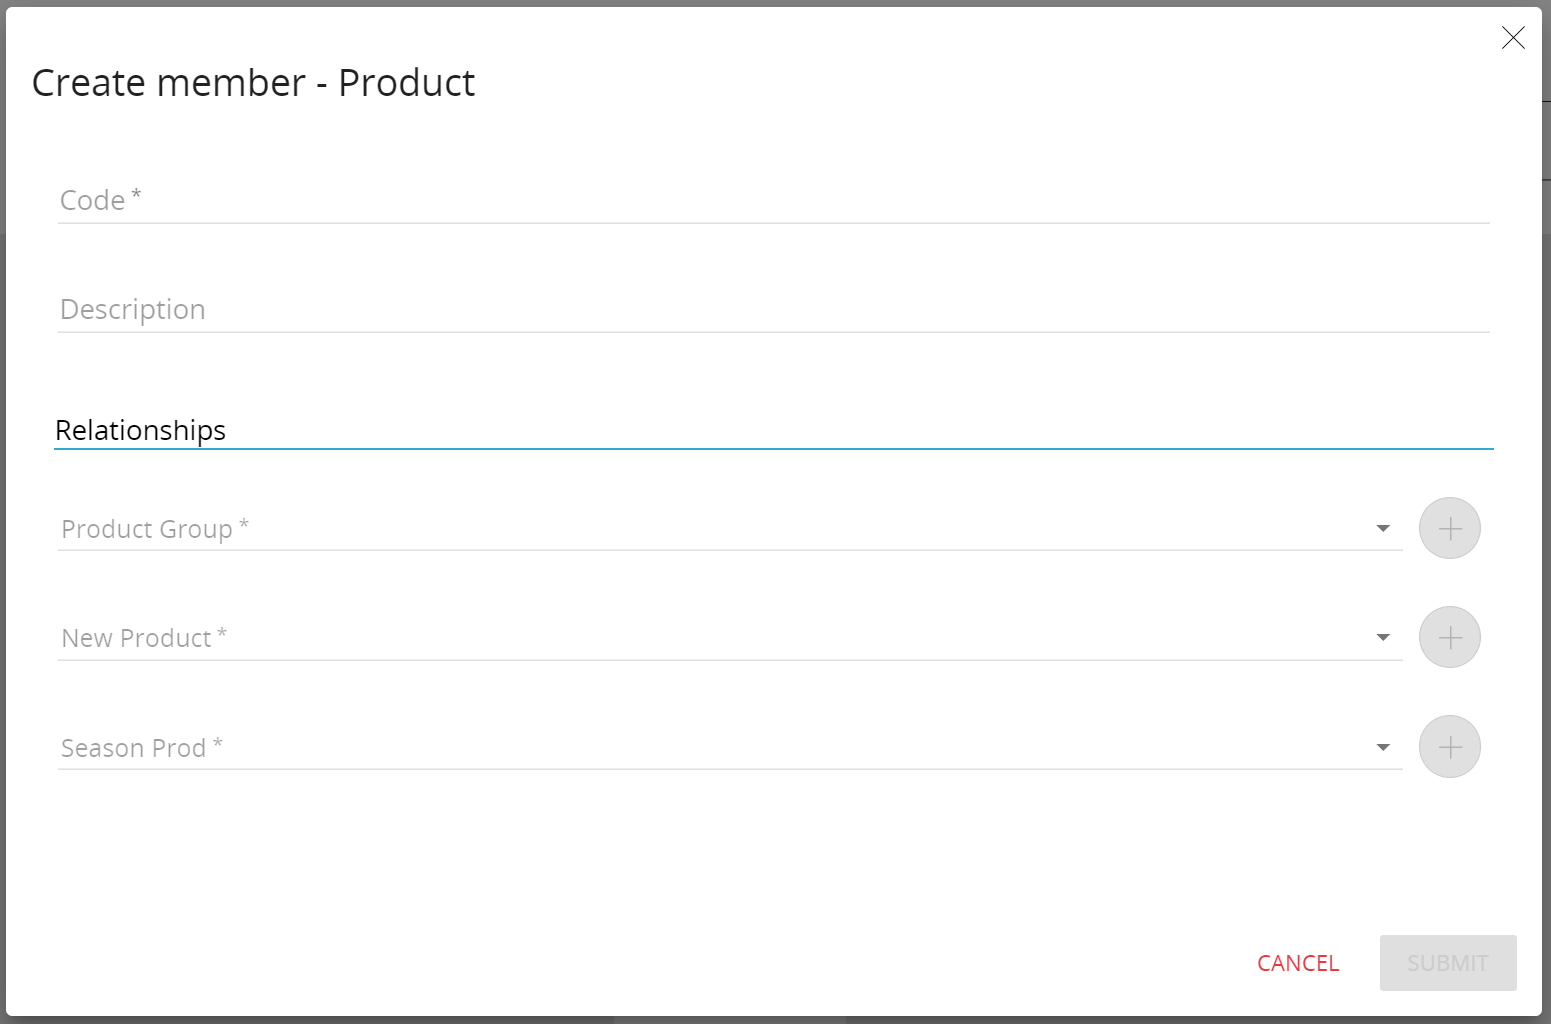
To create a new Entity member, give it a code, a description and define all necessary relationships with listed parent Entities. Click the SUBMIT button to save the new Entity member - Edit existing member (
 ): allows to modify the relationships and the description of an existing Entity member
It is not possible to change the code of an existing Entity member.
- Edit member's description (
 ): allows to modify the description of an existing Entity member
Entity editor configuration
Instructions for Capsule developers
To configure an Entity editor, you need to activate Design mode.
Once Design mode is active, drag and drop the Entity editor Object onto your Screen or Container: by doing so, you will also automatically enable ATO management on that Screen or Container.
Now select the Entity editor to reveal its configuration options in the contextual right panel, then select an Entity from the dropdown menu to allow end users to edit its members and/or relationships.
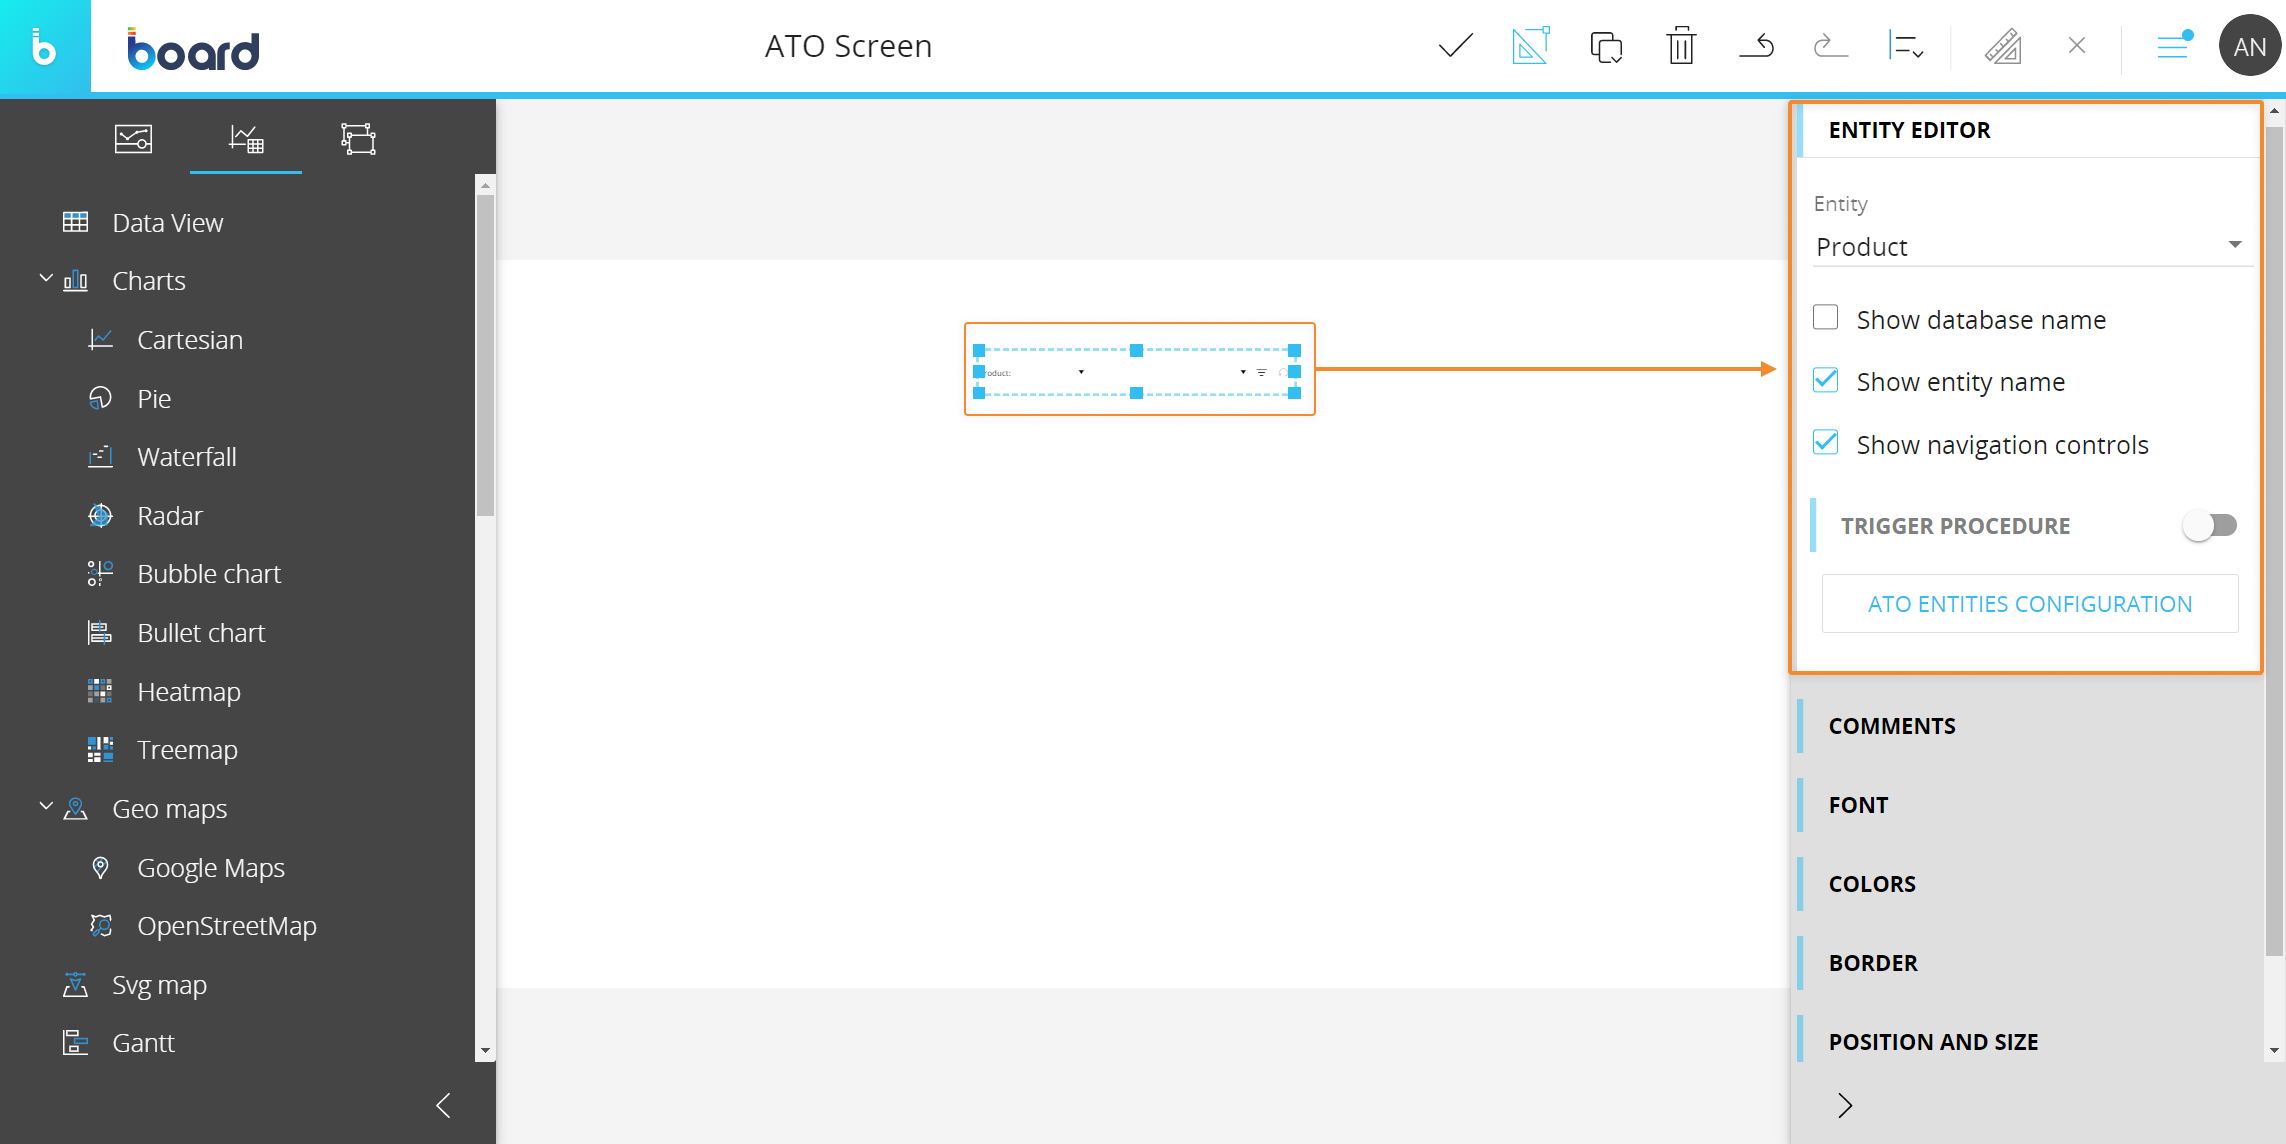
If the Multiple Data models mode is enabled on the Screen, an additional dropdown menu will allow you to select the Data model containing the Entity to be associated with the Entity editor.
You can add multiple Entity editors to an ATO management environment (a Screen or a Container), but you can't add an Entity editor to a Container if the Screen or Container that contains it already has an Entity editor in place. In other words, you cannot nest an ATO management environment inside another one.
Other Entity editor options available in the right panel are the following:
- Show database name. If enabled, displays the Data model name in the Entity editor area
- Show Entity name (enabled by default). If enabled, displays the associated Entity name before the Code and Description fields
- Show navigation controls (enabled by default). If disabled, hides the Insert new member icon (), the Edit existing member icon () and the Edit member's description icon (), regardless of configurations made in the ATO Entities configuration window (see next paragraph for more details)
- Trigger procedure. If enabled, allows to configure a Procedure that is executed whenever the end user selects an Entity member. Additional options let you disable the Layout refresh for other Objects in the ATO management environment when the end user makes a selection (in this case, be sure to include a Refresh Screen action in the triggered procedure in order to always show updated data) and to trigger the procedure execution also when the end user clears the current selection using the reset selection icon (). See The Trigger procedure feature on the Pager Object for more details
Once you've selected an Entity, click on the ATO ENTITIES CONFIGURATION button to bring up the following configuration window:
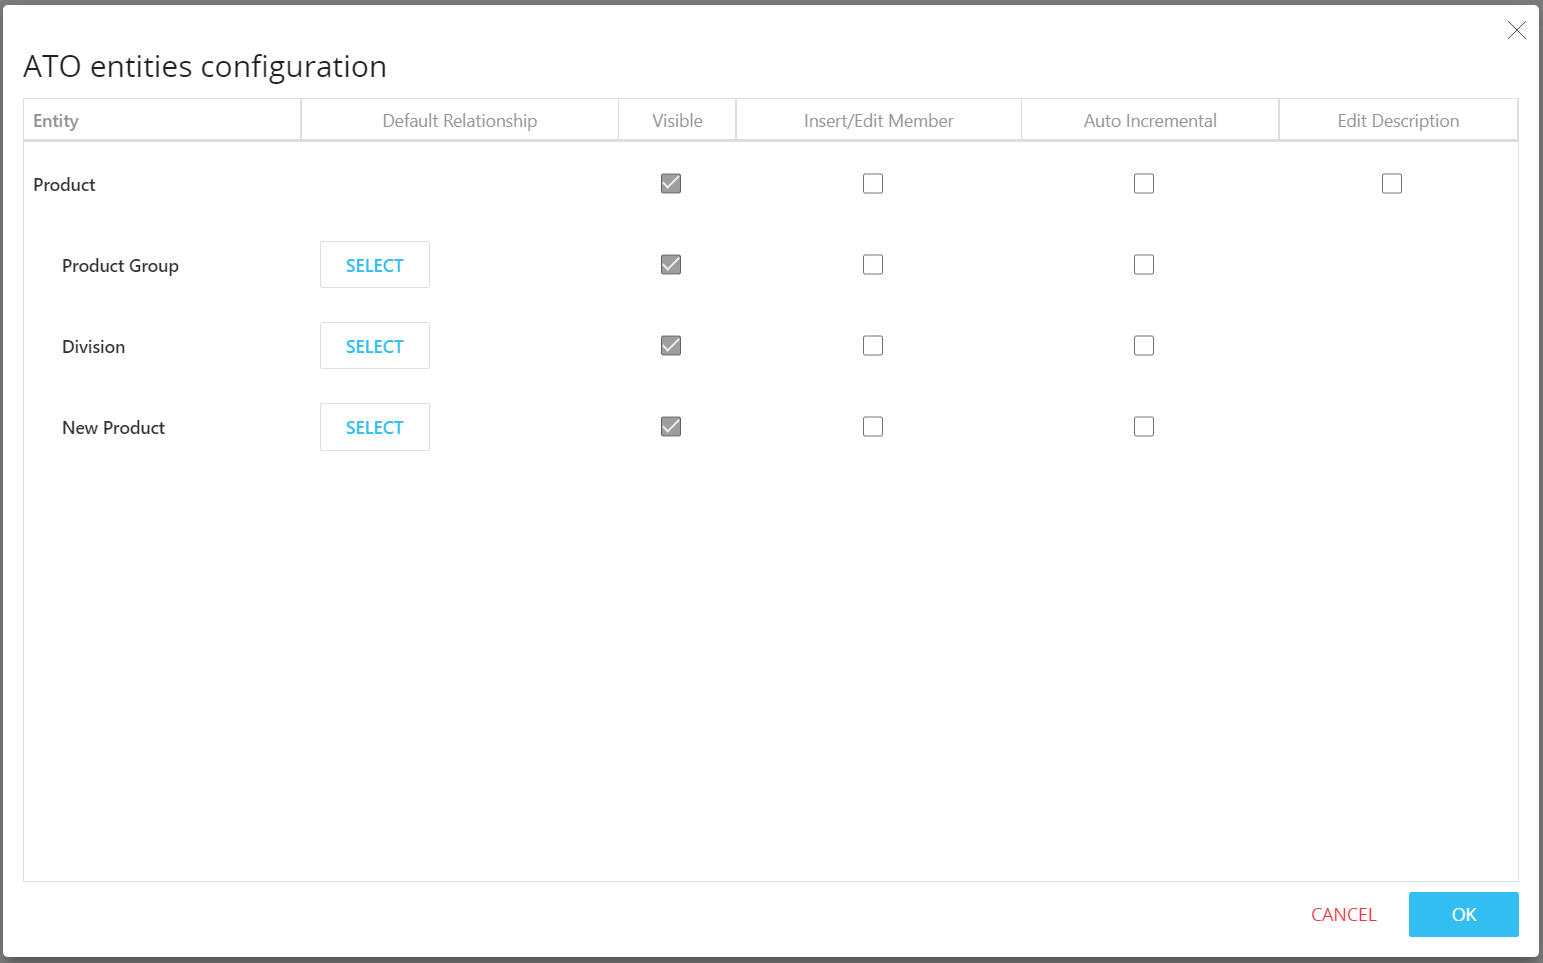
The ATO configuration window shows all parent Entities of the Entity you previously selected, even if they're not directly related. For each of them, the following options are available:
- Default Relationship. Allows to select the default member of the parent Entity to which newly created members of the child Entity are assigned by default.
For example, consider a scenario where an Entity editor allows the creation of new members in the Product Entity (the "Insert/Edit Member" option has been enabled on the Product Entity). In the configuration window you can set a default member for each of the available parent Entities: by doing so, every new member added to the Product Entity will be automatically related to previously chosen default members of available parent Entities. - Visible. If enabled, the end user is allowed to modify the relationship between the selected member of the child Entity and members of parent Entities
You can use the "Visible" option in conjunction with the "Default Relationship" option to suggest the end user a default member of the parent Entity to assign to new members of the child Entity: in this case both options must be active. You can also set a default member of a parent Entity that will be automatically assigned to all new members of the child Entity created by the end user: in this case, a default member of the parent Entity must be configured via the "Default Relationship" option and the "Visible" option must be disabled, so the relationship can't be modified by the end user. - Insert/Edit Member. Allows the user to create new members of the previously configured Entity using the icon of the Entity editor. If the option is enabled on parent Entities, the end user will be able to add new members at higher levels of the hierarchy from the member creation window using the "+" button shown below:
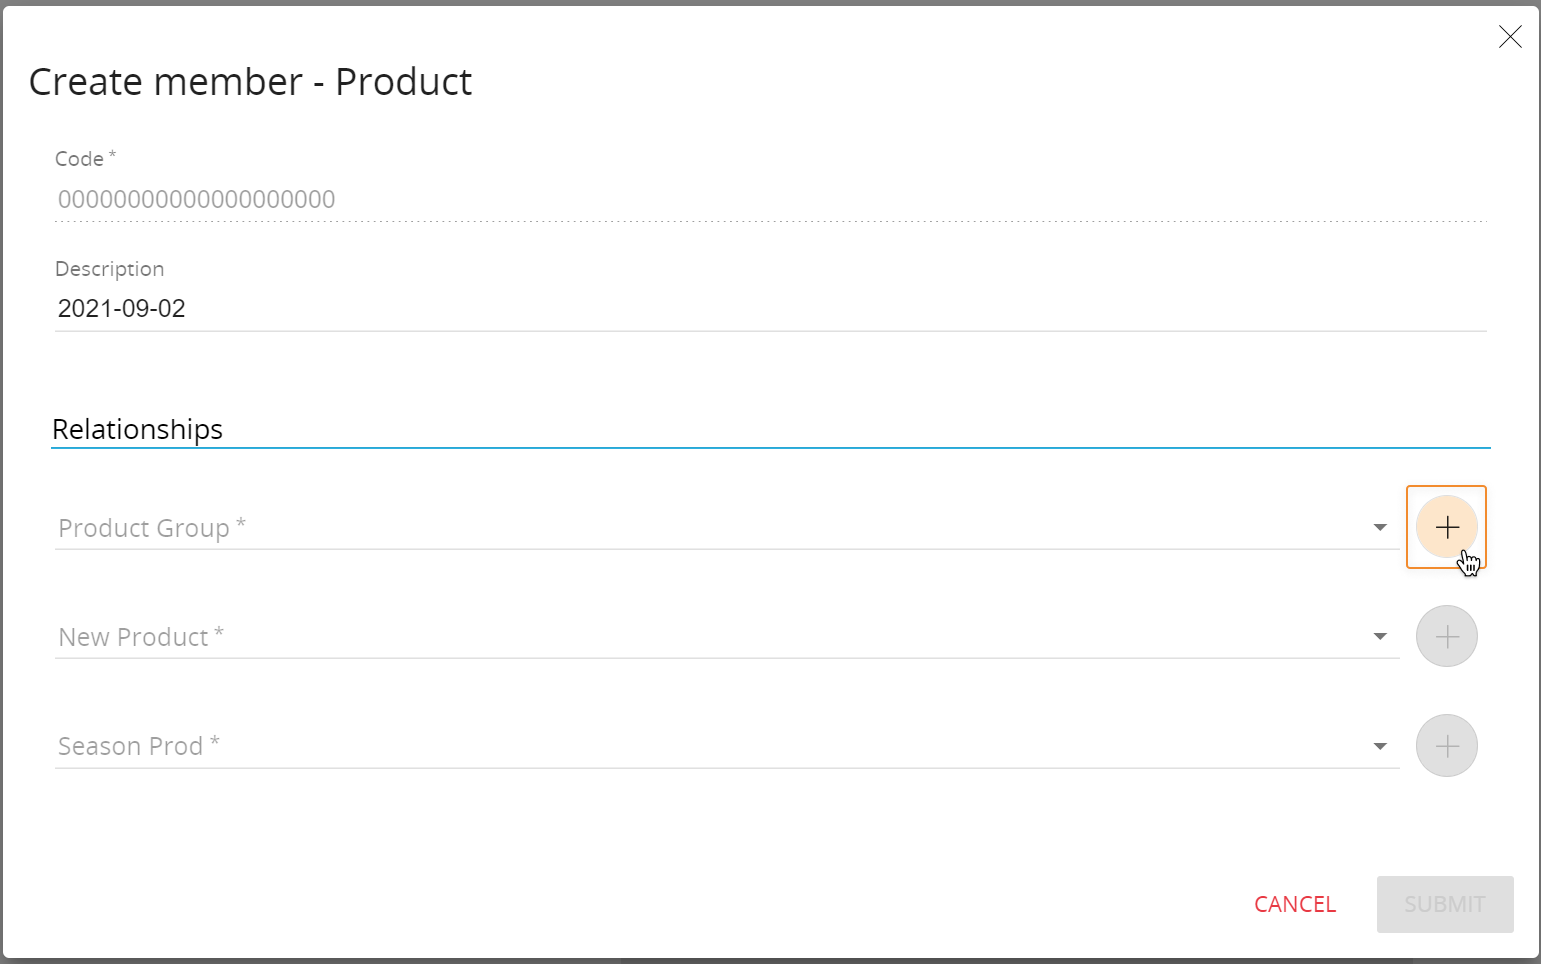
- Auto Incremental. Automatically creates the code for new Entity members incrementally, using a sequence of numbers (i.e. 0000000000000000001, 0000000000000000002, and so on).
- Edit Description. Allows the user to edit the description of the selected Entity member.
Learn more about: