Data entry on Cubes (Cube write-back)
To enter data on a Cube, you need to use a Data View Object: it allows data entry of numeric data, dates, text and even files into Cubes. Refer to The Block settings section of this manual for details on how to configure data entry options and features.
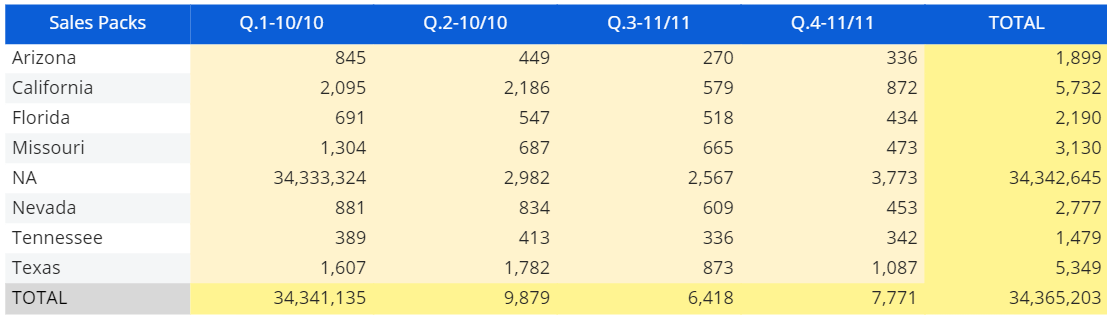
When data entry is enabled on a Cube, the background of totals cells turns yellow while the background of values cells turns ivory (unless otherwise formatted), as in the following example:
Data entry on numeric Cubes
To enter data on a numeric Cube, double-click on a cell and type the desired value.
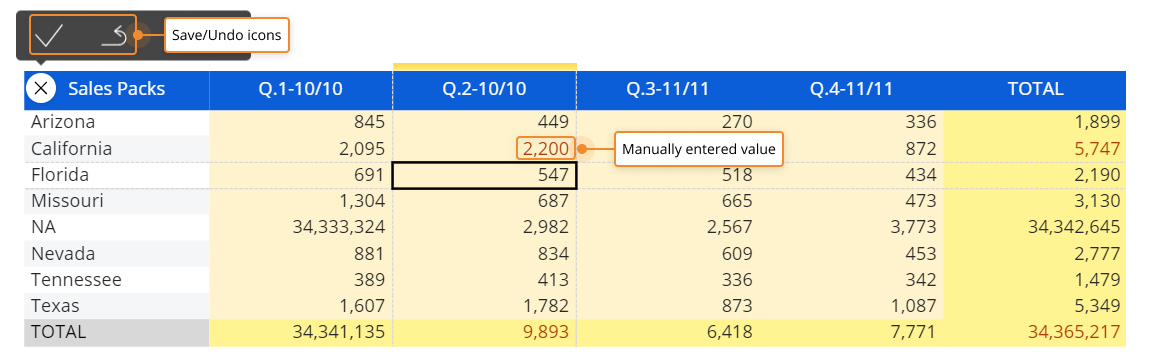
If Save/Undo mode is enabled on the Screen, after you have entered a value click the save icon at the top left of the Data View to actually save the value in the Cube. To do this, you can also press the F9 key on your keyboard.
The undo arrow icon allows to restore the last saved values (i.e. it discards all unsaved changes).
Unsaved values and totals that depend on those values are shown in red. When you press the save icon, their text color will change to match the text color of previously saved values, indicating that all changes have been saved in the target Cube.
In case of suggested values taken from an Entity or a Custom list, the user will be presented with multiple suggested values for a single data entry action. The list supports vertical scrolling and its elements are filtered as the user writes in the cell. The list displays a maximum of 200 items: if the desired item is not displayed in the list, start typing in the cell to search on the entire set of suggested values.
If Save/Undo mode is disabled on the Screen, after each data entry action the new value is automatically saved and you can't restore the previous one.
When manually entered data are saved in a Cube, automatic version alignment is not performed. To align all versions of a Cube after entering data, you need to verify and align Cubes manually, as explained in the Managing Cubes page.
Data entry on BLOB Cubes
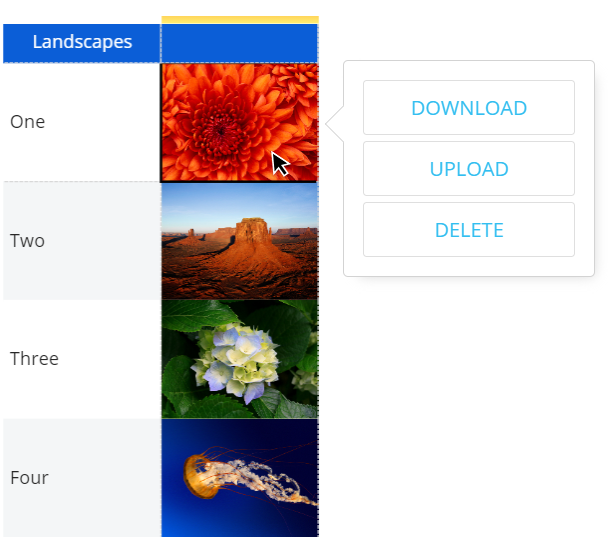
If you're working on a BLOB Cube containing image files, double-clicking on a cell brings up the following options:
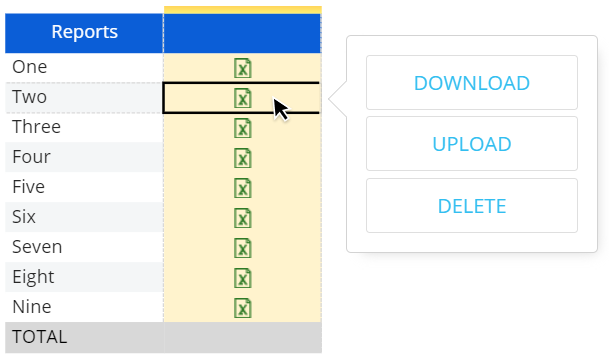
The data entry options shown above apply to BLOB Cube containing any type of file, for example Excel files as shown in the following image:
Data entry on Text or Date Cubes
In case of Cubes containing text or dates, data entry actions are allowed only at the physical level of the Cube and not on aggregate views.
To reach the physical level of the Cube, you can:
- Add all Cube dimensions in the Axis area of the Layout associated with the Data View, either by row or by column
- In the Data View, drill down on a cell until you reach the physical level of the Cube
Once you're at the physical level of the Cube, you'll notice a change in the cells background color, indicating that data entry is allowed.
To make the data entry process even more efficient, you can use validation rules, locking conditions, suggested values, the reverse algorithm function and other data entry-related options. See About Data Block settings for more details.
Data Entry with Detail By option
Data entry can also be used in conjunction with the Detail By option to provide greater flexibility in configuring data entry forms where different business perspectives must coexist.

In the image above, the Layout associated with the Data View contains the Cube (Sales Packs) in two different Blocks with two different Detail By options (by Quarter and by Area).
In this case, the values of the second Block (Sales Packs detailed by Area) will be updated only when manually entered data is saved.
Data entry cannot be used in conjunction with the Detail By option when there are Entities set by Column.
If you apply a locking option on a Block where a Detail By option is active, you must apply the same Detail By settings to the locking Block (or Cube) as well.
When manually entered data are saved in a Cube, automatic version alignment is not performed. To align all versions of a Cube after you need to verify and align Cubes manually, as explained in the Managing Cubes page.
Data Entry on unbalanced hierarchies
When the Entity that contains an unbalanced hierarchy is added in the “BY ROW” field of a Layout, you will be able to perform Data Entry on parent members: data will be proportionally distributed on children members following the split and splat logic, while a Data Entry on a leaf will be aggregated before saving it and then sent to the Data Model to update it.
Only leaf data are saved.
When cells are locked, the following rules apply:
- If the locked cell is a descendant of the cell on which the Data Entry is performed, it will be ignored when redistributing data and its value will be retained
- if the locked cell is an ancestor of the cell on which the Data Entry is performed, its value will be retained and data will be redistributed among all its other descendants
Data Entry Keyboard Shortcuts
The following list of keyboard shortcuts can help you when entering data into cells of a Data View.
| Shortcut | What it does | Example |
| K | Enters the value in thousands | 3K enters 3000 |
| M | Enters the value in millions | 5m enters 5000000 |
| B | Enters the value in billions | 7b enters 7000000000 |
| + | Adds to the value | +10 in a cell containing 10 enters 20 |
| ~ | Subtracts to the value | ~10 in a cell containing 20 enters 10 |
| per, pct | Enters the given percentage of the value | per10 in a cell containing 2000 enters 200 |
| inc | Increases the value by a given percentage | inc10 in a cell containing 2000 enters 2200 |
| dec | Decreases the value by a given percentage | dec10 in a cell containing 2000 enters 1800 |
| pow | Raises the value to the given exponent | pow2 in a cell containing 5 enters 25 |
| > | Fills cells to the right with the same entered value | >100 will fill all the cells on the right with 100 |
Data entry shortcuts can be used also in the Lock and Spread advanced windows.
Learn more about: