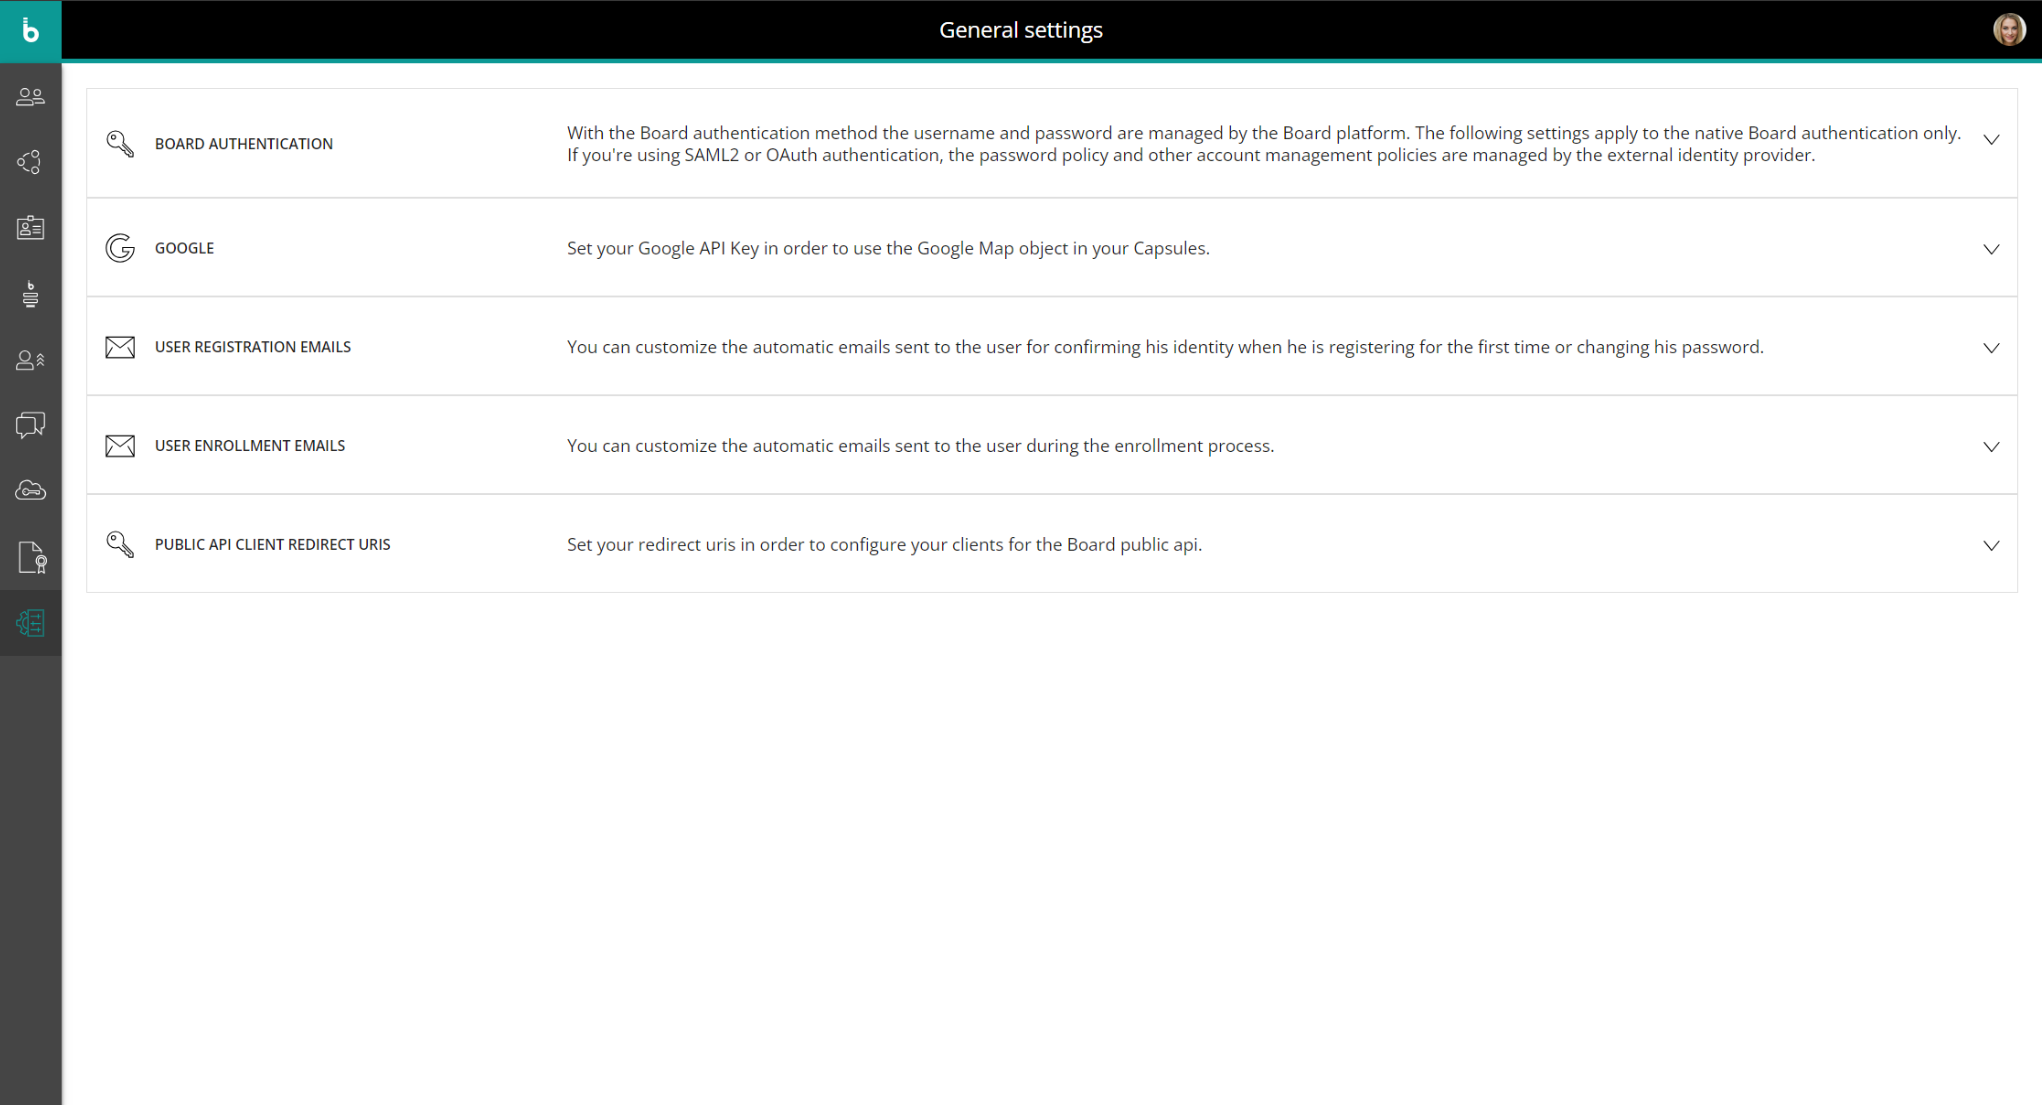
The General settings section
- Applies to: All Board Cloud subscriptions using Board version 12.2 (2021 Winter Release) or newer
WHAT: Introduction to the General settings section
The General settings section lets you configure several options and properties that apply to all Platforms associated with the Subscription Hub.
From the General settings page you can define login options, a password policy and a lockout policy. You can also enter your Google API Key to enable all features of the Google Maps Object and customize all Enrollment and Registration automatic emails.
You can also set Redirect URIs for enabling user authentication following OAuth 2.0 Authorization Code with PKCE flow specifications.
WHAT: The BOARD AUTHENTICATION menu
Under the Board Authentication menu, the following options are available:
- In the Login submenu:
- Sign-in hint text. Here you can customize the hint text appearing in the account name field of the log-in page
- Enable lost password. Enable this option to display a "Lost password" link in the log-in page. Clicking on that link will initiate the password recovery flow
- Max forgot password daily requests (required field). Specify a maximum total number of lost password requests in a 24-hour period. When the maximum total number of lost password requests is exceeded, users will not be able to send any more requests until the next day
- Single sign-on. If you use external identity providers (IDPs), you can use this option to automatically redirect users to the default external IDP login page without the need to open the Board Sign-in page.
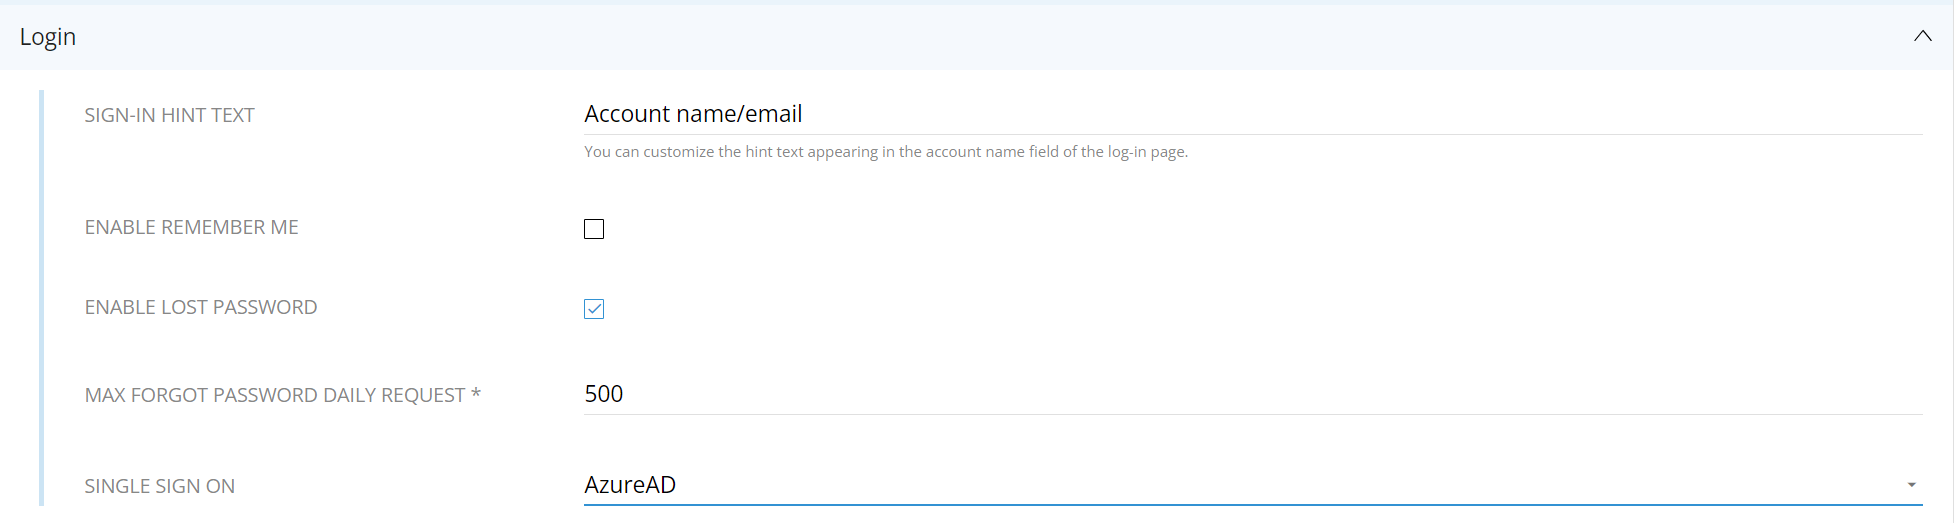
If enabled, other authentication methods can still be used to log into Board from the page https://customerplatform-idp.board.com/account/login
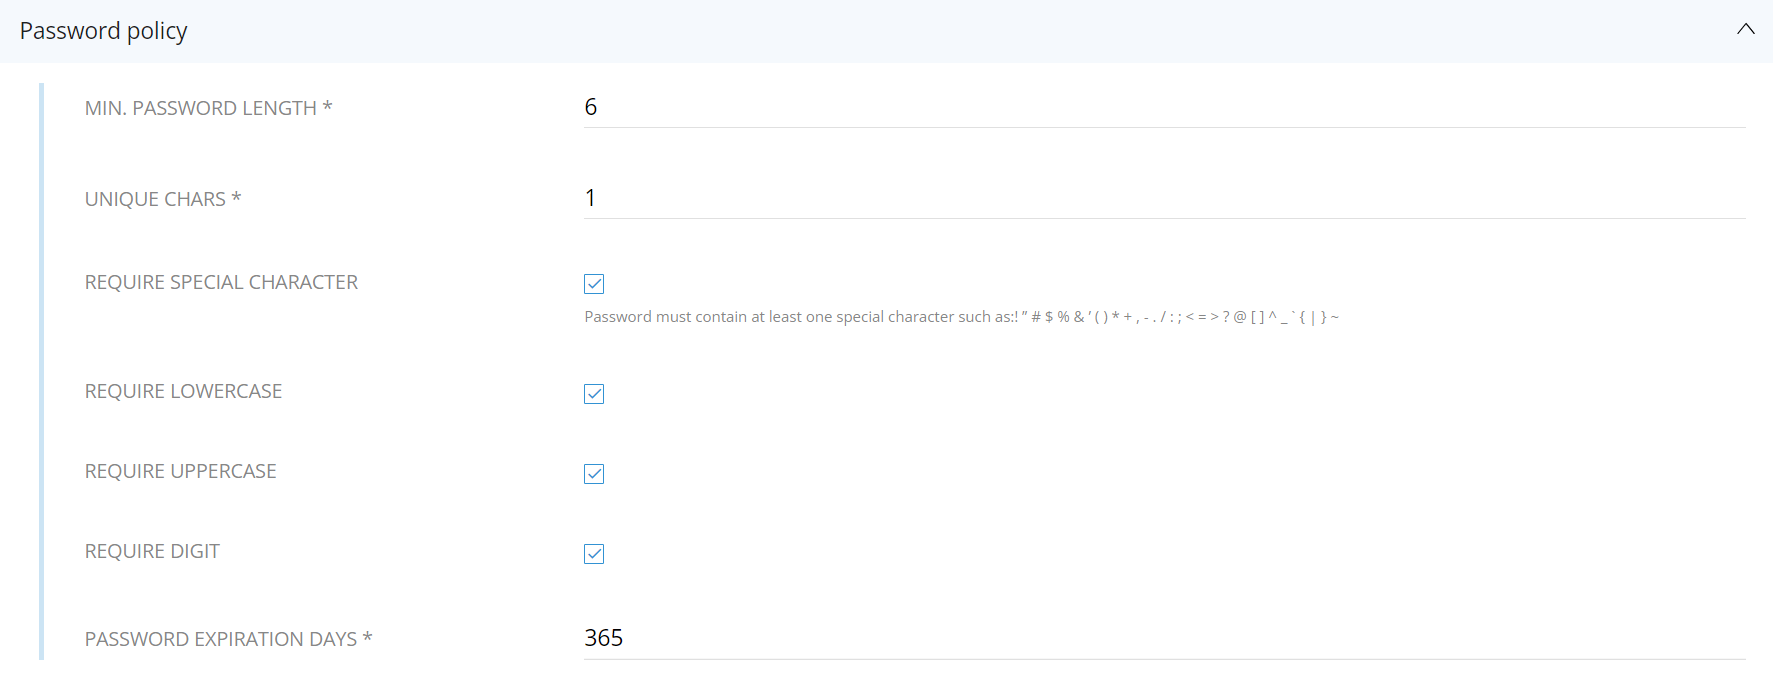
- In the Password policy submenu, the following options are available:
- Min. password length (required field). Specify the minimum length of the password
- Unique chars (required field). Specify the minimum number of unique characters in the password. For example, if the entered value is 3, the password must have at least 3 unique characters, such as "qwertyqwe"
- Require special character. Select this option to require at least one non-alphanumeric character in the password, such as: ! ” # $ % & ’ ( ) * + , - . / : ; < = > ? @ [ ] ^ _ ` { | } ~
- Require lowercase. Select this option to require at least one lowercase character in the password
- Require uppercase. Select this option to require at least one uppercase character in the password
- Require digit. Select this option to require at least one number character in the password
- Password expiration days. Specify the minimum number of days that must pass between password changes (default value: 365 days).
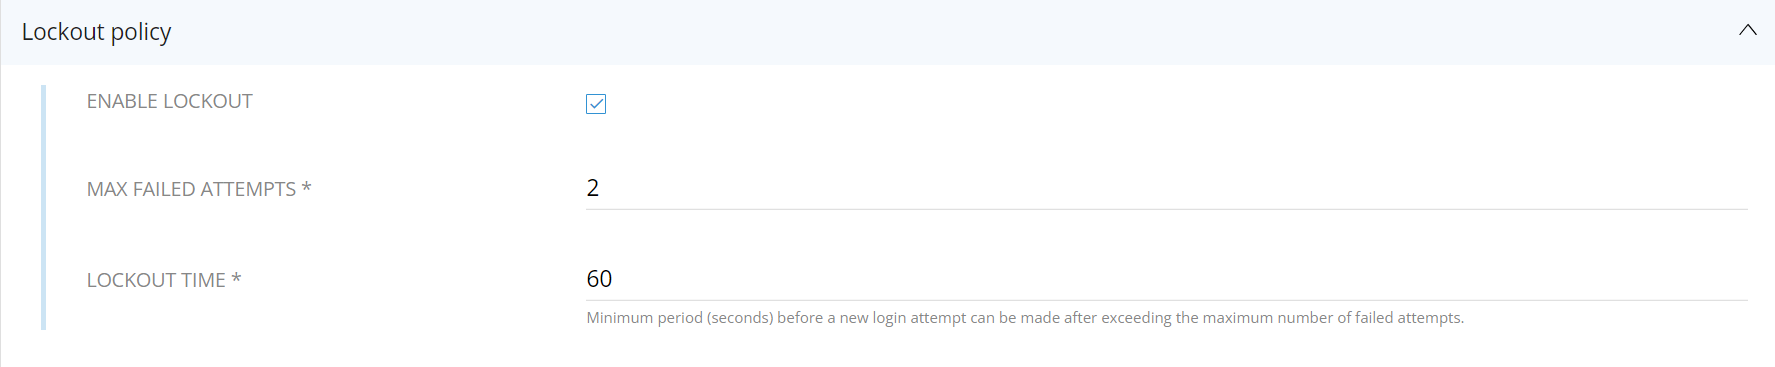
- In the Lockout policy submenu, the following options are available:
- Enable lockout. Enable this option to activate the account lockout policy
- Max failed attempts. Set the number of failed sign-in attempts that will cause a user account to be locked. Once an account is locked, the user will have click the "Lost password" link to unlock it by completing the password recovery flow
- Lockout time. Set the minimum period (in seconds) before a new login attempt can be made after exceeding the maximum number of failed attempts
Options described above only apply to the "Board Authentication" authentication type. If External Identity Providers are used to manage user identity and authentication information for logging into Board, password policies and other user management properties have to be configured on those services.
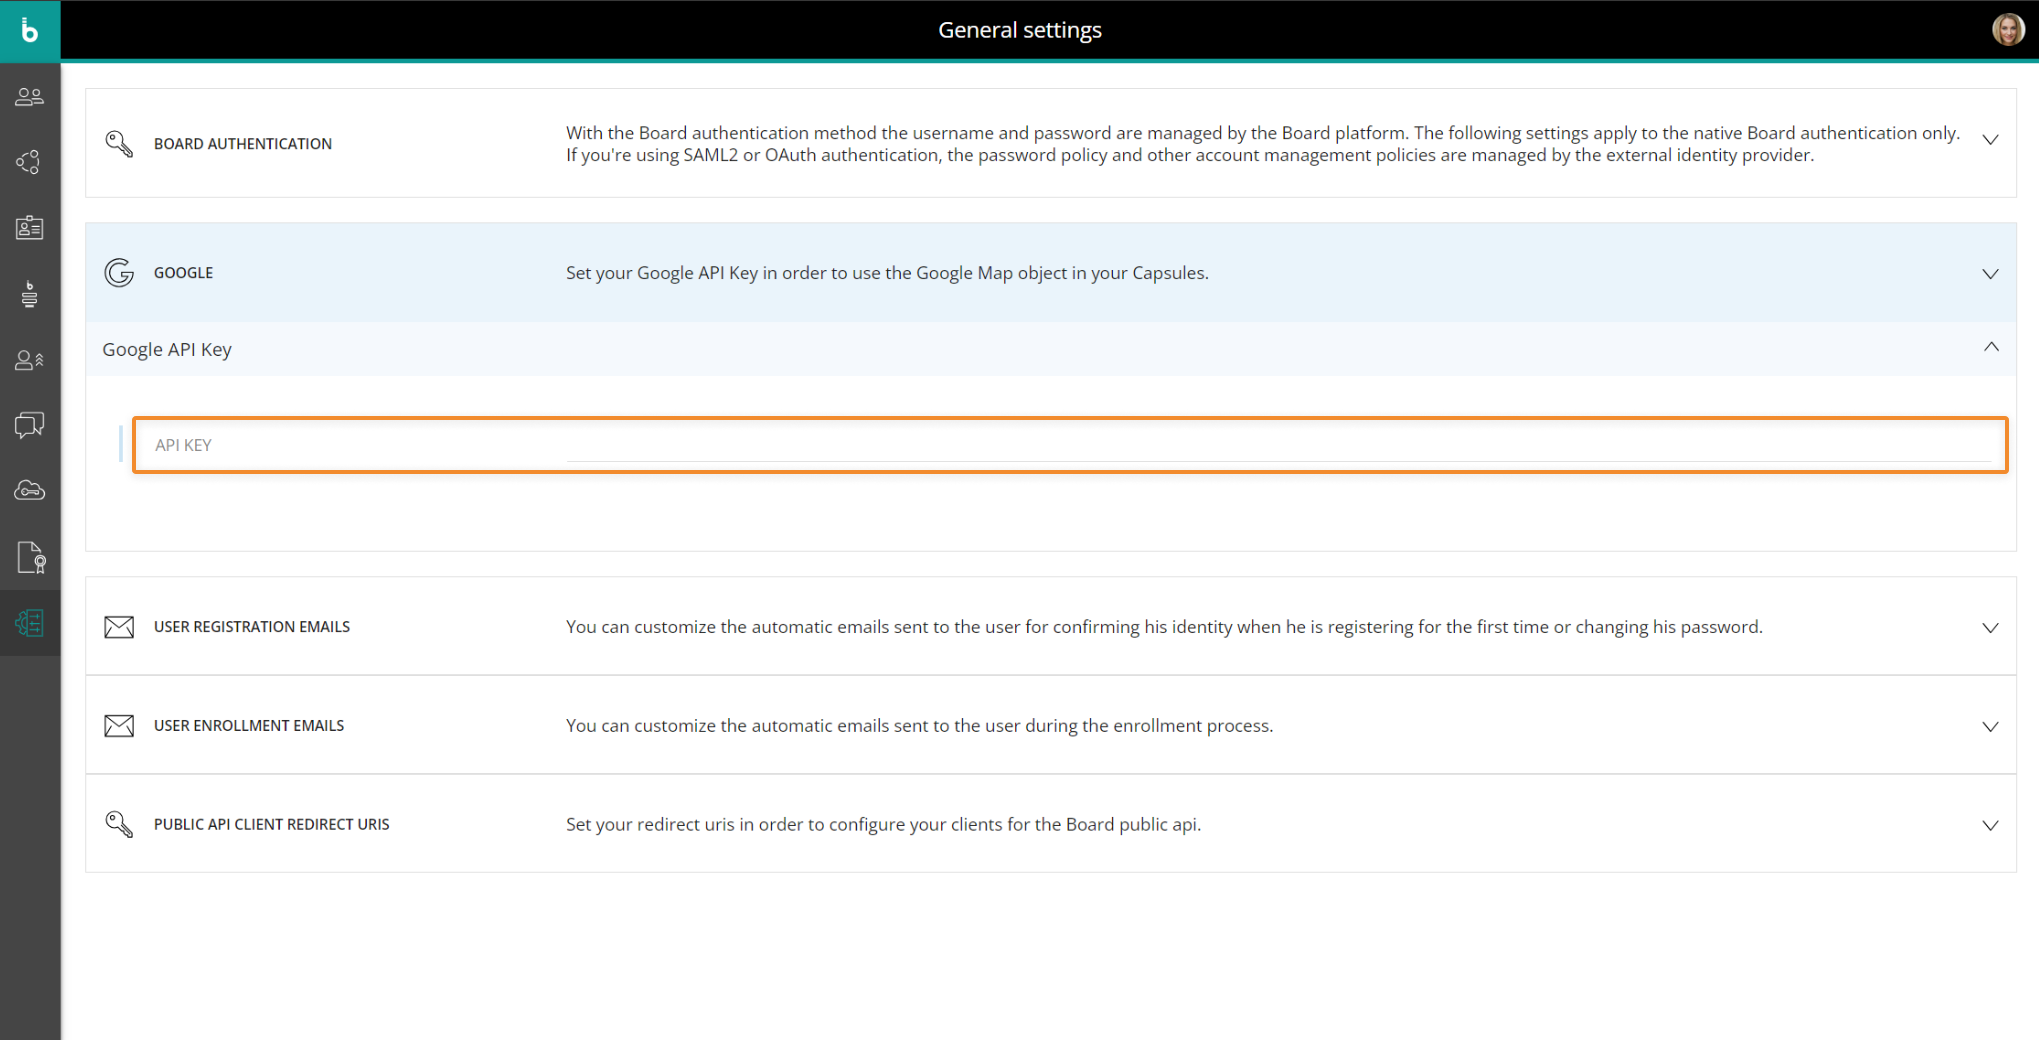
WHAT: The GOOGLE menu
The Google Maps Object introduced in Board 2021 Summer Release requires a valid Google Maps API key (a unique alphanumeric string) that can be obtained following the official Google guidelines.
Once the API Key is created, you will need to paste it in the "API KEY" field as shown below:
WHAT: The USER REGISTRATION EMAILS and USER ENROLLMENT EMAIL menu
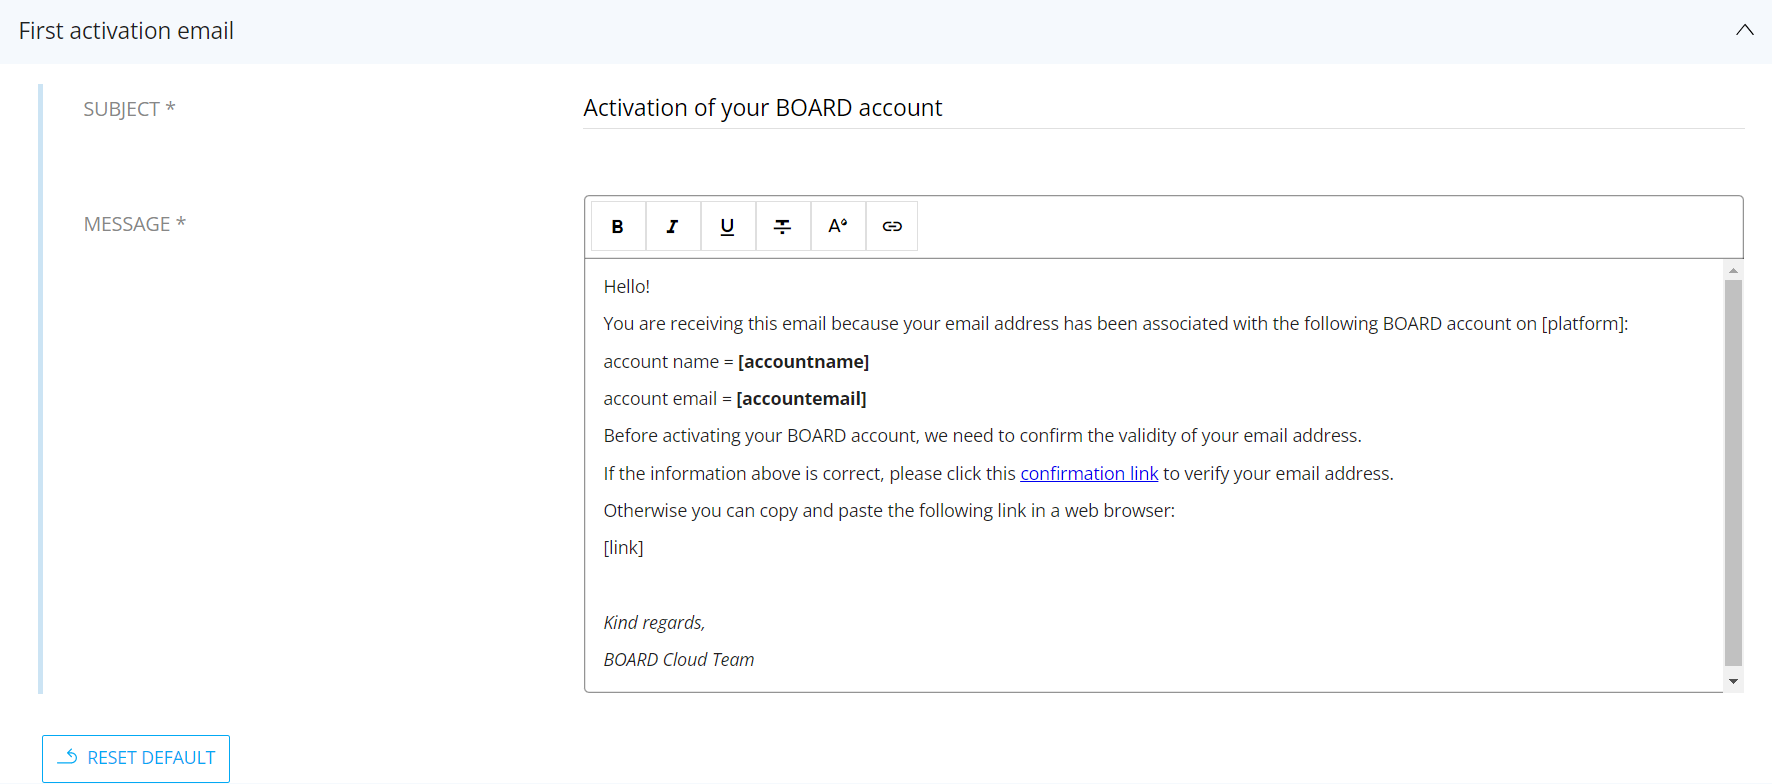
Under the User registration emails menu, you can customize the automatic emails sent to the user for confirming his/her identity when he/she is registering for the first time or changing his password.
For each email, you can edit:
- The subject line
- The body. You can apply predefined text styles, change the font color and add links. Words in square brackets are placeholders which will be replaced with the appropriate values, such as the user's account name or a unique URL during sending.
The following placeholders are used by Board:Placeholder Description [accountname] The user's account name as seen in the Account name field in the User Profile panel [accountemail] The email associated with the user's account as seen in the Email field in the User Profile panel [link] An automatically generated temporary link that the user can copy and paste in the browser's address bar for account activation, email verification or password confirmation and reset [message] All user information (Name, Email, custom user metadata) retrieved from a custom request form configured in a manual approval enrollment process It is recommended not to delete any placeholder to avoid missing information in the emails sent to the user.
The "Reset Default" button in the lower left corner allows you to restore the default configuration.
If an email includes a temporary link, you can define its expiration period (in hours) under the Links availability submenu.

Under the User Enrollment emails menu, you can customize the automatic emails sent to the user during the Enrollment process as described in the instructions above.
WHAT: The PUBLIC API CLIENT REDIRECT URIS menu
Under the "Public APIs client redirect URIs" you can set the URL or program the user will be redirected to after the external application has been authorized through the authentication flow following OAuth 2.0 Authorization Code with PKCE flow specifications. Redirect URIs are part of the REST API configuration process and must be entered before querying Board.
To configure a Redirect URI, proceed as follows:
- Navigate to the "General settings" section of the Board Subscription Hub
- Click on the "Board API client redirect URIs" menu and enter the necessary redirect URIs. You can add as many fields as you need using the "ADD NEW" button on the right to configure multiple applications at the same time

To know more about Board APIs, see Client API and New REST APIs.