Associate a Mask with one or more Screens
There are two ways to associate a Mask with a Screen:
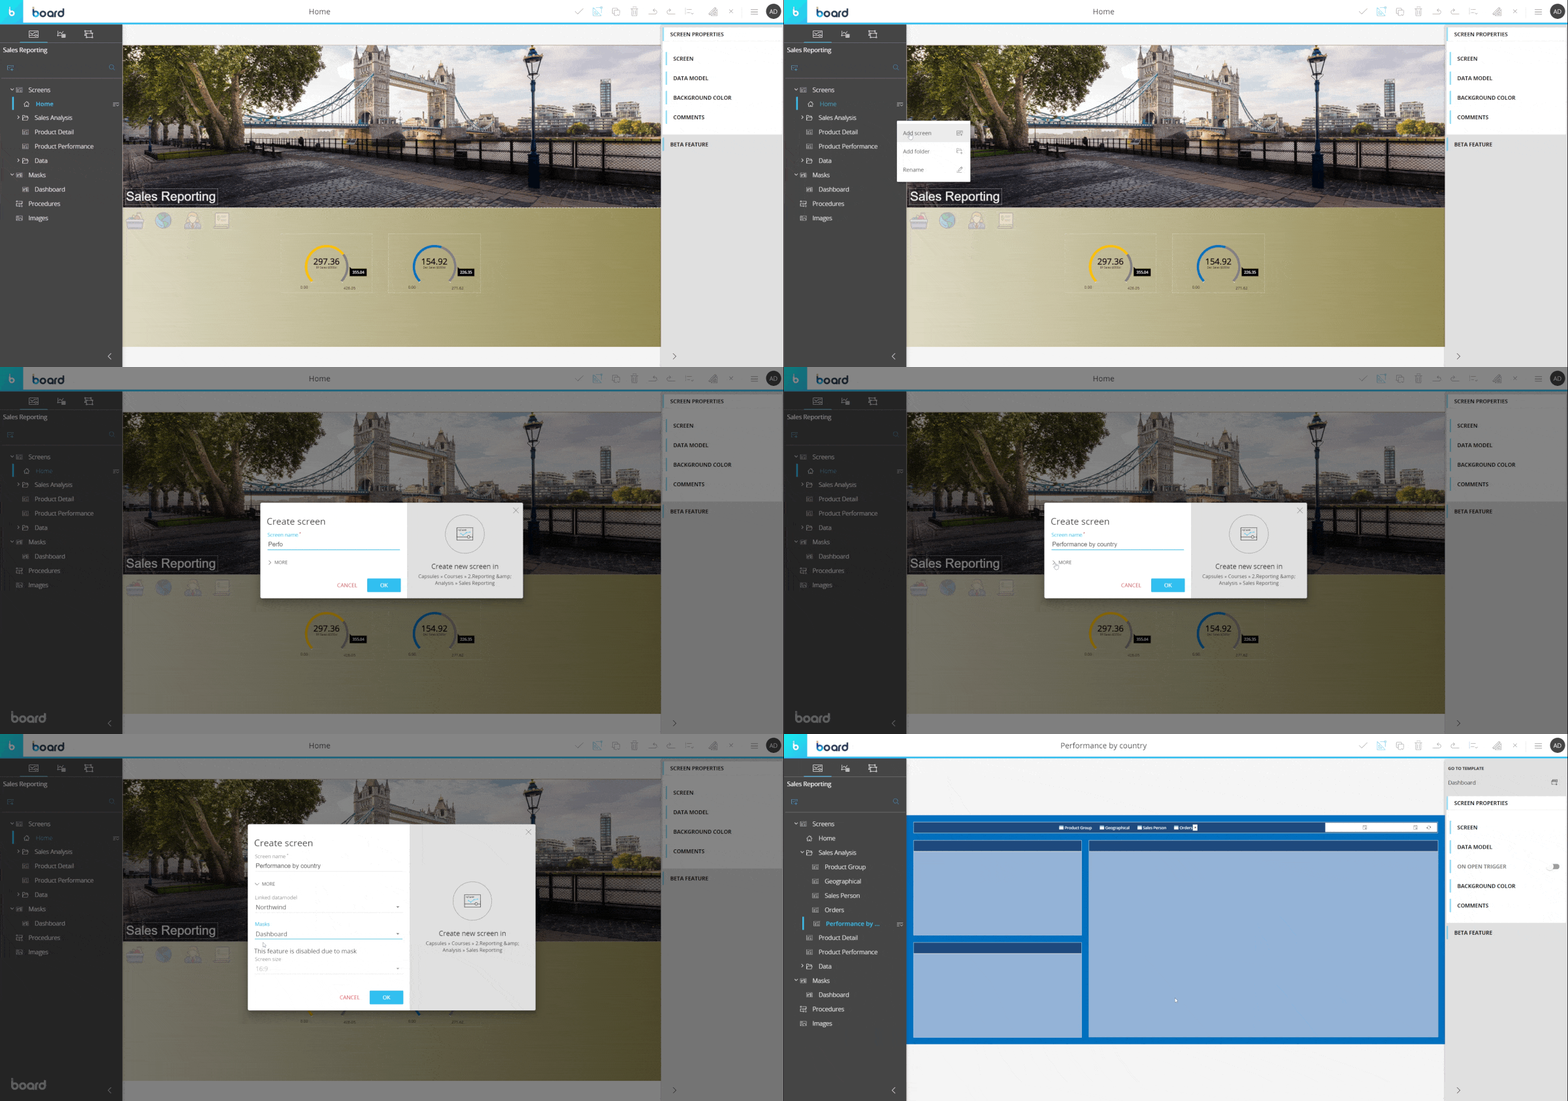
- During the creation of a new Screen
In the "Create screen" pop-up window, click on "MORE" and select an existing Mask from the dropdown menu.

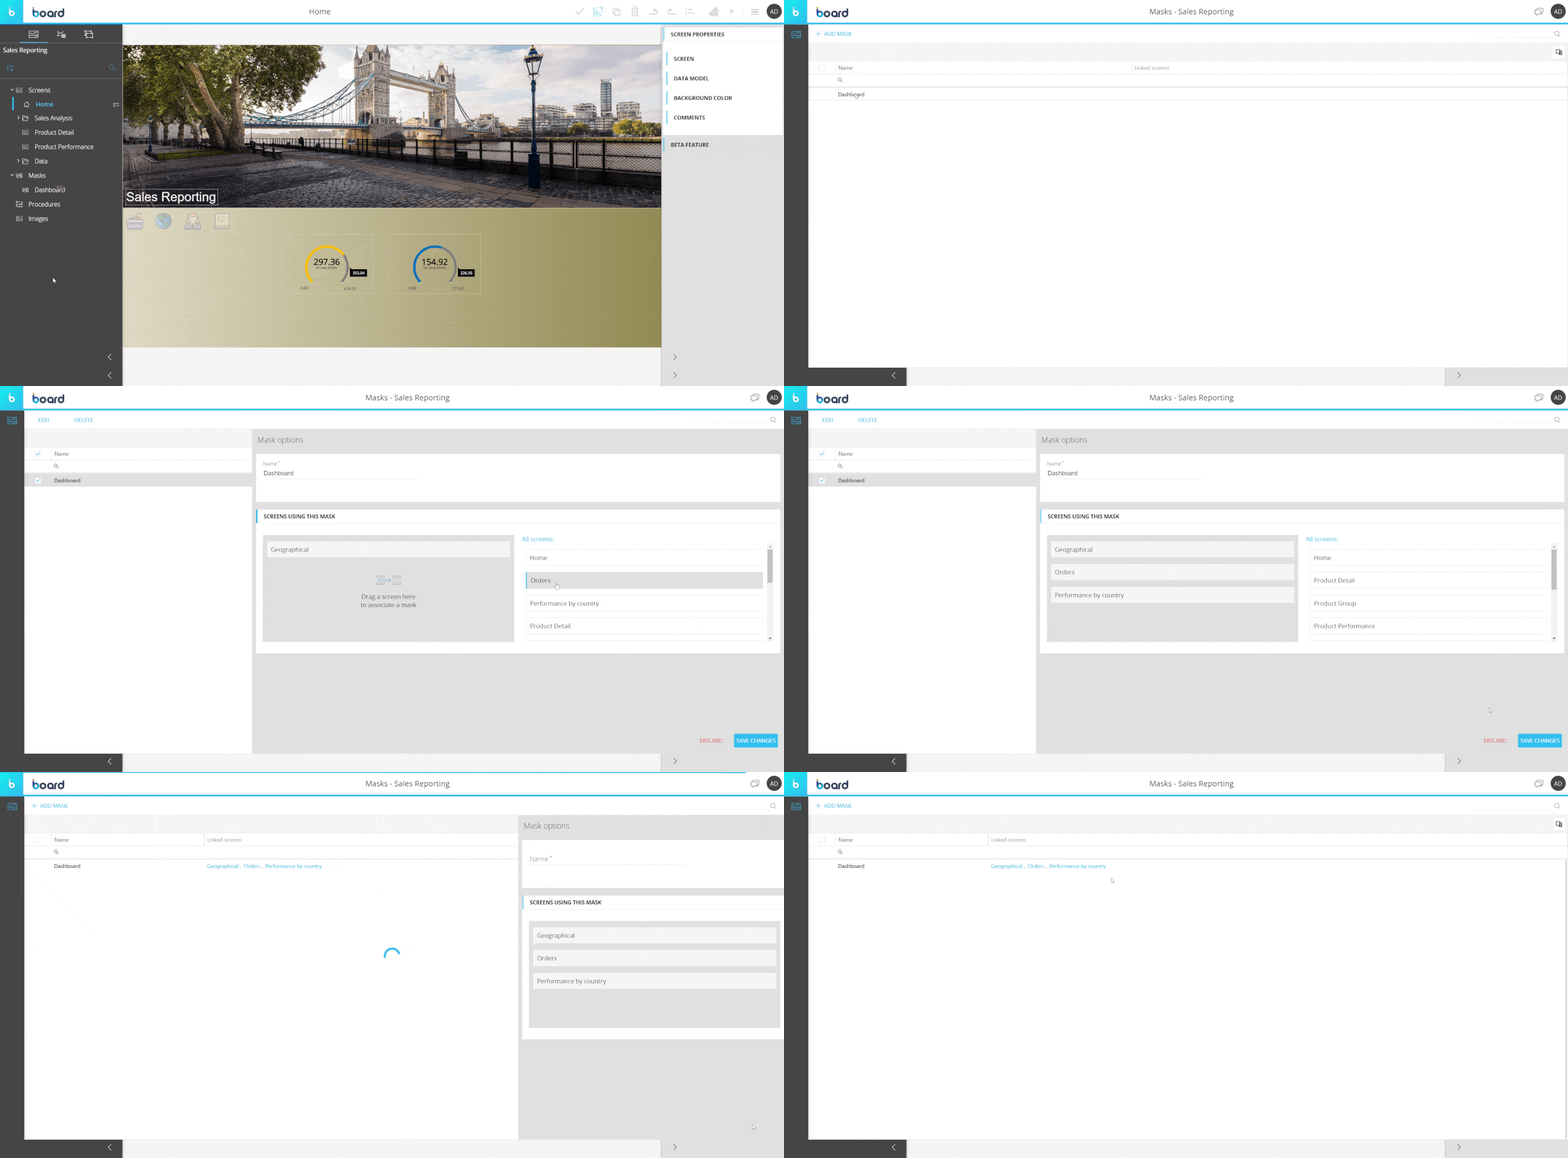
- From the "Mask options" panel in the "Masks" page:
- In the left panel, click on the "Masks" root folder to access the "Masks" page
- Select an existing Mask so that the "Mask options" panel will appear on the right-hand side of the page
- Under the "SCREENS USING THIS MASK" section, drag and drop Screens from the list on the right to the grey area on the left to associate them with the selected Mask
- Click "SAVE CHANGES". You will see all Screens your Mask is associated with in the summary table: by clicking on each listed Screen name, you will be taken to that Screen in Design mode
The table is sortable and searchable using the interactive header fields. You can also hide unnecessary columns to you liking, by clicking the Column chooser button in the upper right corner of the table.

To remove a Mask from one or more Screens, proceed as follows:
- In the left panel, click on the "Masks" root folder to access the "Masks" page
- Select an existing Mask so that the "Mask options" panel will appear on the right-hand side of the page
- Under the "SCREENS USING THIS MASK" section, drag and drop Screens from the left grey area to the column on the right to remove those Screens' association with the selected Mask
- Click "SAVE CHANGES". The changes you've made are instantly reflected in the summary table.