This feature, enriches data entry capabilities with extremely powerful and flexible options for the user.
The Lock&Spread features are available on a DataView with data-entry on one or more numerical fields. Lock & Spread can be used in two modes:
This mode can be accessed from any DataView with data entry on one or more numerical columns. It allows to lock the value of one or more cells, including subtotals or totals, and then enter the desired value on non locked cells. If a total is locked, then when a value is entered, the other non-locked cells summing into that total are re-proportioned in order to maintain the locked total. If a total is not locked, it is possible to modify it and the new value is allocated proportionally to the non-locked addends.
The locked cells can be recognized because the typical data-entry color (yellow background by default) is disabled.
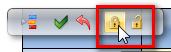
To lock or unlock one or more cells, select the desired cell by clicking on it (to select multiple cells use Ctrl + click) then click the padlock icon located at the top left of the DataView.
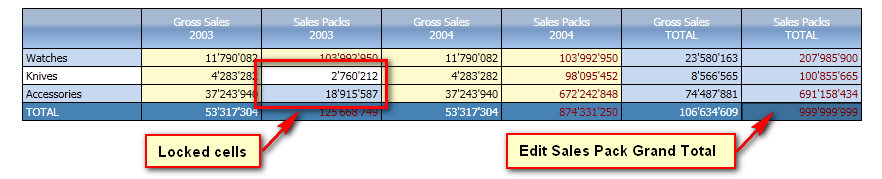
In the following example two cells have been locked, Sales Pack for 2003 Knives and Accessories, and the yearly grand total of Sales Pack has been modified. The allocation to the .
In the example hereafter, two cells have been locked (Knives and Accessories Sales for 2003) and the grand total has been changed. The impacted cells are highlighted in red.
To save values to the database, click the Save icon (green check) or press the F9 function key of the keyboard.
In this mode, a dedicated pop-up window provides more options for entering data. To open the advanced mode window, click the Edit Block icon appearing on the column header of a block where data entry is enabled, as shown in the following illustration.

The following pop-up window will open
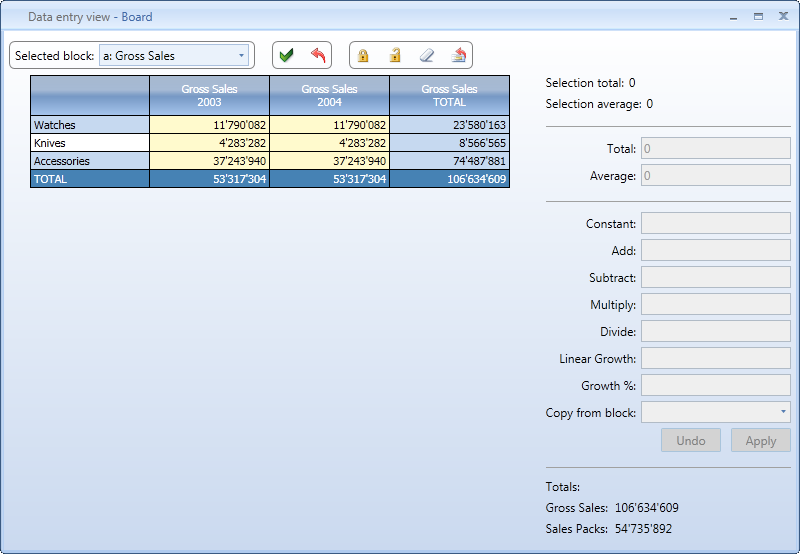
Selected blocks. This drop-down list allows to select the block to work on. The Show All option displays all blocks of the DataView.
Save and Undo. Click the Save icon (green tick) to save the changes to the database or undo (red arrow) to revert to the last saved values.
Padlock. Select one or more cells, then click the closed/opened padlock icon to lock or unlock the values. Note that it is possible to lock row and columns totals as well.
The advanced mode window shows a single block of the DataView at a time. This allows to easily make a selection of a range of cells, and either lock them (to subsequently enter data on other non-locked cells) or modify the selected cells using one of the functions available on the right of the window. The data-entry functions act on a selection of cells and allow to set the total value or the average value, to increase or decrease all selected cells by a constant or a multiplier.
To make a selection of contiguous cells, keep the Shift key pressed and press the left button of the mouse then drag the mouse over the range of desired cells. To make a selection of non contiguous cells, keep the Ctrl key pressed and select the desired cells.
After having selected a range of cells, it is possible to enter data using one of the following data-entry functions found on the right of the window:
![]()
![]()
To apply changes to the range of selected cells, press the Apply button, or press Undo to revert to the prior state.