The ATO features can be enabled
on a Capsule screen: all objects on the screen are affected by the ATO settings
on a container object located on a screen: the ATO settings apply to the objects existing within the container only.
To enable ATO at screen level, click the screen icon from the ribbon bar, then choose the ATO Management option and select ATO Enabled.
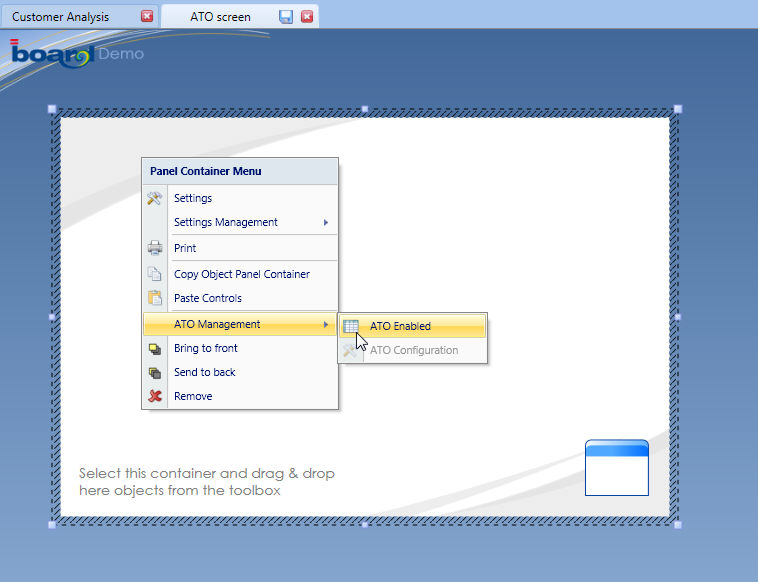
To enable ATO for a container, open the container properties window (right-click on the container), then go to the ATO Management option and select ATO Enabled, as illustrated hereafter.
When ATO is enabled on a screen (or container), the DataView and Pager objects present on that screen (or container) slightly change behaviour:
the Pager object allows to create new entity members and assign relationships and to change the description of an existing member.
the DataView object, data-entry is enabled, doesn't have its own individual save and reset buttons for saving data. It is required to add a button that executes the write-back action either through a Board procedure or using the button's pre-built Save Data Entry function. The save action applies to all DataView objects subject to the ATO management therefore with a single click the user simultaneously saves data which has input on one or more DataView objects.
To create and configure an ATO, start by creating a capsule screen or placing a container on the screen, then enable ATO on it and then after, place the desired objects on it, such as Pagers, DataViews, Buttons and others.
Note:
It is possible to place on a screen two or more ATO objects, for example using two Panel containers each one with a set of Pagers and DataView objects on, and each having its own distinct settings of the ATO Management. The container object where ATO is enabled creates an isolation layer between the objects contained in it and other ATO objects.
It is not possible to enable ATO on a container if a Pager is already present on the container, or enable ATO on a screen if a Pager is present on the screen. It is required to enable ATO first then add the required Pagers on the container or screen.