The Web Capsule Designer is now available in the Board Web Client. The front-end of the BOARD application, the capsules, can now be developed using the web browser.
The capsule format has been changed starting from version 10.5. The new capsules have the extension ".bcps". The old ".cpsx" capsules need to be converted to be opened in edit mode from a web browser.
How to Convert a Capsule
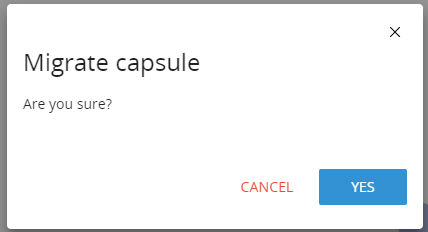
The capsule conversion is a single click and automatic process available in the web-client. The following message is prompted out :
Click Yes. The Capsule is converted and open in Edit mode.
You are asked to convert the capsule when :
you open a capsule and then you switch in edit mode
you're in edit mode and you click on a capsule
you click the conversion icon when on mouse overing a capsule
Once the operation has been confirmed by the user, the migration process is automatically performed. The capsule conversion creates a new ".bcps" capsule. If the Keep a copy of the capsule in the original format" check-box is flagged, an old ".cpsx" copy is kept in the same folder. The capsule name of the old format one, is modified with an additional tag: "(BKP)". The 2 copies of the capsule with different formats will be both visible from the web application. The BOARD Windows Client only see the ".cpsx" formatted capsules.
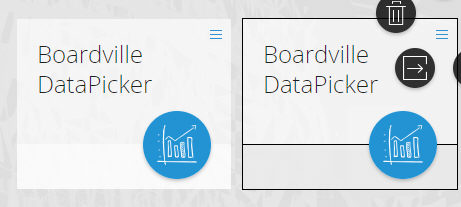
You can recognize the 'old' Capsule format because its web tile has a black border .
Important Notice
Capsules that are still in the old format ".cpsx" can still be used in PLAY mode using the web browser version 10.5. The conversion is necessary only if you like to use the web client for developing
Attention !
If you click a Capsule older than 10.x Series you're prompted the following message.

Before converting it you need to open it with the Win Client and Save it .
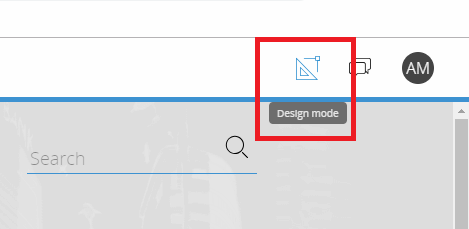
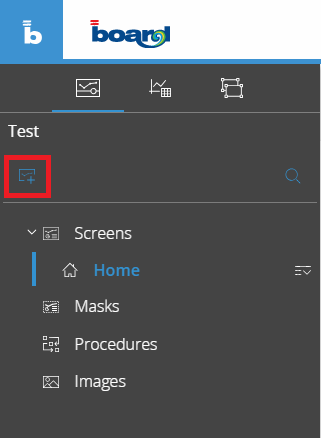
When connected to the BOARD web application using the web browser, you can switch in Edit mode clicking on the button in the top right corner of the page:
A set of new options and features are then available :
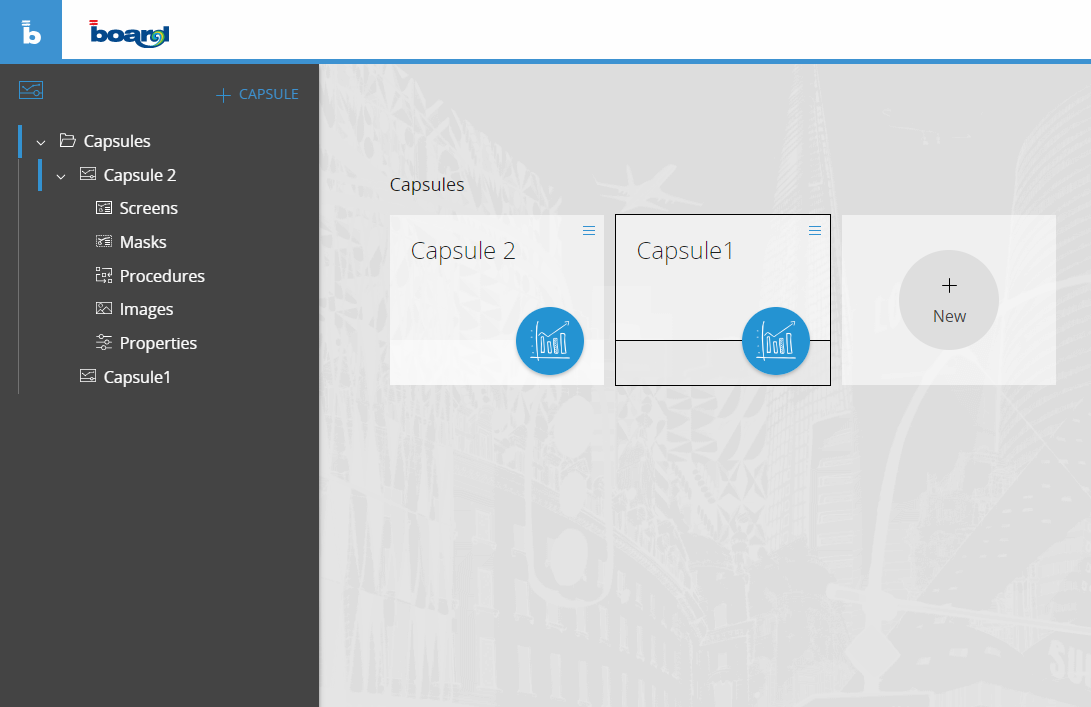
Sitemap: it is the left sliding panel . It lists sub-folders and capsules available in the capsule main folder according to your the security profile if any.
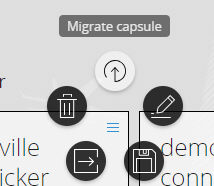
Capsule Tile Options: capsules in the new format have the following functions available: edit capsule, info, show screen list, properties and delete capsule.
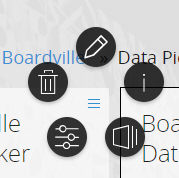
Capsules in the old format have the following options available: migrate, rename, save as, move to and delete capsule.
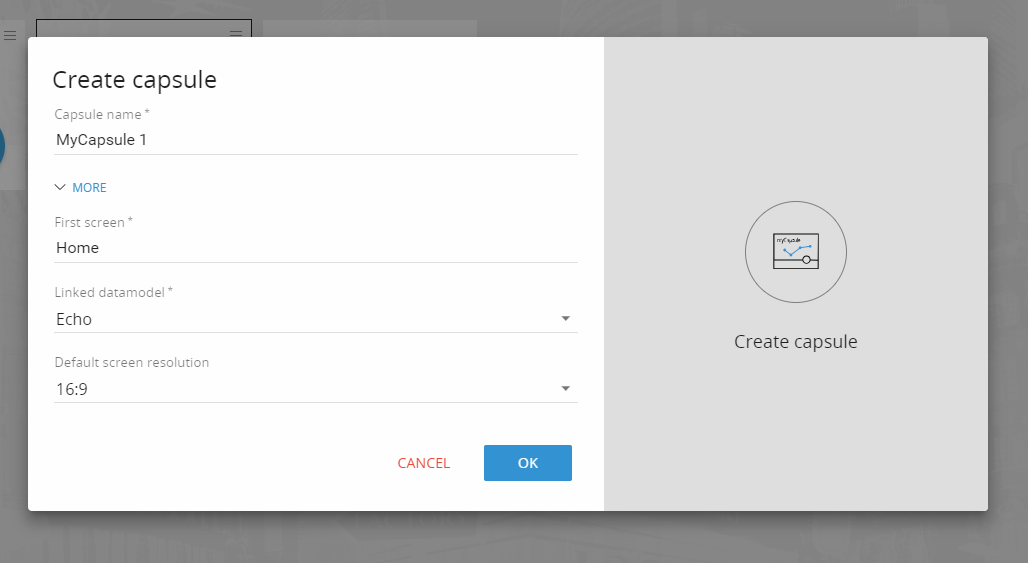
It is possible to create a new Capsule from the "New" icon on the capsule browser and from the "+ Capsule" button when the edit mode is enabled. Once clicked you have then to type the capsule name, the first screen name, the linked Data Model (Board Database) and a default screen resolution.
Once a capsule is opened in edit mode with the web client , the workspace is split in panels :
Left Side: navigation panel
Central: design workspace
Right Side: setting/properties panel
Left Side Panel
The navigation panel shows 3 main views: the capsule sitemap, the toolbox tree and screen objects.
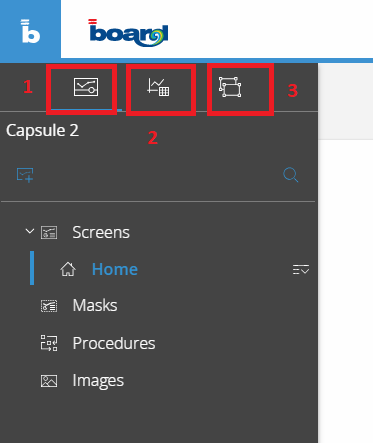
1) The Capsule Sitemap
It shows the list of the capsules available in the environment and it is structured in different sections for each capsule: Screens, Masks, Procedures and Images.
Screens: it shows the list of the screens in the capsule. From that list it i possible to access to the save as and delete functions. New screens can be created clicking the button here below:
Masks: You can edit existing masks or creating a new one .
Procedures:You can edit existing procedures or creating a new one . To create a new procedure click the 'Add' button. Then type the procedure name, the default data model and the way the user is notified during the procedure execution. Read more...
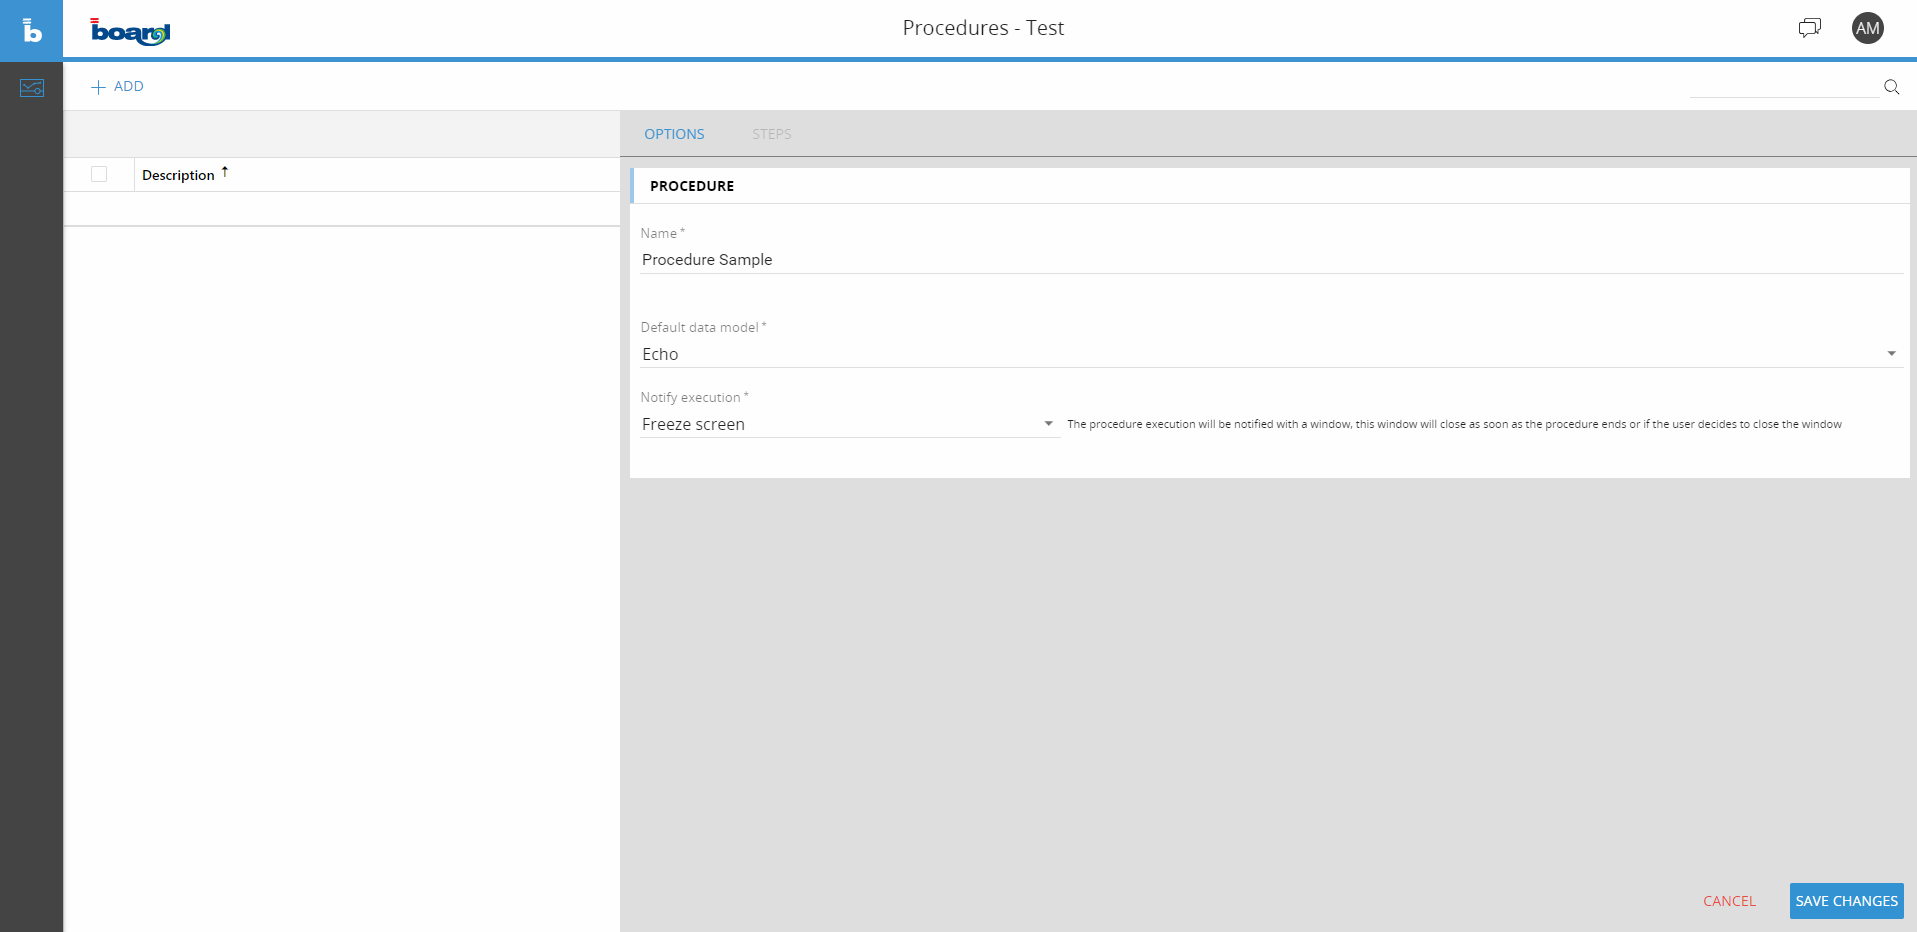
After the Save Changes confirmation, the procedure is displayed in edit mode and new groups and steps can be created. The available steps are the followings:
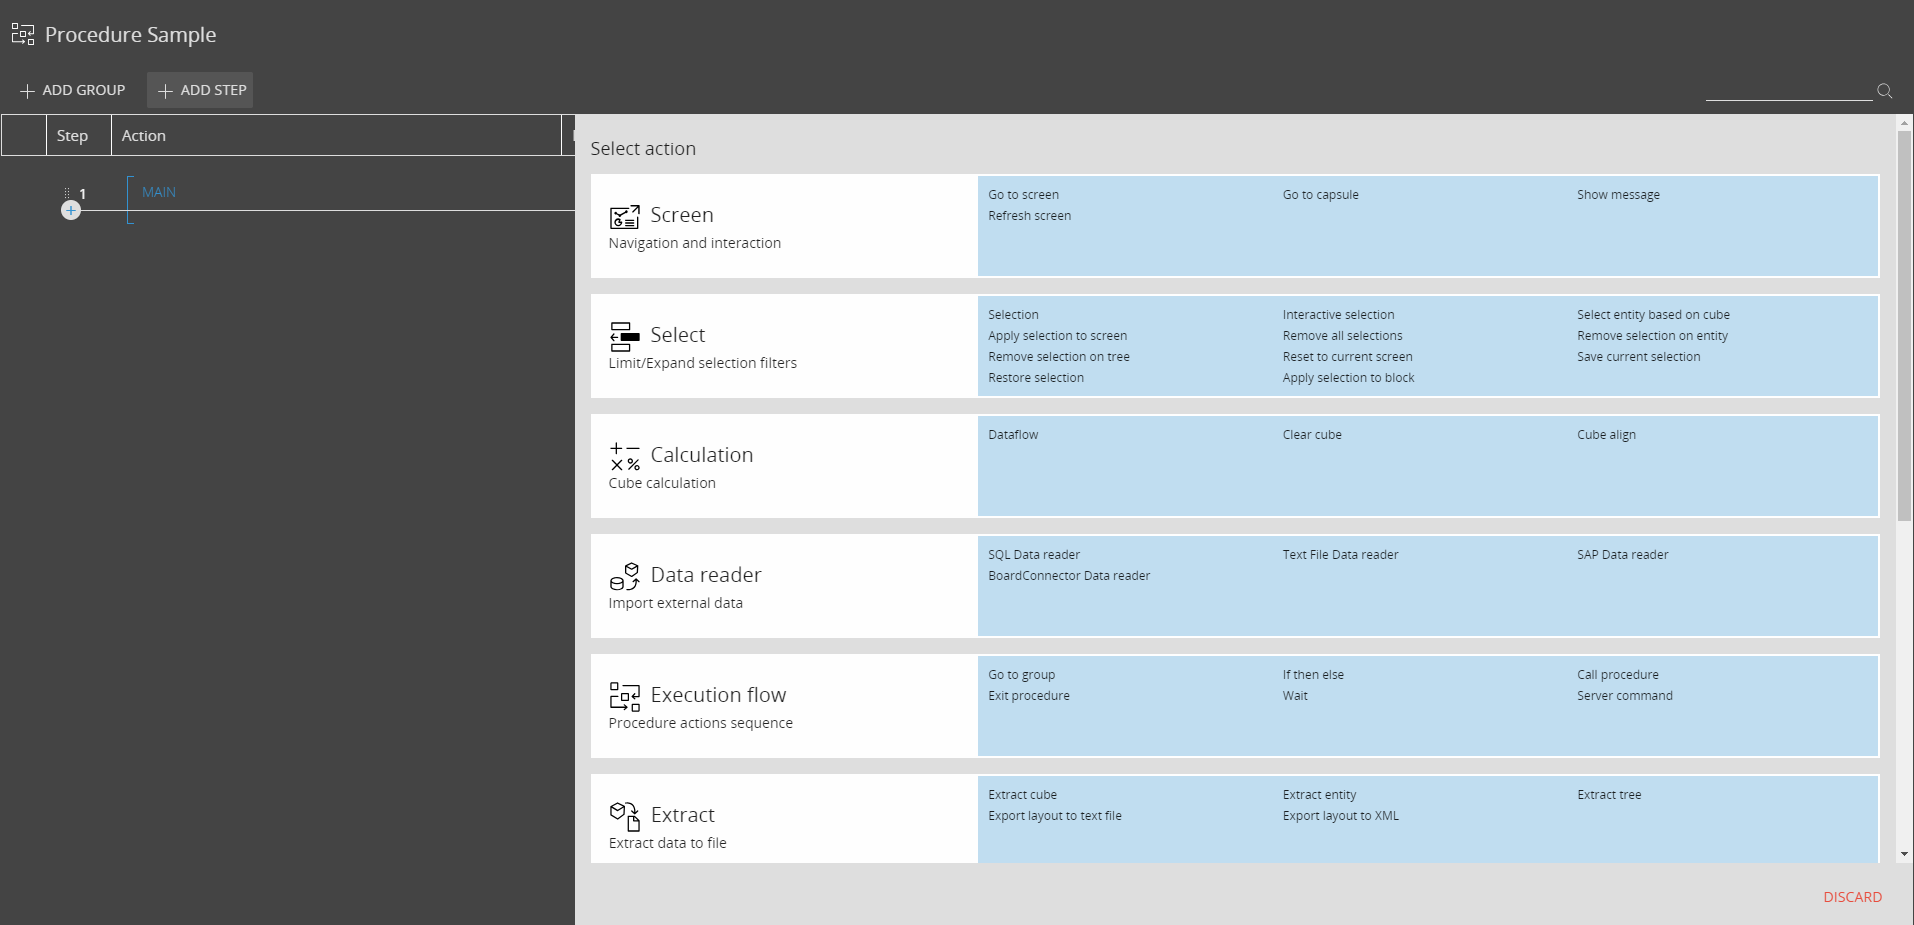

The Xbrl steps are available only using the Web client. It can be enabled or disabled through a parameter available on the "xbrl.config" file of the web application. The parameter is the following:
<add key="xbrlEnabled" value="true" />
Images: It is possible to manage the capsule images and import new ones.
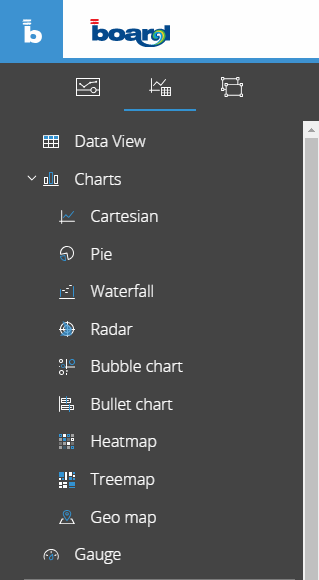
2) The Toolboxes Tree
It shows the toolbox objects . Drag and drop any of the in the Design Workspace (Screen) to build your own screen.
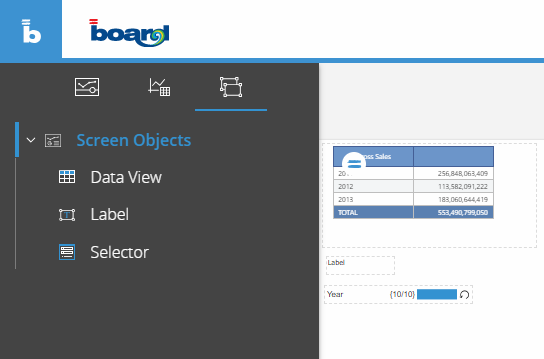
3) The Screen Object List
It shows all the objects that are in the screen you're building .
Central Panel
It is the workspace where it is possible to create and model the screens . The objects can be can be dragged from the toolbox . Then , the objects can be resized and configured.

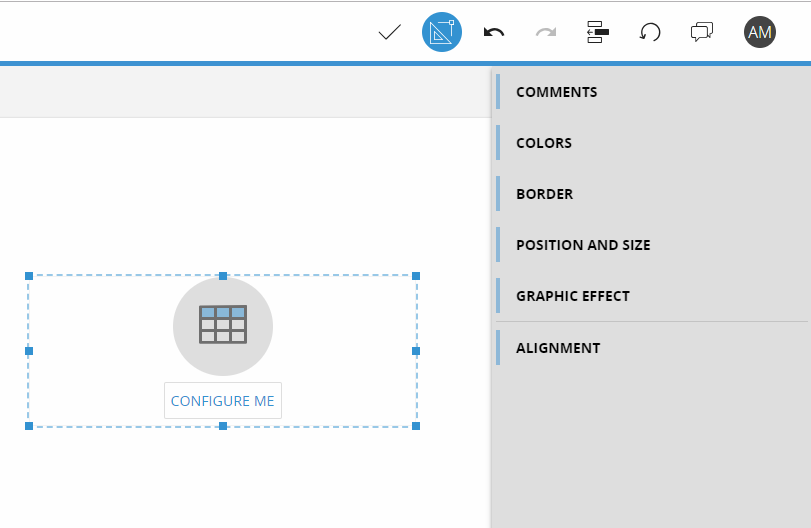
The "Configure Me" button, it's a shortcut to access the layout editor.
Modifications in the screen need to be saved clicking the button on the top of the page. If the user leaves the screen without saving it the pending changes are notified in a pop-up message.
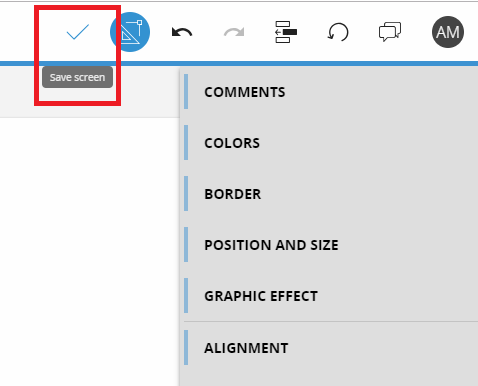
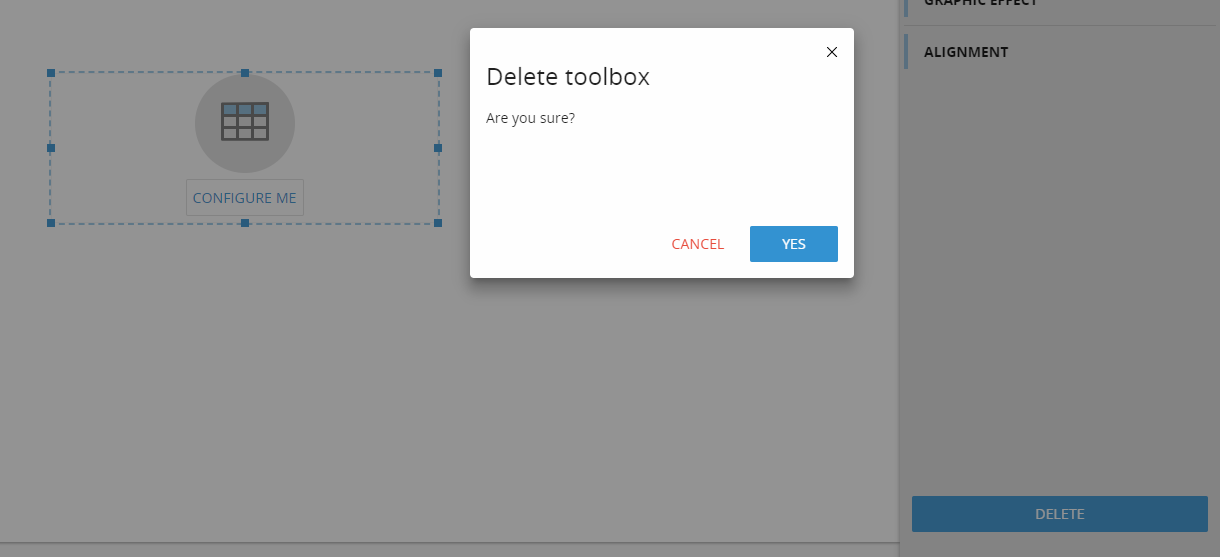
Undo and Redo buttons are available next to the edit/play mode button on the top of the page. The object deletion is available from the right-side panel after the object has been selected. A confirmation message appears before the execution of the delete action.
Right Side Panel
The right panel shows the properties of the selected object. If no objects are selected (clicking on an empty part of the screen) it shows the screen properties:
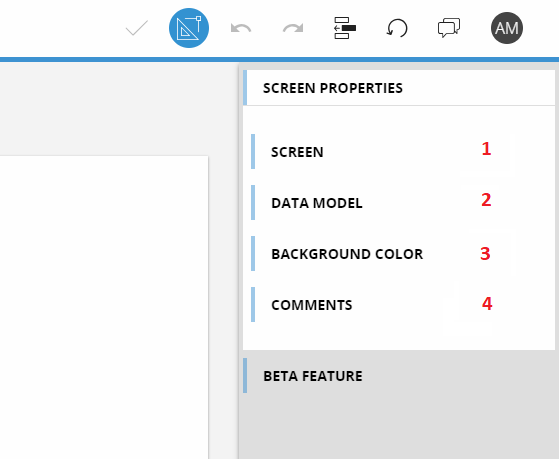
Screen
Screen name: where to change the screen name
Screen size: options for the screen sizing to be set as 16:9, 4:3 or custom size (in pixels)
Fit Mode: adaptive default mode when opening the screen
Deny layout designer: disable the edit layout feature
Deny selection editor: disable the select window
Save/Undo Mode: enable or disable the data entry when clicking -enter- button
Enable ATO: enable the ATO feature int he screen
Data Model
Multiple data model: it enables the multi database feature for the current capsule.
Background Color
Appearance setting of the screen.
Comments
Comments of the screen that are visible in play mode as annotations.
Once an object is selected in the screen, the right panel shows the object settings.