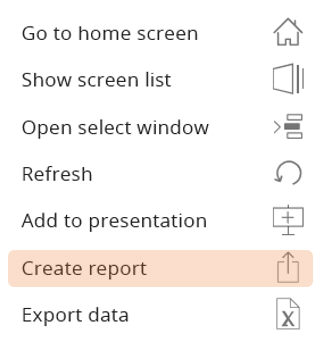
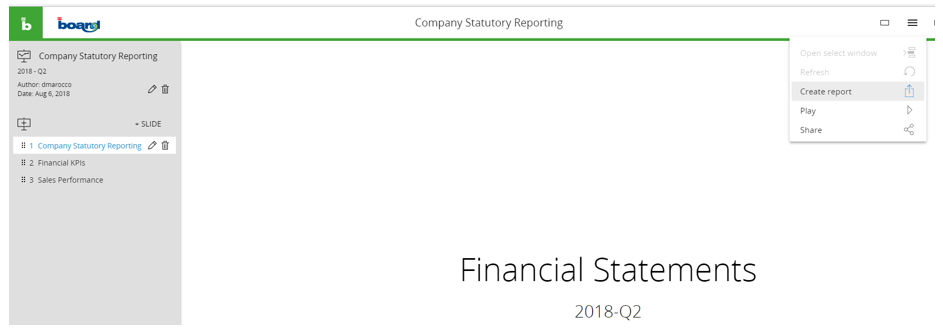
From a Board Web Page (Screen) click on the 'Open Menu' Icon. The option 'Create report' is now available.
When you click you can first choose the Report Format among PDF, MS Word, MS Powerpoint or a simple Snapshot.
Click on the Format Icon you like. The 'Report Creation' Workspace opens.
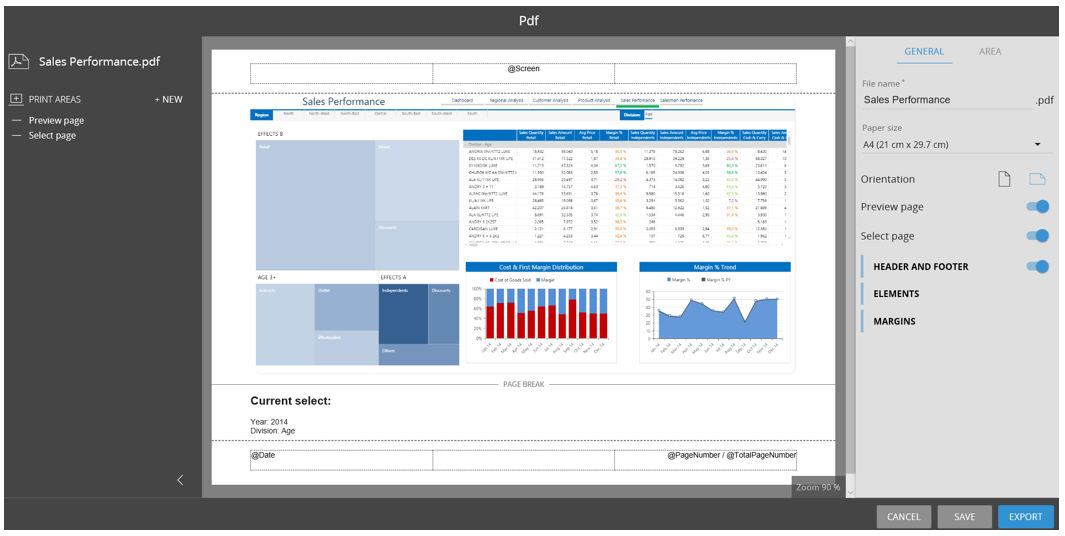
By Default, the Report includes the entire Screen Page (Page Preview), the Active Selection (Page Select) and the Header and Footer. To hide any of this Report Areas slide the switches on the left.
|
In this sample the Active Selection has been hidden and it is not part of the Saved or Printed Report. |
On the right side Menu you can apply popular settings like Editing the Report Title, change the Paper Size and the Orientation. When you adjust the Paper Size a Zoom % shows how much the Page is stretched.
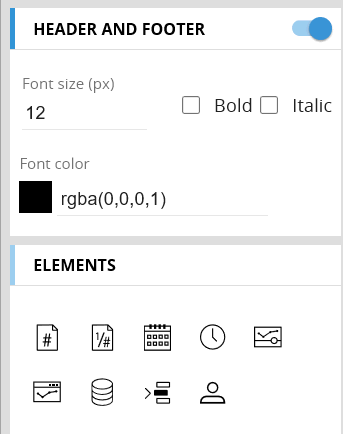
In the Screen Page the Header and Footer areas are pre-built. It is possible to edit your text in the given frame-set or include dynamic variables dragging and dropping the icon you like in the frame.
|
It is possible to apply format options clicking on the 'HEADER AND FOOTER' Label.
Or to include dynamic Elements such as Page Number, Date-Time, Active Selections, Report Author etc. click on the 'ELEMENTS' Label. Click on the icon of the element you like and drag and drop the icon in the target frame. |
Finally you can click on the 'MARGINS' Label to Customize the Page Margins.
It is also possible to include in the Report Page some selected Objects (Print Areas) of the Screen Page. Click on the '+New 'Icon in the left side Menu.

At this point the entire Page Preview is prompted. As suggested, Click and Drag the Selection upon the Object you like to Include in the Report.
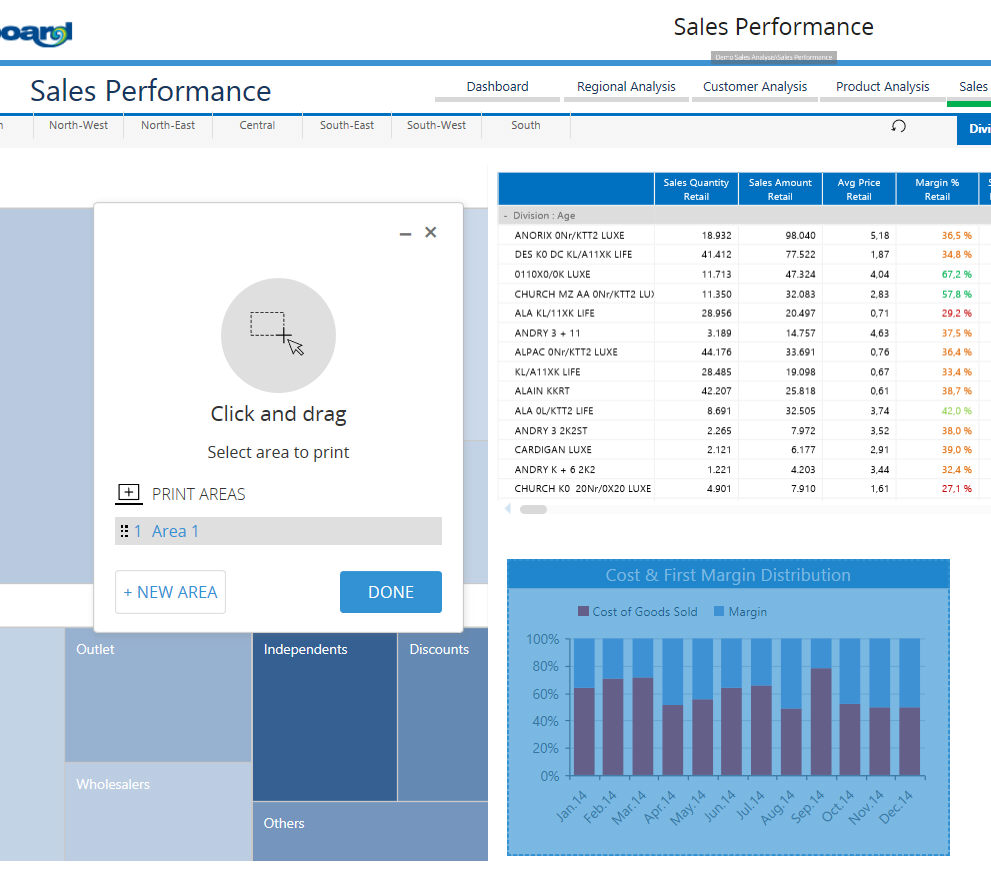
When the Object is properly picked it is light-blue highlighted with a dotted border.
 |
Click on '+NEW AREA' Button to add another Object or click on the 'DONE' button when you have selected all the Object you like to print. It is anyway possible to add other objects from the Printing Workspace. |
Attention
To pick up a Screen Object you need to completely select its area.
To each Screen Page you can associate several Print Areas :
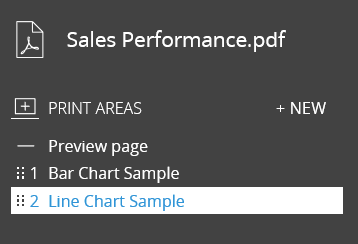
Clicking on each Print Area (White background) on the right side menu you can edit the Area Title and add Text Annotation
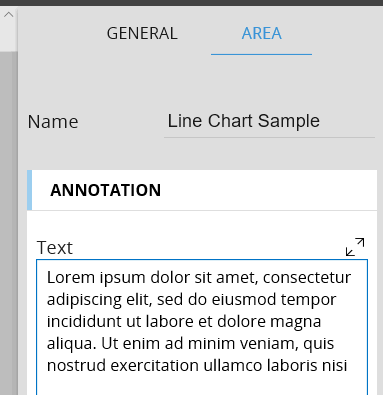
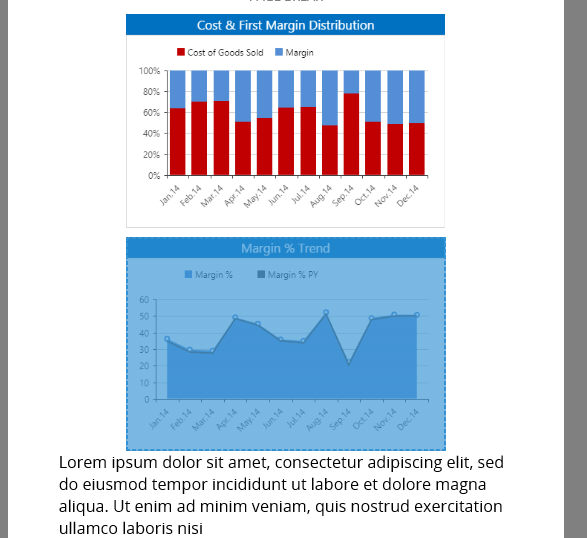
The annotation is then added to the Print Page below the Object
To save this configuration for the Screen Page click on the 'SAVE' button. To Create the File (PDF, DOCX etc) click on the 'EXPORT' Label and Save As using Browser.
Short Notices
The Preview Page and Select Page in the Left side menu facilitates the scroll of the print body if you have tens of print areas, positioning the pointer on the Preview Page or Select Page of the Print Area if they are enabled.
To change the position of the print areas in the page just drag and drop the Print Area Icon along the Item List in the Left menu.
The Saved Print Areas and their annotations are retained regardless the File Format you select during the Report Creation. Attention even if Lite Users can create and print reports at their convenience only Power Users or Developers can permanently Save the Print Properties of the Web Page (Screen) .
 It is
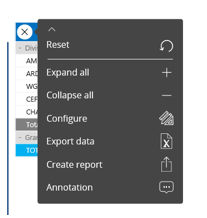
also possible to Create the Report clicking on the 'Create Report' icon
of the drop down menu of each single object of the screen : only
PDF and Snapshot format are available.
It is
also possible to Create the Report clicking on the 'Create Report' icon
of the drop down menu of each single object of the screen : only
PDF and Snapshot format are available.
When you put in the Printing Page a Dataview Object only a placeholder is displayed; if the Dataview has several pages they are printed in the position of such placeholder. Header and Footer are repeated at any page break.
If you need to wrap up several pages, even belonging to different Capsules in a printable Booklet, you can now use the Board Presentation. First create the Report attributes in each Web page (Screen) you like to include in the Booklet as explained above. It is obviously recommended that the Pages share the same look&feel, header and footer options.
Then collect all of them in a Board Presentation, adding the Cover and reorder them as you like.
Finally click on the 'Create Report' Icon; the entire collection of Screens will be merged in a single PDF or Powerpoint format File, ready for save or print.