Data Reader
The TEXT Data Reader now allows to import data from a text file stored on a cloud storage service. The file can be in fixed-width or CSV (comma separated value) format.
The following cloud storage services are now supported in Board:
- Amazon S3
- Azure Blob Storage
- Google Cloud Storage
To configure a cloud storage service to be used with a Data Reader, proceed as follows:
- Access the Data sources page under System Administration and click on "+ DATA SOURCE CONNECTION"
- Give it a name and select your cloud storage provider from the dropdown list
- Fill in required fields and select the "TEST CONNECTION" in the bottom left corner of the panel. If it turns green, a successful connection has been established.
To configure an Amazon S3 cloud storage service, you will need the following information:
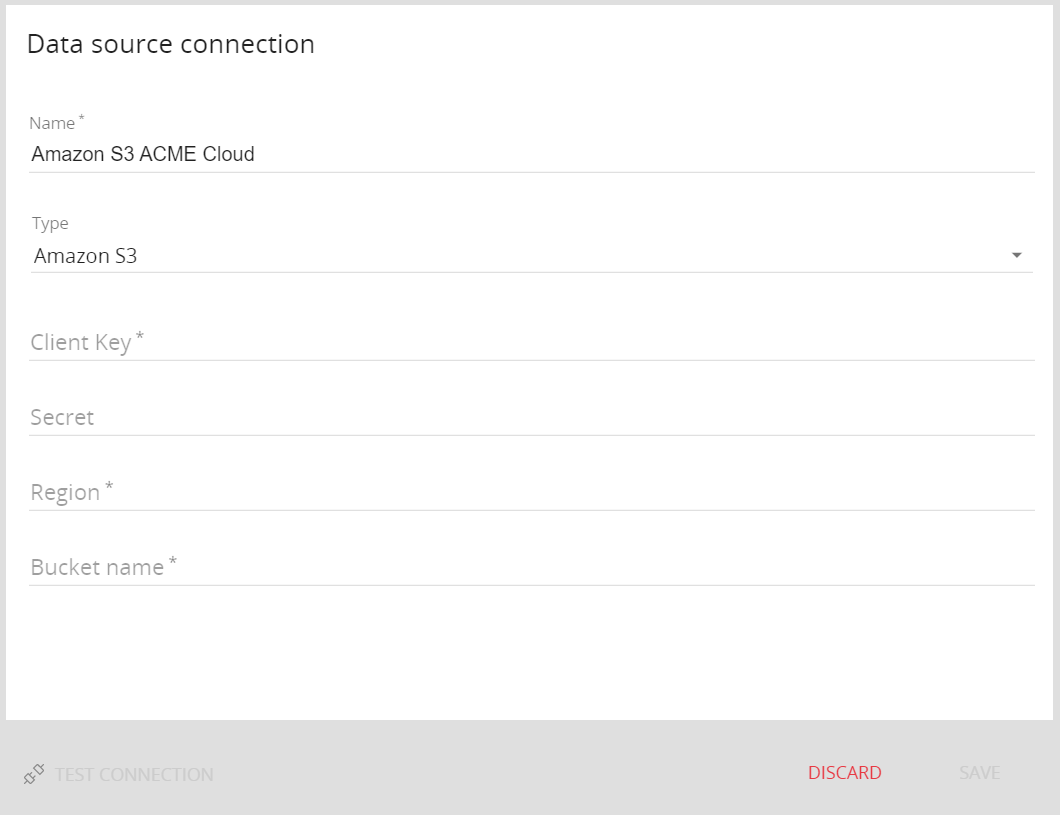
Fields marked with an asterisk (*) are required
Please refer to Amazon S3 documentation for more details.
To configure a Google Cloud Storage, you will need the following information:
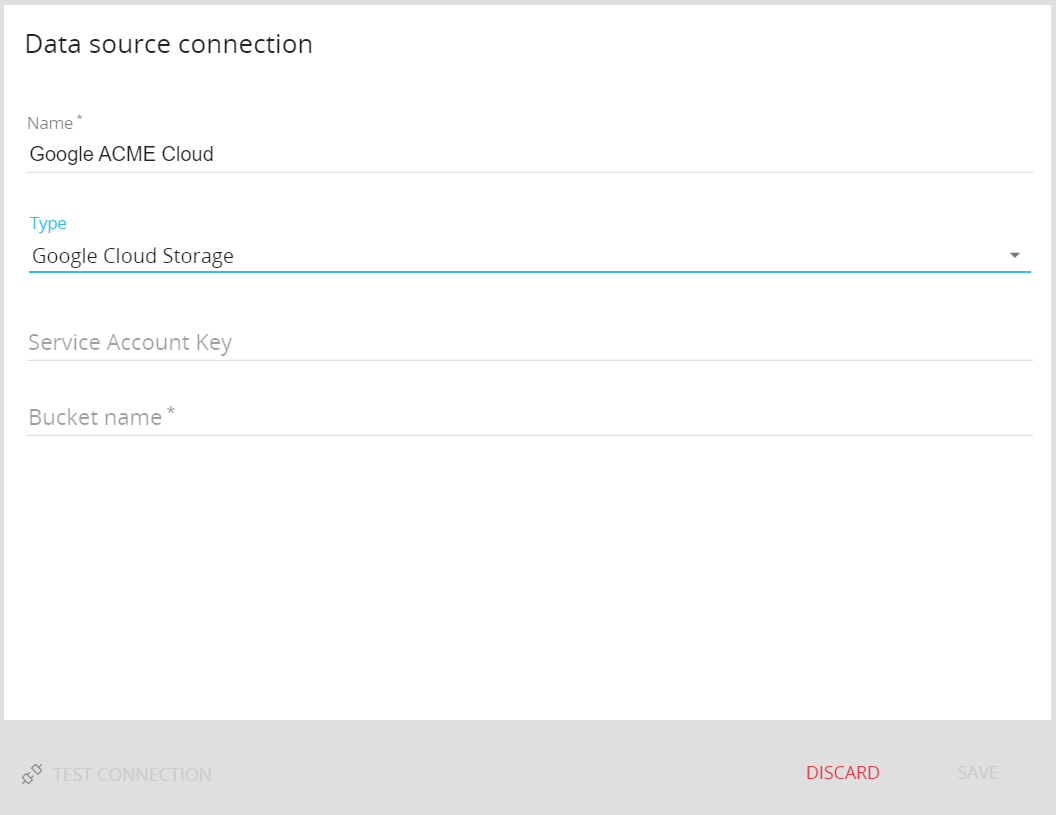
Fields marked with an asterisk (*) are required
Please refer to Google Cloud storage documentation for more details. - Save and proceed to the Data reader configuration.
To configure the Data Reader to import data from a text file hosted on a cloud storage service, proceed as follows:
- Access the Data Reader section of a Data model in Board
- Create a new Data Reader and select "Text File (Local files/Cloud)" in SOURCE TYPE list
- In the first configuration step, click on the "Storage connection" dropdown menu and select a preconfigured cloud storage service.
If no cloud storage services have been configured, you can add one by clicking on "New source"
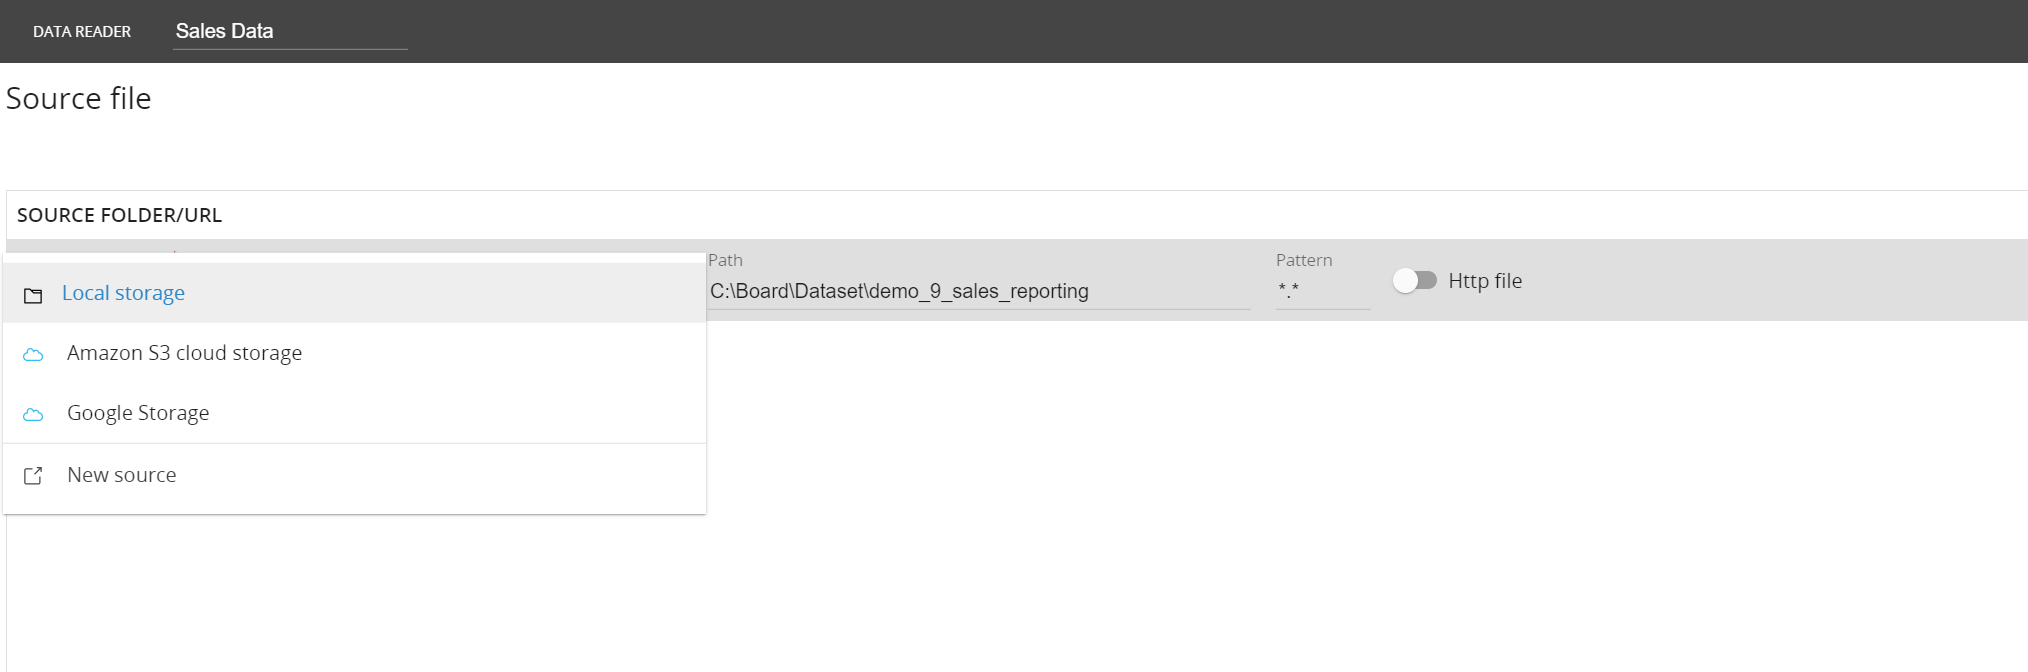
Clicking on "New source" will take you to the Data sources configuration page under System Administration, where you will be able to configure a new cloud storage service.
- Once you've successfully connected to your cloud storage service, you will see its folders in a tree format. Select the appropriate text file by clicking on its name: the icon on its side will change to indicate a successful connection and the "Path" field will autocomplete with your selected file path.
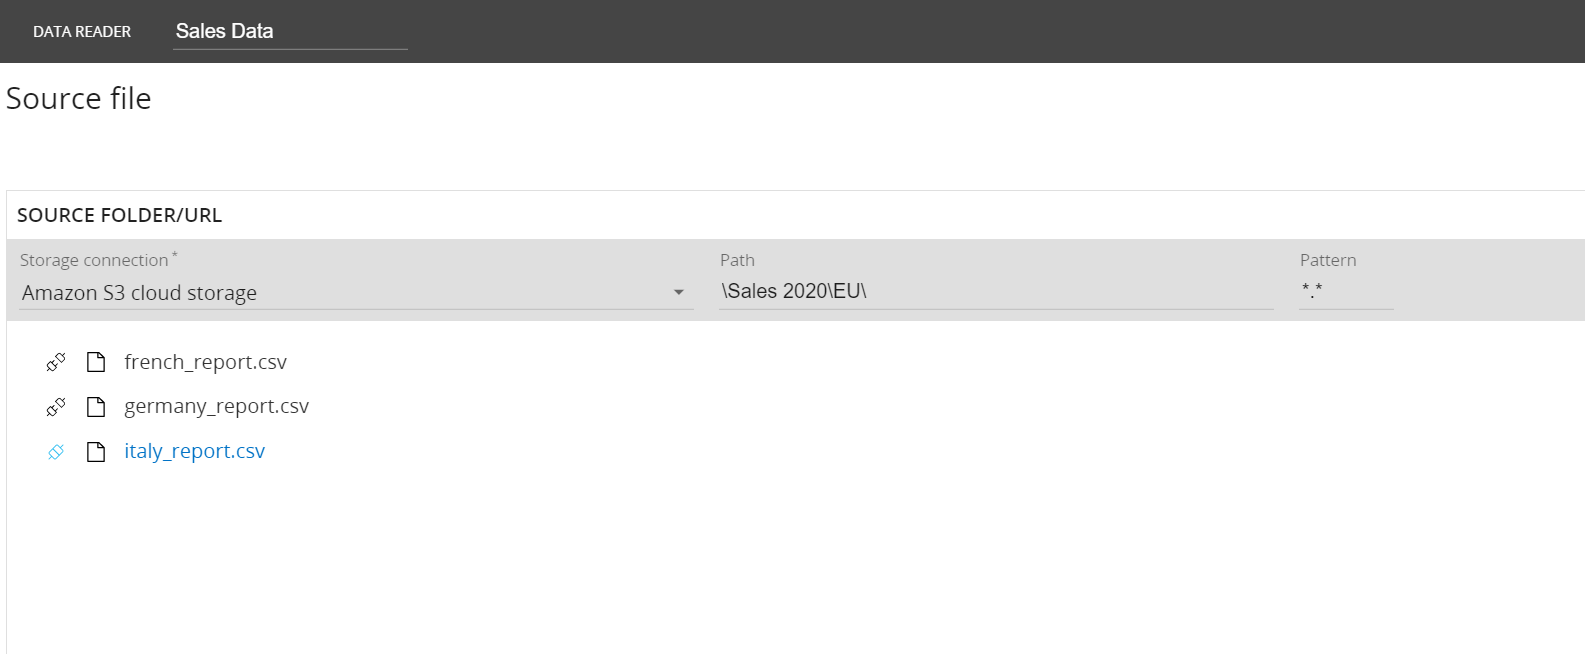
- Configure the options in the right hand side panel and proceed to mapping, using data extracted from your cloud-hosted text file.