Power BI add-in
The new Power BI add-in for Board allows you to connect to Board directly from Power BI Desktop and import data from Screen Objects included in your Presentations. The new add-in is a step forward towards an enhanced integration between Board and third-party applications, allowing you to simply connect to your data across all of your business systems environments.
The Power BI add-in runs through Board’s Presentations APIs and allows you to load the following data from Presentations into Power BI:
- A list of Presentation available to the user
- A list of Slides from a specific Presentation
- A list of Screen Objects/Layout titles from a specific Slide
- Data from a single Layout
Prerequisites
- Your organization must have a configured Board Platform. The user account on the Board Platform must have all necessary permissions for Board’s Presentations APIs, as described here except for the default Redirect URI step that can be skipped, as the Power BI redirect URI is enabled by default
- The Power BI add-in only supports Power BI Desktop version May 2022 and newer
- The Power BI add-in supports Board 2022 Summer release and newer
- The Power BI add-in supports Board's Subscription Hub version 4.0 and newer
Installing the Power BI add-in for Power BI Desktop
Since the Power BI add-in is pending certification from Microsoft, you need to install it manually. Once the add-in is certified by Microsoft, the manual installation will no longer be required as the add-in will be bundled in the Power BI Desktop installers.
To manually install the Power BI add-in, proceed as follows:
- Download the add-in files
- If Power BI Desktop is currently running on your machine, close it
- Create a new subfolder in the Documents folder of your machine. The new subfolder name must be “Power BI Desktop” (without double quotes)
- Create a new subfolder in the subfolder you just created. The new subfolder name must be “Custom Connectors” (without double quotes)
- Copy the file Board.pqx in the “Custom Connectors” folder. The file must be in located in the path \Documents\ Power BI Desktop\Custom Connectors\
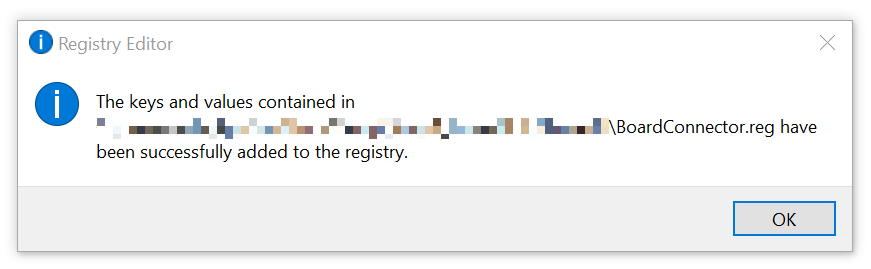
- Double-click on the file BoardConnector.reg, then click on "Run" and click on "Yes" in the following two notification dialogs. When the "Registry Editor" confirmation dialog appears, click on "OK" to close it. It should look like this:
If you don't have administrative rights on your machine, please contact your IT department.
- Open Power BI Desktop and configure the connection to Board as described in the following paragraph
Connecting to Board using Power BI Desktop
To connect to Board using Power BI Desktop:
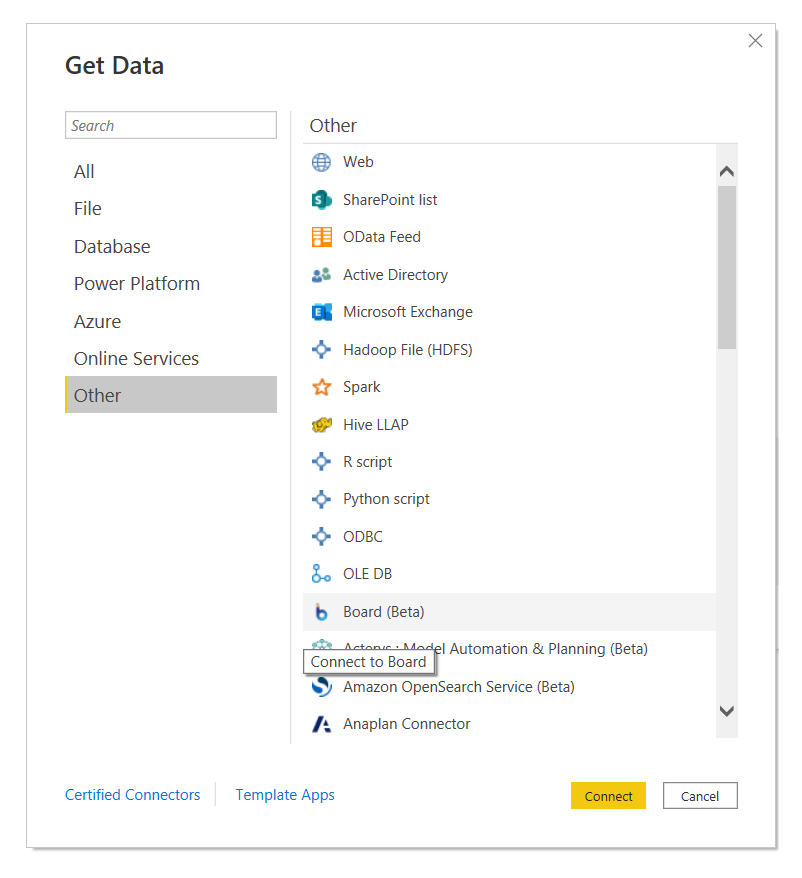
- In Power BI Desktop, select Home > Get Data or click on “Get data” from the Welcome screen
- From the categories on the left, select Other > Board (Beta). Then select Connect
- If this is the first time you're connecting to the Board Power BI add-in, a third-party notice appears. Select “Don't warn me again with this connector” and select Continue
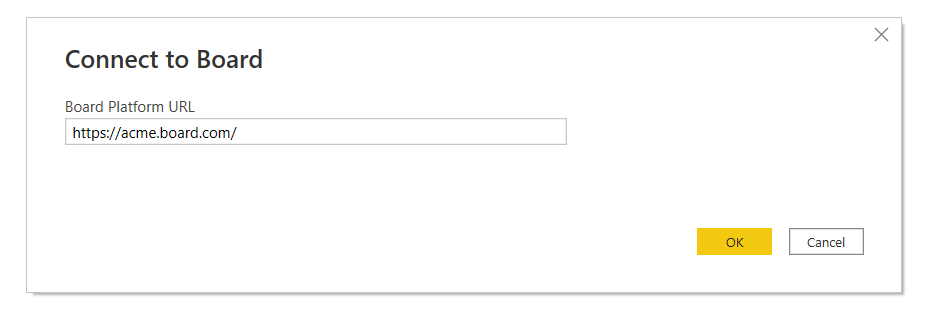
- Enter a valid Board Platform URL, for example https://acme.board.com/
- Click on Sign in and enter your Board credentials in the authentication pop-up window, then click on Next. The authentication pop-up window closes
The authentication must comply with OAuth 2.0 Authorization Code with PKCE flow specifications.
If the authentication pop-up window displays errors or closes unexpectedly, the reason might be that Power BI Desktop tries to load Board's login page using Internet Explorer 11, which is no longer supported by Board. However, previously saved credentials should continue to work until their existing authentication tokens expire. To resolve this issue, please update Power BI Desktop to the latest available version. - Click on Connect
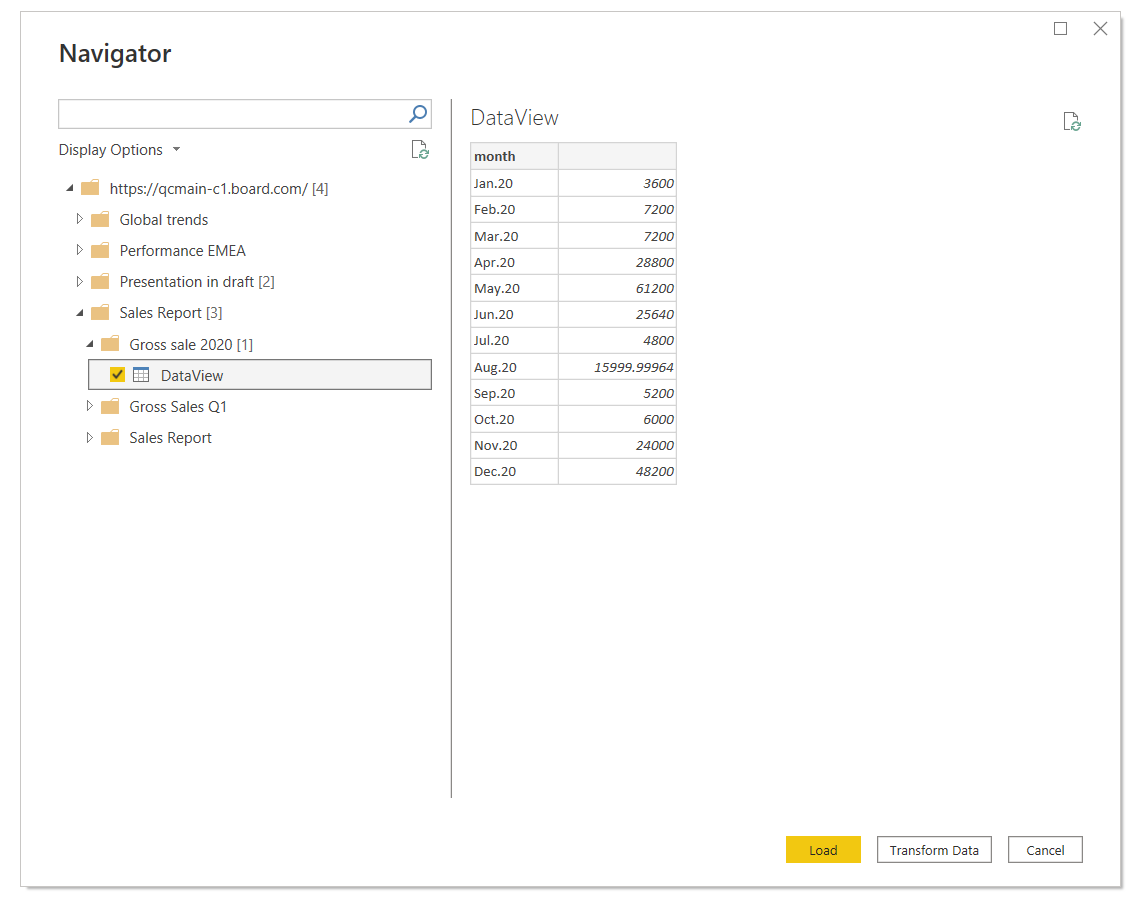
- Choose the data you want to import to Power BI by navigating through the Navigation Table and selecting the desired Objects from the available Board Presentations.