Creating a Procedure
This topic describes how to create a new Procedure and its specific properties.
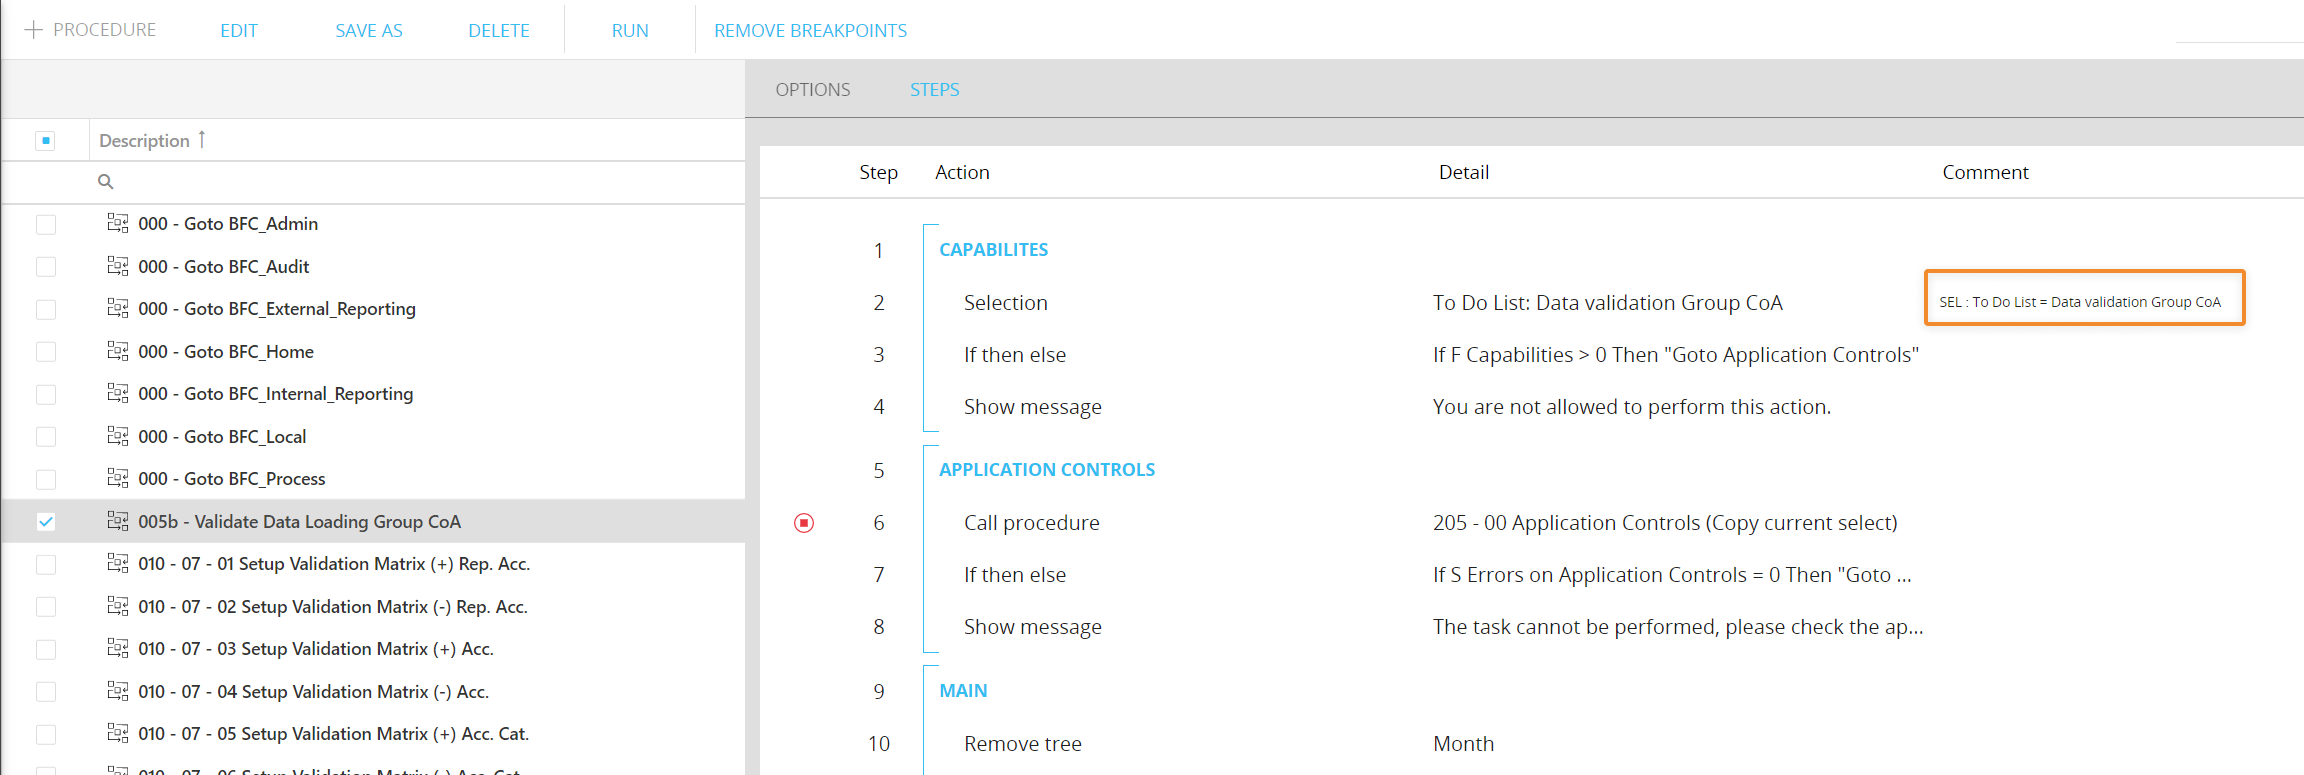
A Board Procedure is a sequence of actions (also called steps) organized into groups. The execution of a Procedure starts with the first step of the first group (usually called Main group) and ends after executing the last step of the first group.
The execution flow can jump to other groups, by invoking a specific "Go to group" step, or even jump to another Procedure with the "Call Procedure" step. This allows to better organize the Procedure logically and to reuse common series of steps.
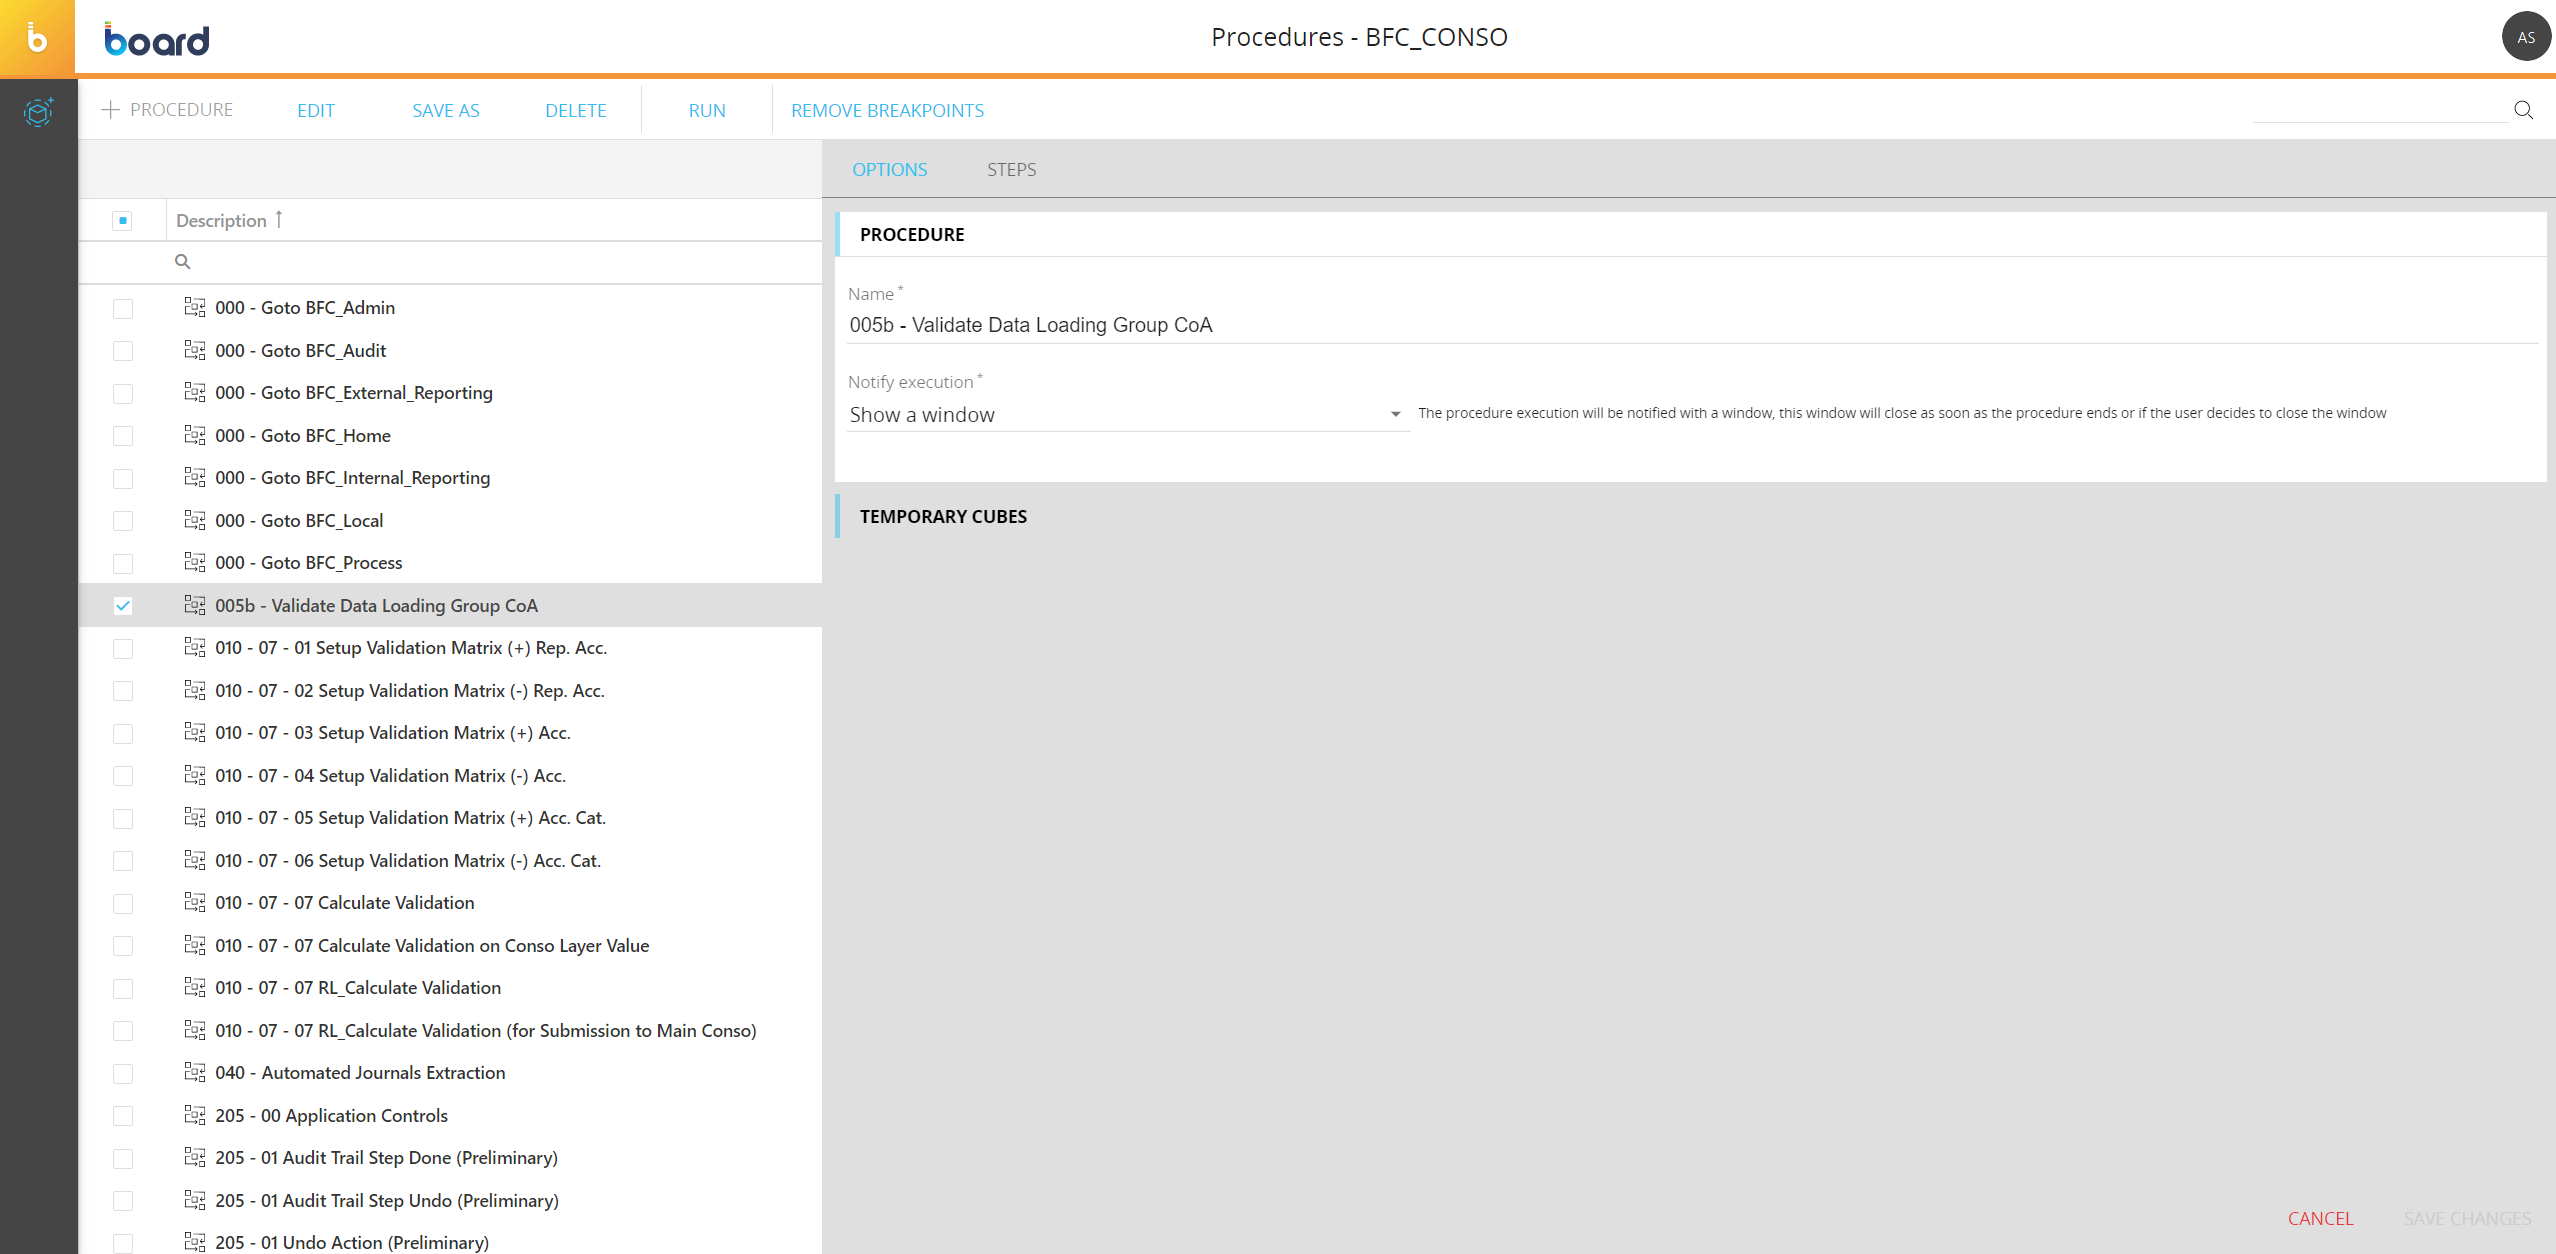
To create a new Procedure, click on "+ PROCEDURE" to access the Procedure configuration panel.
Once the configuration panel is displayed, proceed as follows:
- In the "OPTIONS" tab, enter the Procedure name
- Select the notification execution style from the three available options:
- Show a window. The Procedure execution will be notified with a window, this window will close as soon as the Procedure ends or if the user decides to close the window
- Freeze screen. The user cannot click on any part of the screen until the Procedure ends
- Background execution. The Procedure will execute in background, the user can navigate the application without waiting for the end of the Procedure
- Add the necessary Temporary Cubes from the "TEMPORARY CUBES" submenu.
Temporary Cubes are created and used only as part of the Procedure in which they are defined, which means that they can only be used within the Procedure in which they are created and are not visible in the Cubes section of the Data model. Temporary Cubes are created when the execution of the Procedure starts and are deleted when the Procedure ends. By their nature, Temporary Cubes only occupy RAM during the execution of the Procedure and are never physically stored on disk.
Temporary Cubes can be used as standard Cubes in Dataflow calculations (as target or source of a Dataflow step) and are configured in the Procedure main property panel: from there it is possible to enter the Cube name, the data type, and its Structure (Dimensions). You can also copy an existing Cube and configure the Sparsity for its dimensions, as you would for a normal Cube. See Creating a Cube for more details.
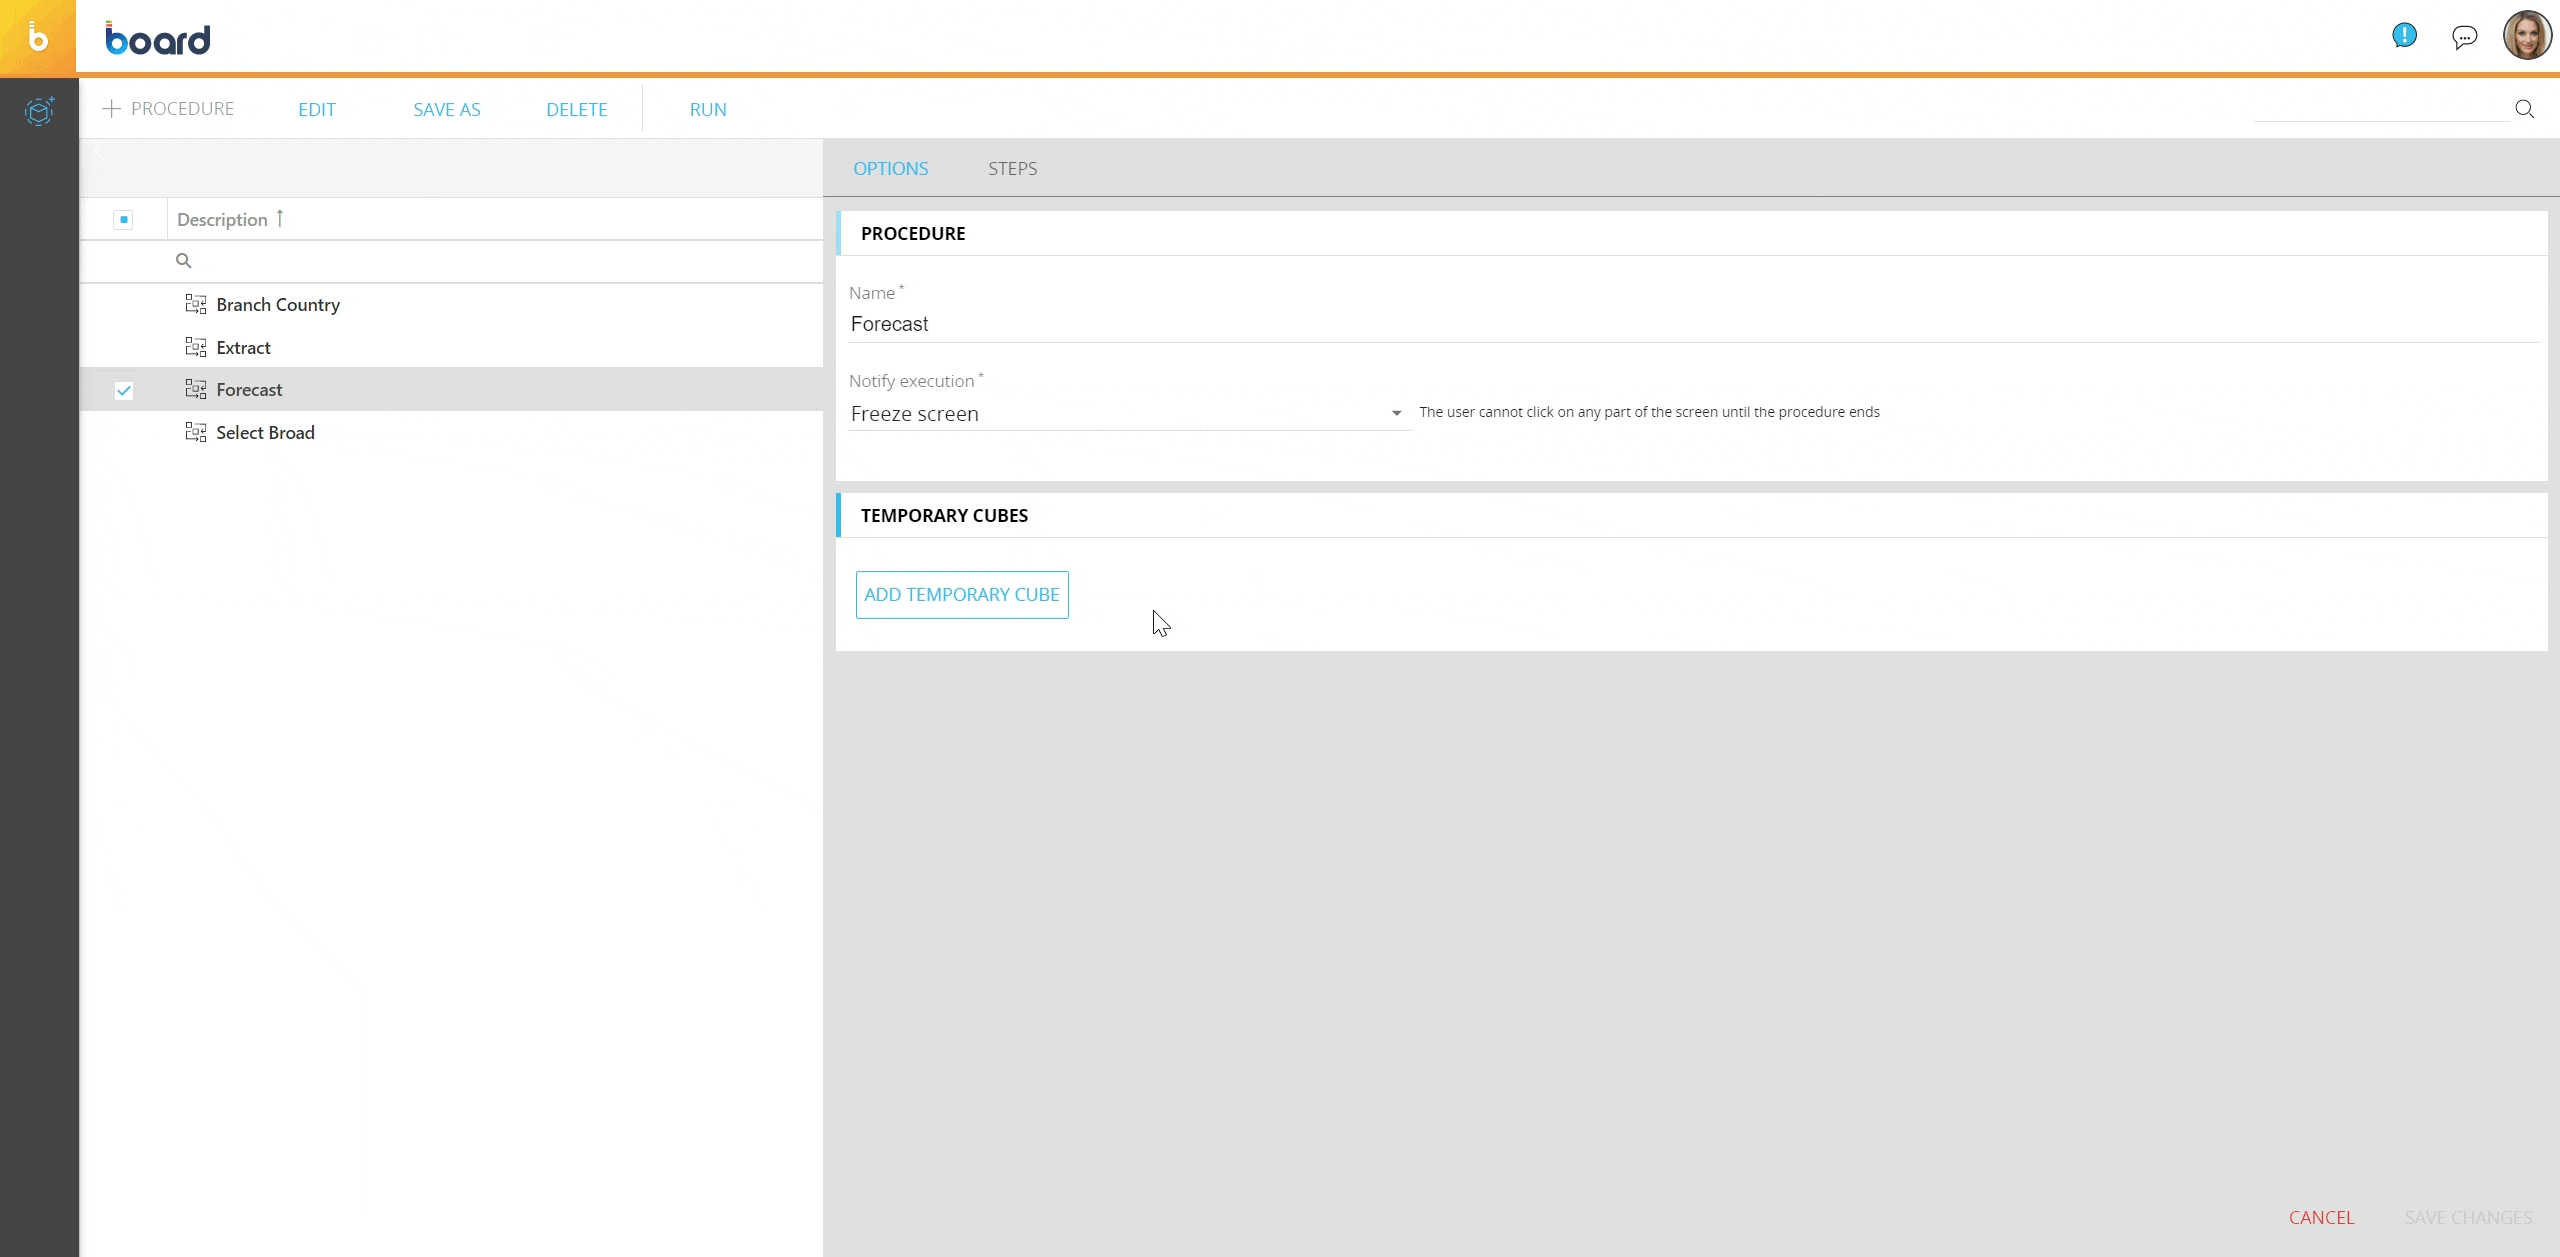
Every Procedure invocation allocates a different Temporary Cube, so two different users launching the same Procedure do not affect each other, but remain completely isolated.
- Click "SAVE CHANGES" to launch the Procedure editor.
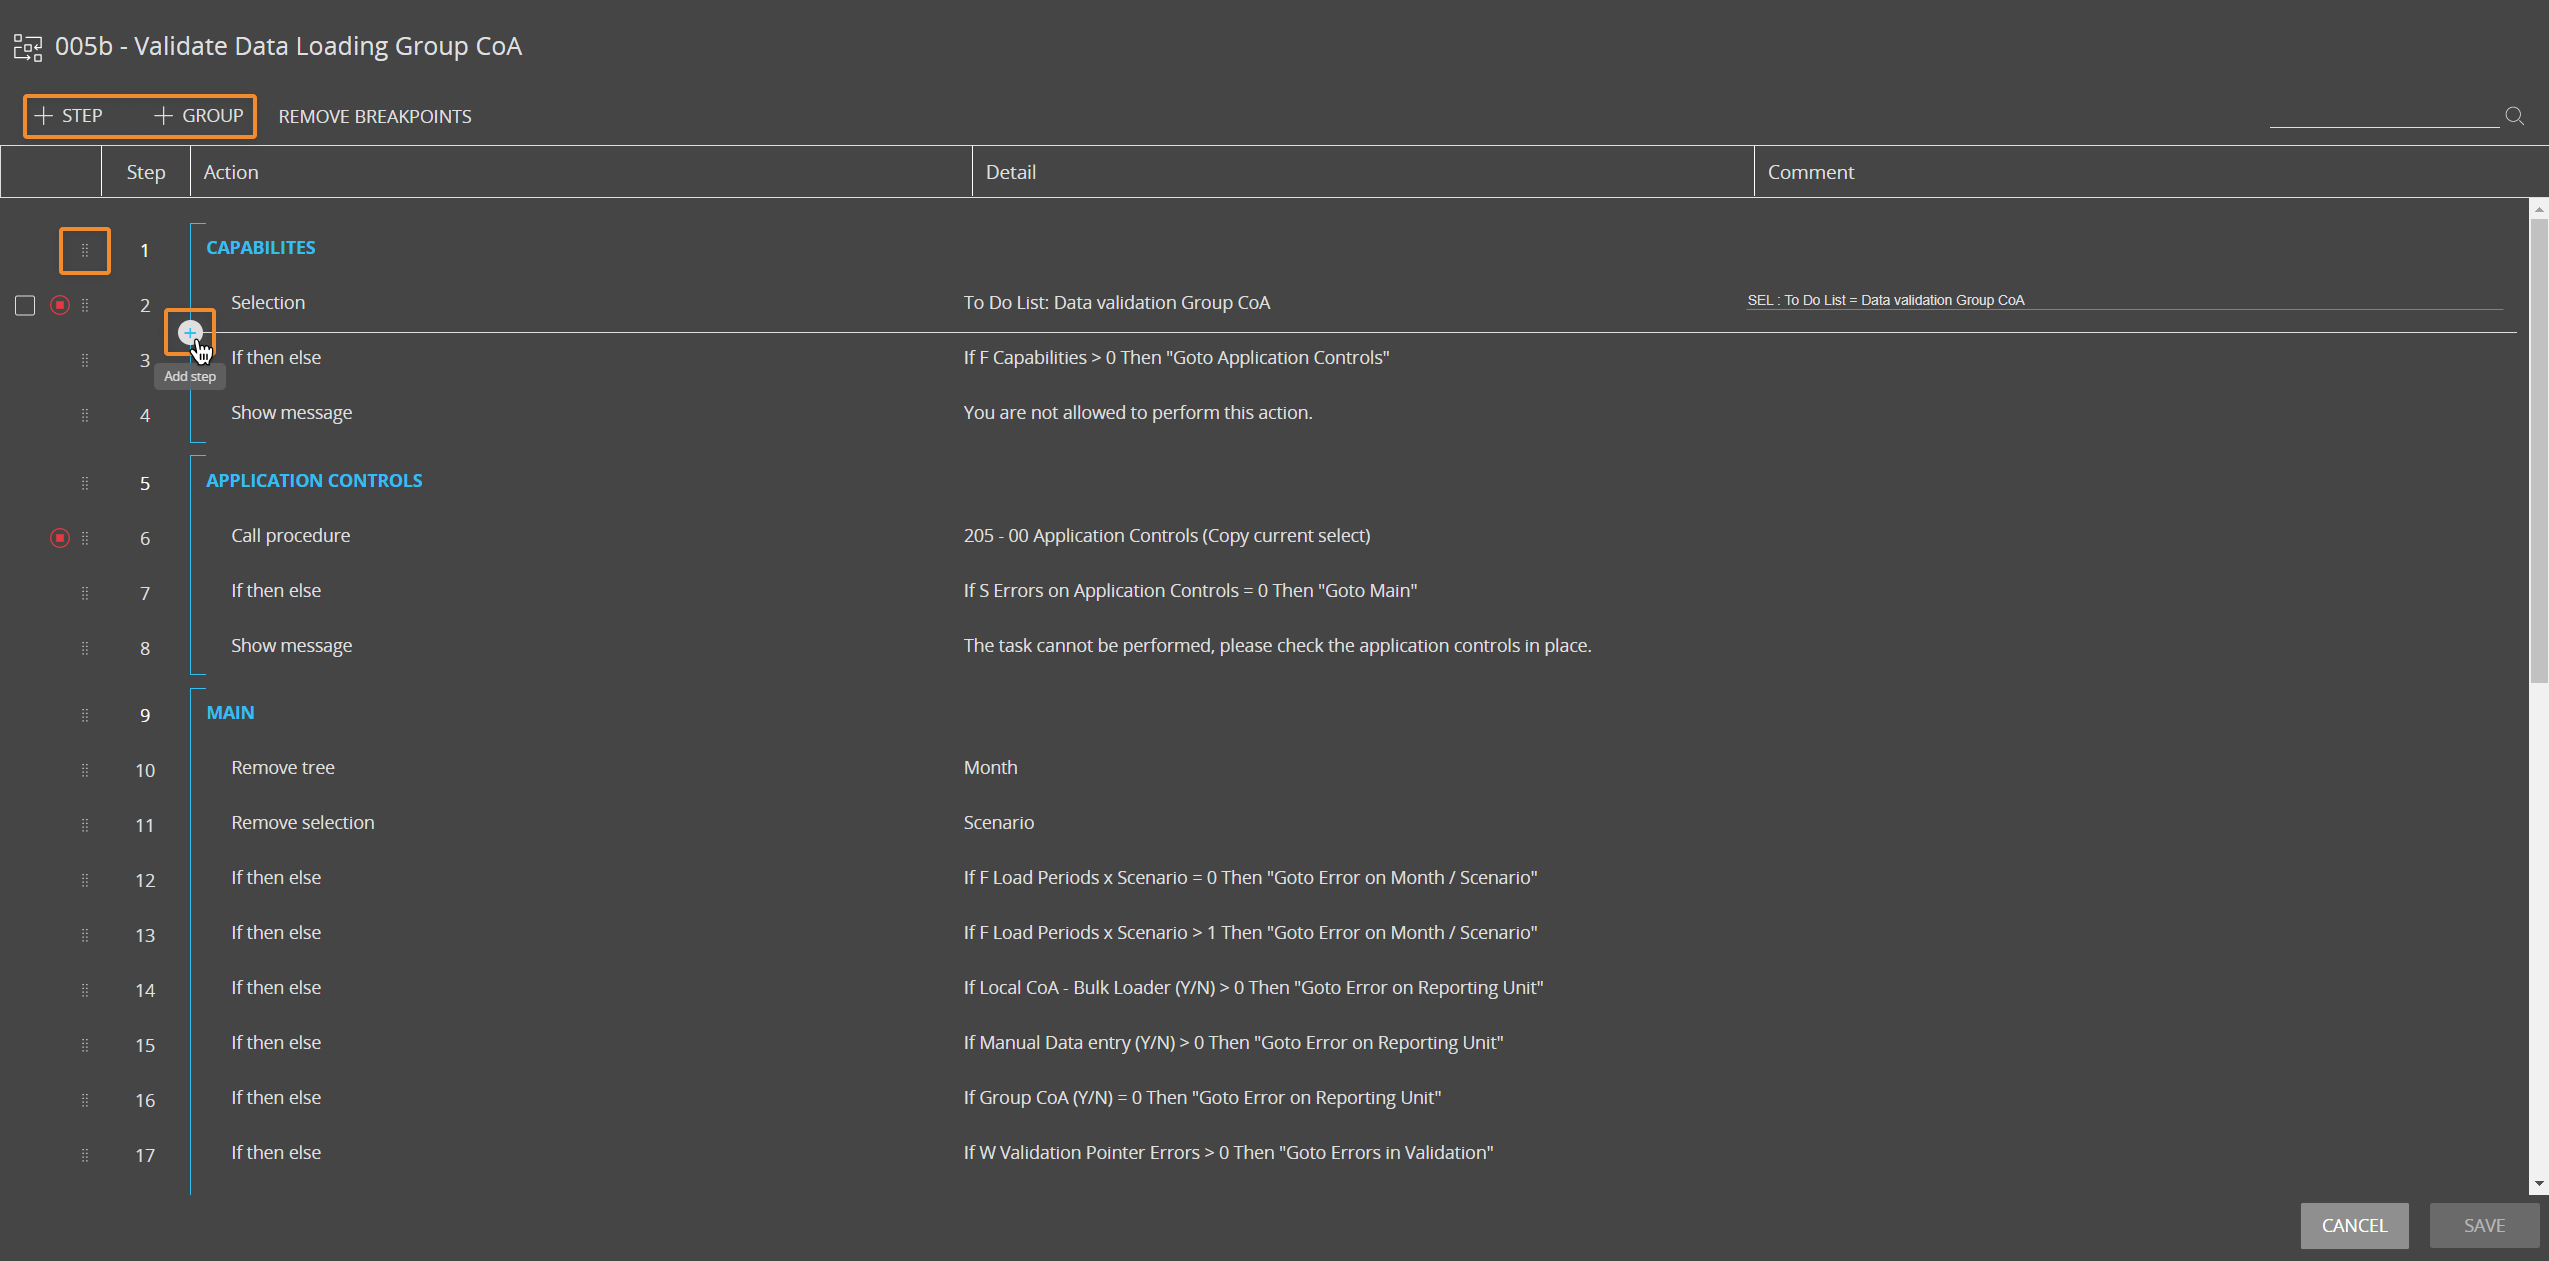
Once the Procedure editor is open, add as many steps and groups by using the "+STEP" and "+GROUP" respectively. You can also add a new step by placing the mouse pointer after the desired step and clicking on the "+" icon.
To move a step or a group, drag the drag indicator icon (![]() ) to the desired position.
) to the desired position.
From the Procedure editor, you can also copy/paste multiple steps and groups in the Procedure. To do so select the desired steps or groups and click the "COPY STEPS" or "COPY GROUPS" buttons on top of the page.
Once the steps or groups are copied, the "PASTE STEPS" and/or "PASTE GROUPS" buttons will appear.
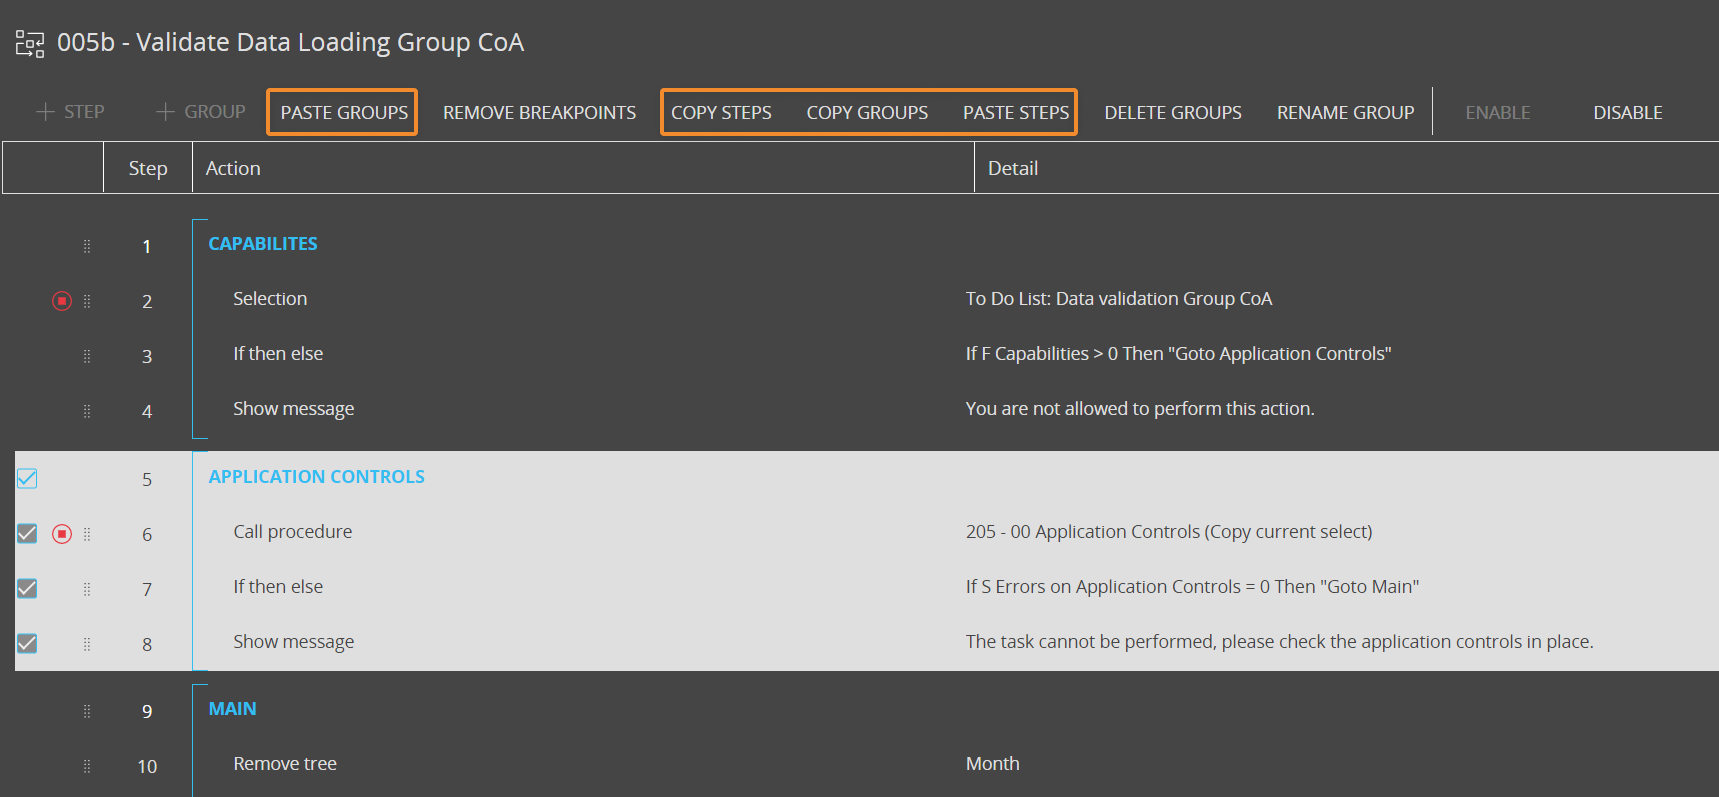
You can also copy and paste steps or groups using the CTRL+C and CTRL+V keyboard shortcuts.
At this point you have two options:
- If you want to paste one or more steps, select an existing step after which you want to paste the steps you copied and click the "PASTE STEPS" button. The copied steps will be pasted below the target step (i.e. the step selected at that time)
- If you want to paste one or more groups, click the "PASTE GROUPS" button. This action will always paste the copied groups to the end of the Procedure, regardless of the step or group selected at that time
You can paste steps and groups within the same Procedure or in another one, provided they are all saved in the same Data model.
In the Procedure editor you can also enter comments for each step: to so so, click on the field next to the step details and enter the desired comment.
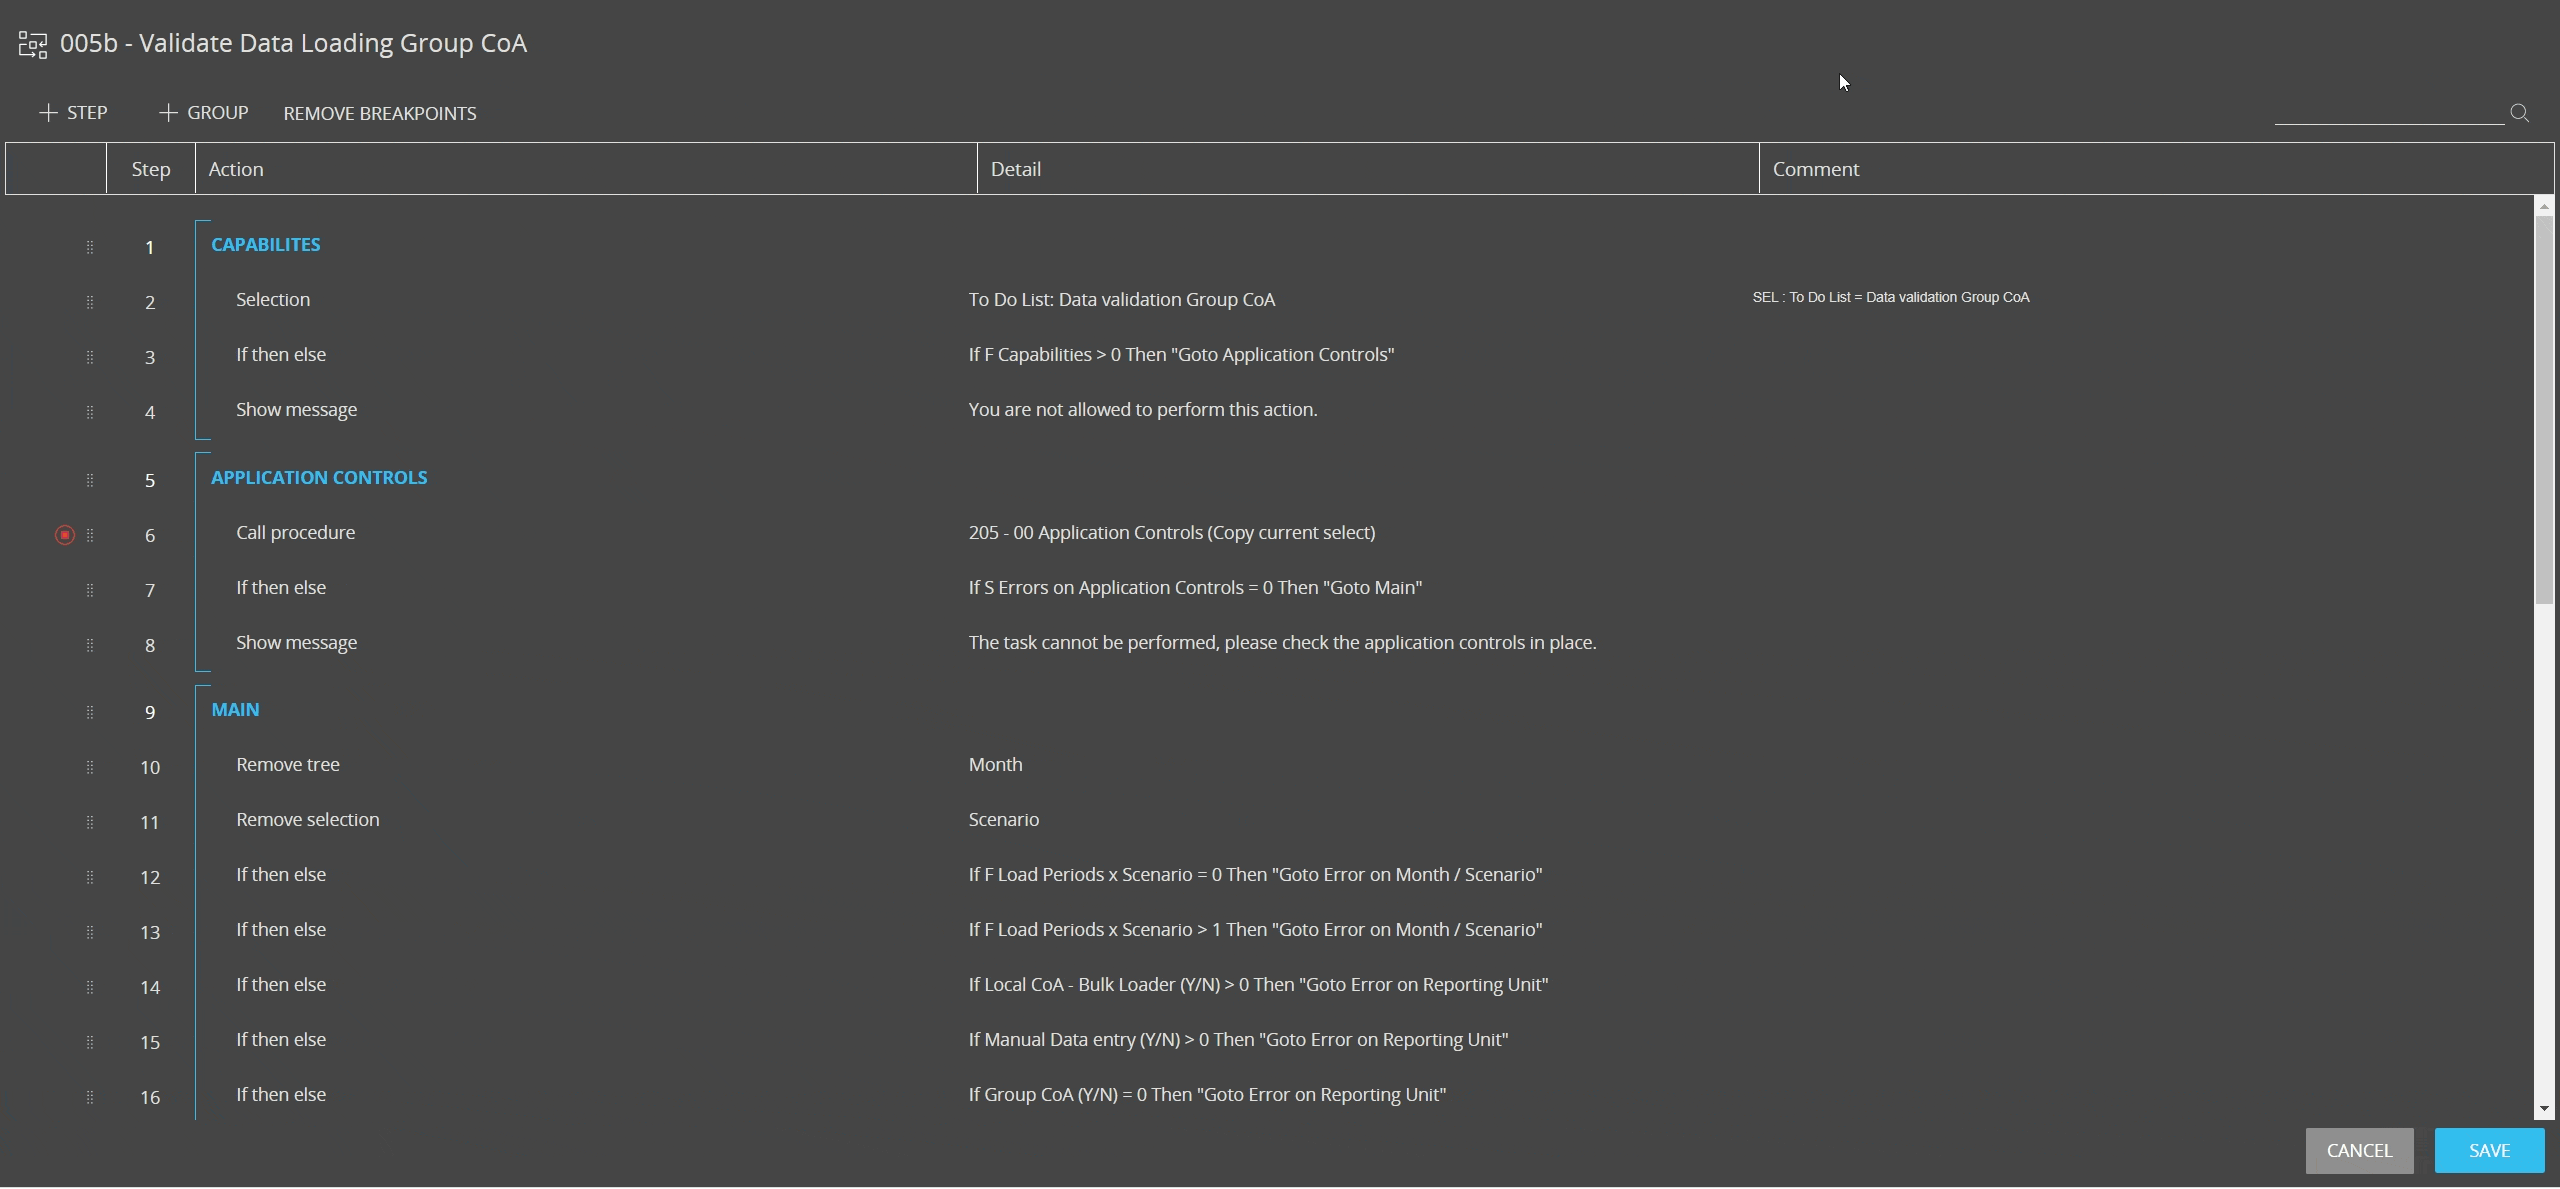
The comment will be displayed in the Procedure editor as well as in the properties panel that appears when the Procedure is selected in the home page.
When you are done configuring your Procedure, click the "SAVE" button to save and close the Procedure designer.