Creating a Data reader protocol
This topic describes how to create a new Data reader protocol and all available options.
From the Data reader home page you can create three types of Data reader protocols, depending on the external data source the data will be imported from.
When creating a new Data reader, the following data source types are available:
- SQL
- Text file
- SAP
Creating a SQL Data reader
To begin creating a SQL Data reader, proceed as follows:
- Click the "+ DATA READER" button in the top left of the screen
- Name your data reader with a relevant name and group it accordingly
- Select "SQL" as source type, then click OK
The "Sorting entity members" checkbox is available when at least one Entity sort option is set to "Custom" in the Entities section: once the option is enabled, only the Entity fields can be used in the Data reader as it will only be able to set the order of members. The order in the file/query read by the Data reader will be used in the custom sort.
Connection
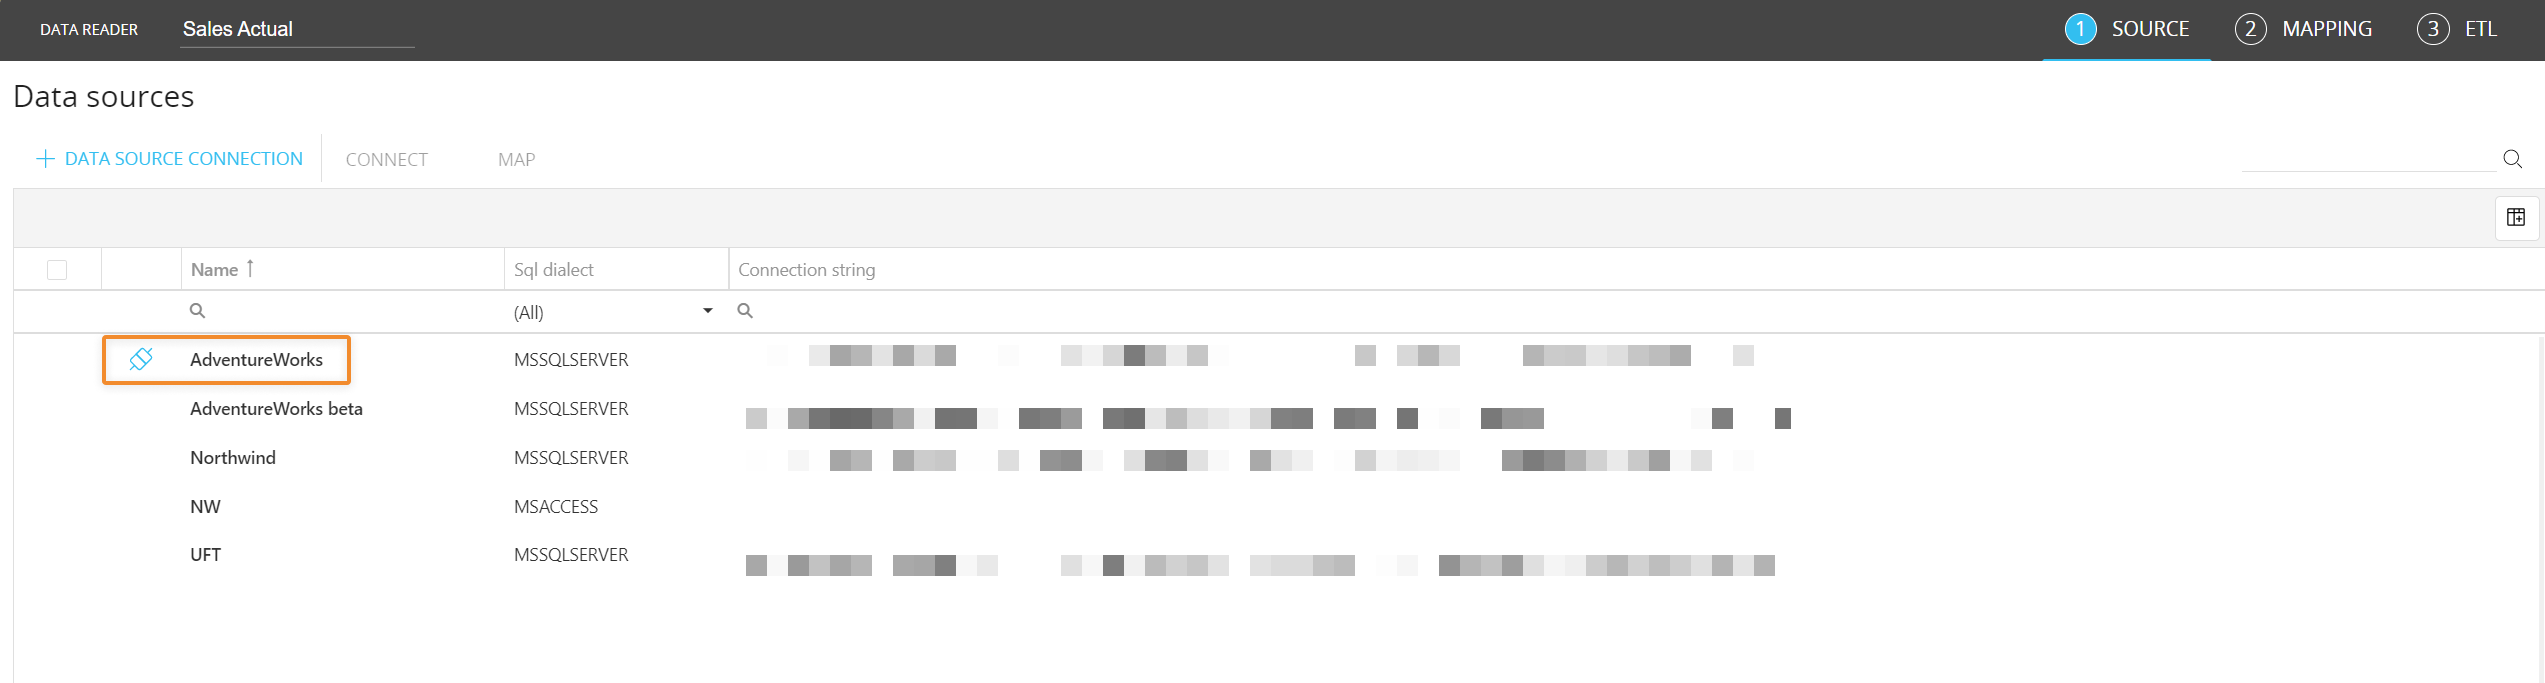
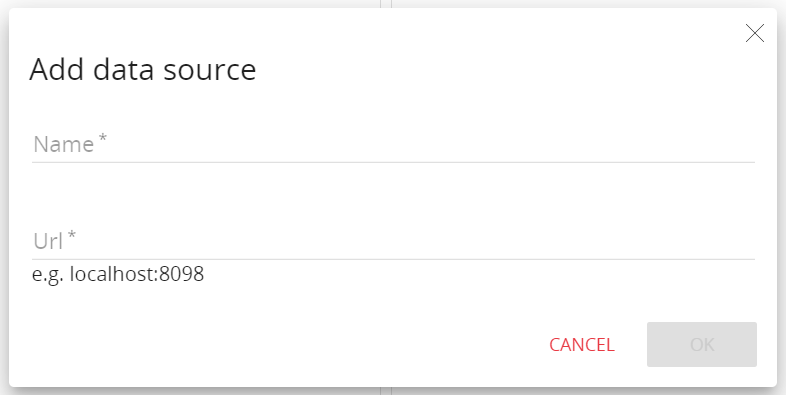
If you have not already set up a Data Source Connection, click the "+ DATA SOURCE CONNECTION" button: this will open a configuration panel allowing you to enter the parameters for the connection you are creating.
There are 2 different connection type available:
- ODBC
- OLE-DB
To complete the ODBC connection configuration, proceed as follows:
- Select the name of the ODBC Connection. This is defined externally to the Board Data model section, in the "Data sources" page under System administration
- Define the SQL dialect for queries. This can be changed to match whichever database type is in use. If the database you are connecting to is not listed, set the type to "General". The following properties are available:
- Query timeout: set of waiting seconds. When you're using an ODBC database, such as Microsoft SQL Server, there may be delays because of network traffic or heavy use of the ODBC server. Rather than waiting indefinitely, you can specify how long to wait before the database engine produces an error. This setting may not be long enough to allow some queries to run against ODBC data sources.
- Disable record counting: Enable/disable counting of affected rows in a query. If disabled, the data reading process completion percentage is not available during the protocol execution
- Disable table sampling: Enable/disable sampling on the Database
- Enter the credentials that were defined at the creation of the SQL server that is being connected to
- Click on "SAVE CHANGES", then click the "Connect" button to establish a connection with the source Database. The "Map" button allows you to define the mapping of fields in the Database to dimensions in a Cube for the load process.
To complete the OLE-DB connection configuration, proceed as follows:
- Define the name of the OLE-DB Connection and the connection string. The connection string can be defined by clicking on the "CONFIGURE" button or just clicking on the connection string field. A pop-up window will then appear for the configuration of the connection string.
The connection parameters depend on the provider you want to connect to. - Define the SQL dialect for queries. This can be changed to match whichever database type is in use. If the database you are connecting to is not listed, set the type to "General". The following properties are available:
- Query timeout: set of waiting seconds. When you're using an ODBC database, such as Microsoft SQL Server, there may be delays because of network traffic or heavy use of the ODBC server. Rather than waiting indefinitely, you can specify how long to wait before the database engine produces an error. This setting may not be long enough to allow some queries to run against ODBC data sources.
- Disable record counting: Enable/disable counting of affected rows in a query. If disabled, the data reading process completion percentage is not available during the protocol execution
- Disable table sampling: Enable/disable sampling on the Database
- Enter the credentials that were defined at the creation of the SQL server that is being connected to
- Click on "SAVE CHANGES", then click the "Connect" button to establish a connection with the source Database. The "Map" button allows you to define the mapping of fields in the Database to dimensions in a Cube for the load process.
When a data source has been connected, the icon to the left hand side will change from a black disconnected plug to a light blue connected plug. You can also click the icon to connect to the source Database.
Mapping
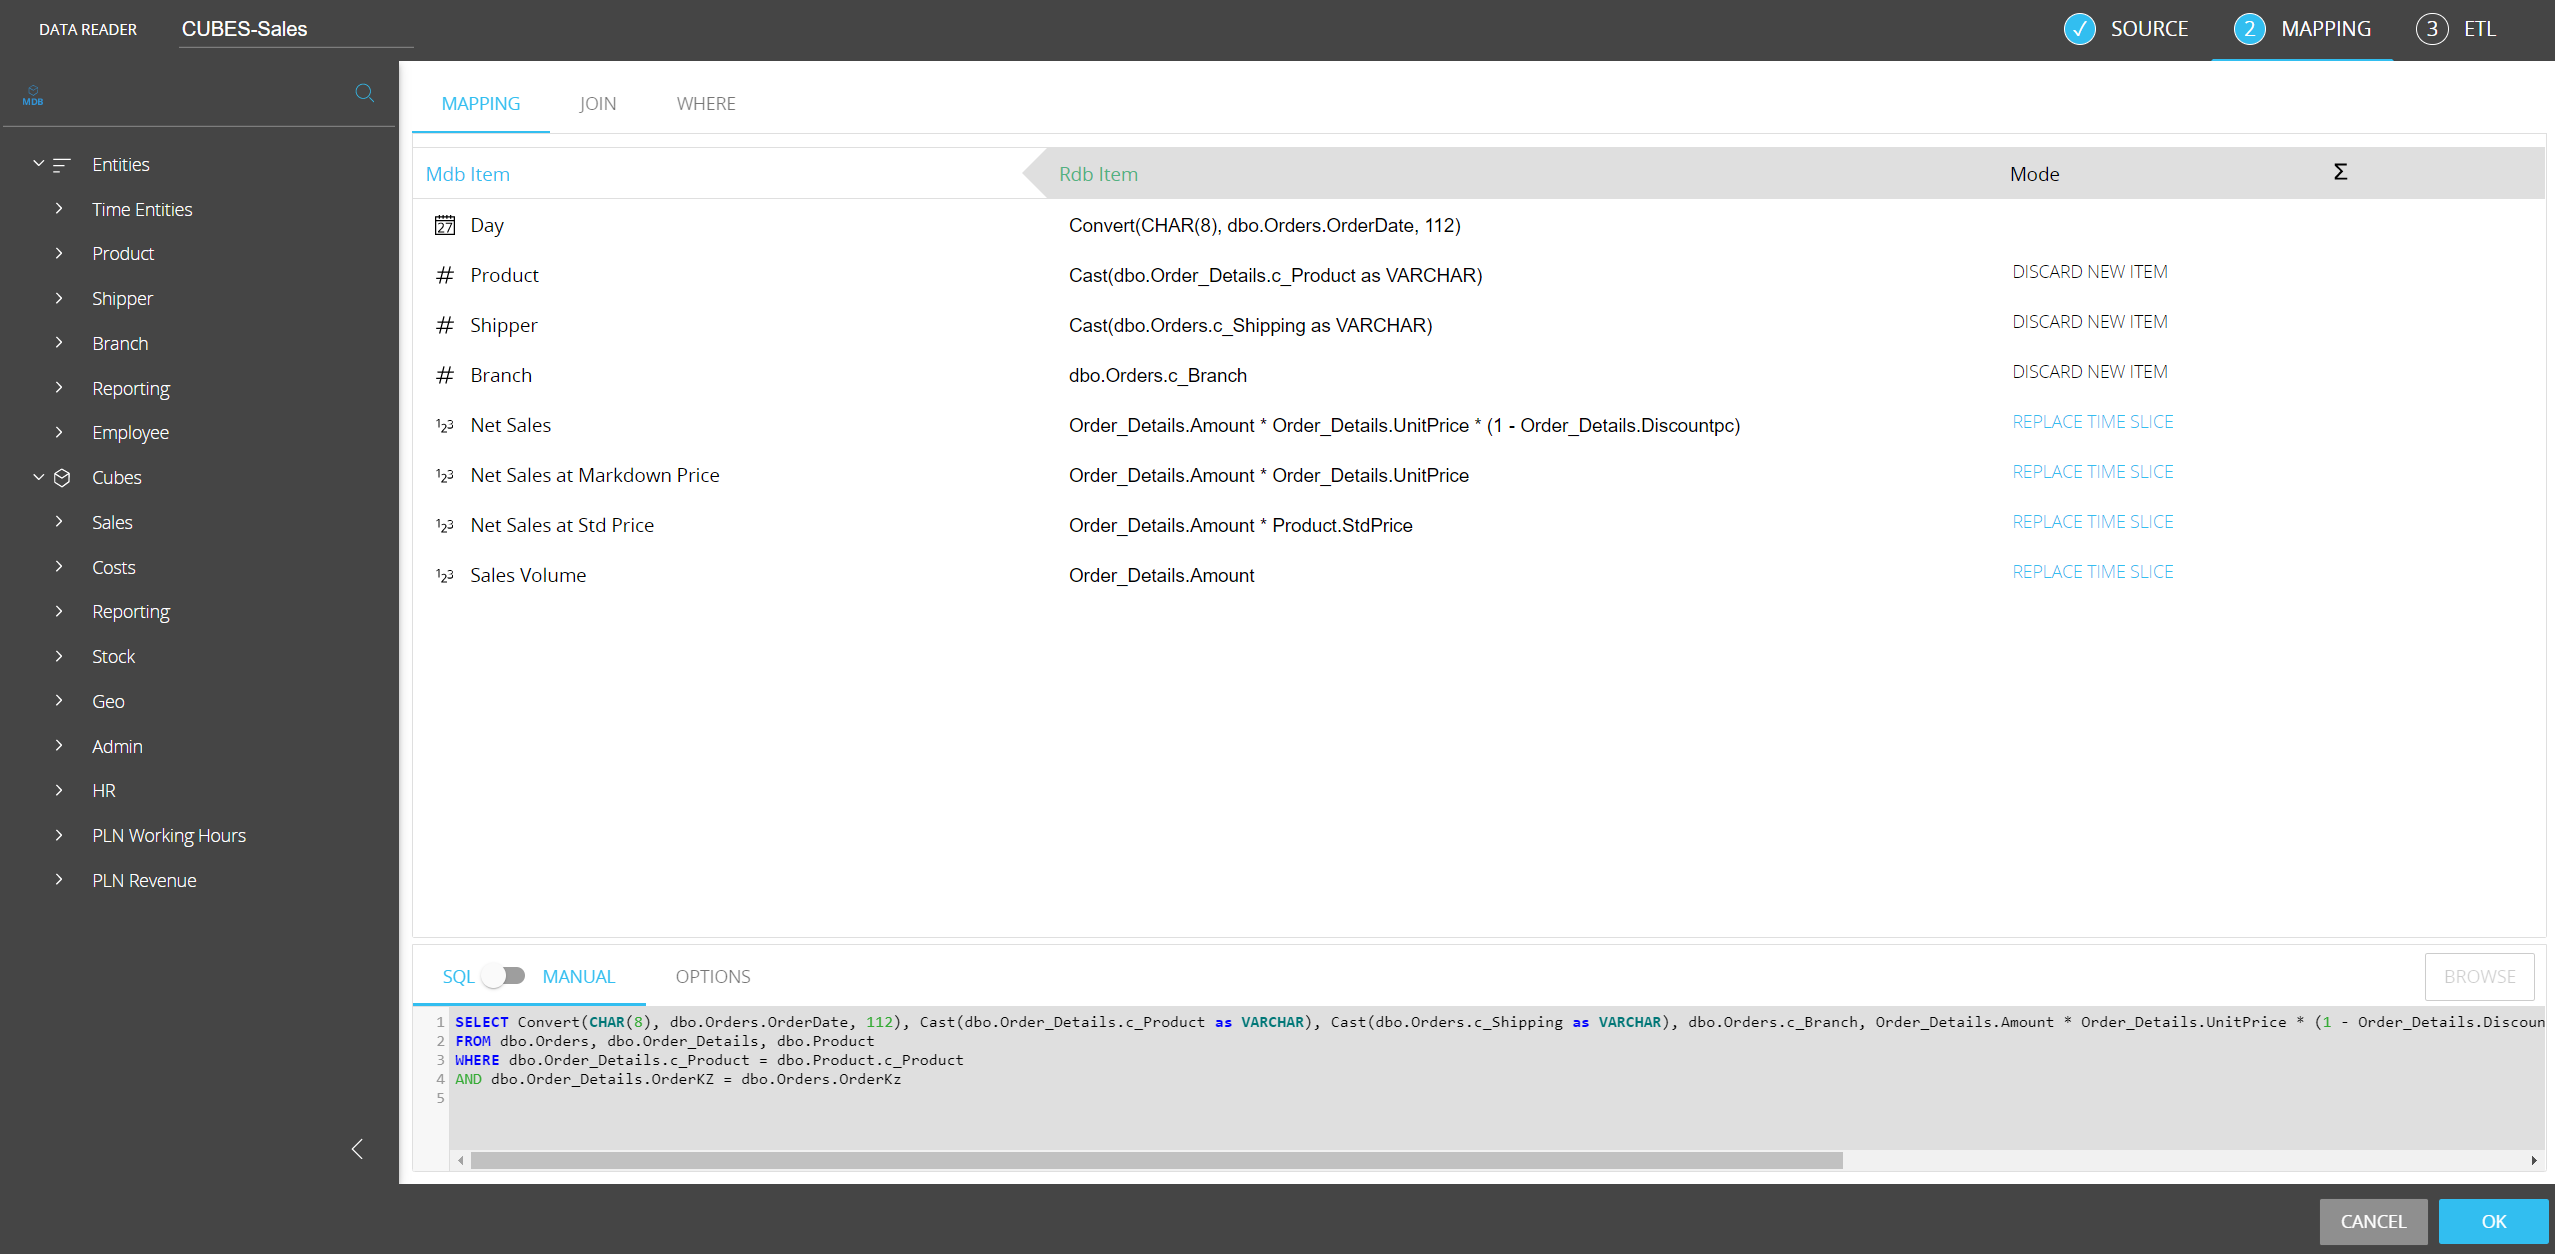
Next the data sources must be mapped. On the left-hand side are the Board Data model objects (Entities and Cubes) that can be loaded. The objects to be loaded should be dragged to the center area outlined in blue. On the right-hand side are the database tables and views from the connected source. The relevant field should be dragged next to the corresponding Board object, in the area outlined in green.

In the "Mode" column, set the desired action for each row. This option controls whether external data will be loaded or discarded and how it will be managed by the system.
The available actions are described in the table below.
| Board field type | Option | Description |
| Entity code | Discard New Item | The incoming record is only loaded if the value found in this field is the code of an existing member of the Entity; otherwise the entire record is discarded. This option is used to filter unwanted records. |
| Entity code | Add New Item | This option validates all incoming records; when the value from the data source is not the code of an existing member of the Entity, a new member is created. This option is used to populate Entities. |
| Entity description | Read | This option only loads the description if the current Entity member description field is not populated; therefore only descriptions for newly created items are loaded. |
| Entity description | Replace | This option overwrites the current Entity member description with the value from the source file. It is recommended to always enable this option in order to update entity members' descriptions with changes that might occur on the operational system master files. |
| Cube | Add | This option adds incoming data to the Cube; if the Cube already contains values, then the new data is added to the existing values. Clearly, summing of data occurs only if the Cube is numeric; for date and text Cubes, the current cell value is replaced with the source data. |
| Cube | Replace Time Slice | This option replaces the Cube cells belonging to all time periods found in the incoming data, with the new values. When this option is enabled, the Data reader performs the following actions: 1) scans the entire source file and memorizes the time periods (i.e. the values of the date field). 2) then clears the Cube cells belonging to the time periods found in the source file 3) then starts loading source data into the Cube. For example, consider a file containing transactions for January, February and March 2004. When loading this file, the Data reader starts by scanning the date field of all records and memorizes the dates. Then it clears all Cube cells for January, February and March 2004 (across all other dimensions) and finally, it reads the values in. |
If more than one table is used, a JOIN condition will be required to join the tables on the relevant field: this can be done from the "JOIN" page that can be reached from the tabbed menu on top. To define a join clause, use the available dropdown menus to select the column shared by two tables.
If needed, a WHERE condition can be added to filter the results of the query: this can be done from the "WHERE" page that can be reached from the tabbed menu on top. To define a WHERE condition, you can manually write the desired RDB item or you can drag and drop it onto the WHERE condition configuration area so that writing it is easier and less prone to syntax errors.
The "SQL-MANUAL" toggle at the bottom of the page allows you to manually edit your SQL statement: to do so, switch to the "MANUAL" setting. This option is particularly useful when more complex actions are required.
Board is not meant to be a sophisticated SQL query generator. If you need more flexibility to create complex queries, use an ad-hoc query tool or create a view which runs the desired query in the relational database then use this view in the Board Data reader protocol.
The SQL statement is run on the OLE DB provider therefore the supported commands and syntax depend solely on the OLE DB provider you connect to.
Other Data reader options are available under the OPTIONS tab and are the following:
- Join syntax. The syntax, which is used for JOIN-condition (WHERE or INNER JOIN condition). The "Where" option defines the join conditions using the WHERE clause, while the "Join" option uses the INNER JOIN clause. The result of the query is the same, regardless of the syntax used, however if you need to define an OUTER JOIN (or other types of SQL JOINs) it is recommended to use the Join option and then manually edit the INNER JOIN clause instead of completely rewriting the statement generated by Board
- Data type. If this value is selected to “Convert“, a transformation formula is automatically generated whenever the data type and format of the source fields differs from data type and format expected by Board. This option is applicable only if the "Sql dialect" field of the ODBC or OLE DB connection, which indicated which is the relational database you are connecting to, has been set to an option other than "General"
- Date format. This option is valid only for certain RDBMS types and it is automatically set by Board. It is used to specify the physical format of the date field. Two options are available:
- Number. This option should be used when date fields of the relational database are in the format of a serial number (dates are conventionally stored in numerical fields where the integer part represents the year, month and day and the fractional part the time)
- Text. This option should be used when date fields of the relational database are in text format
Click on the "BROWSE" button totest and see a preview of the query execution and its result on the first 500 rows of the source tables.
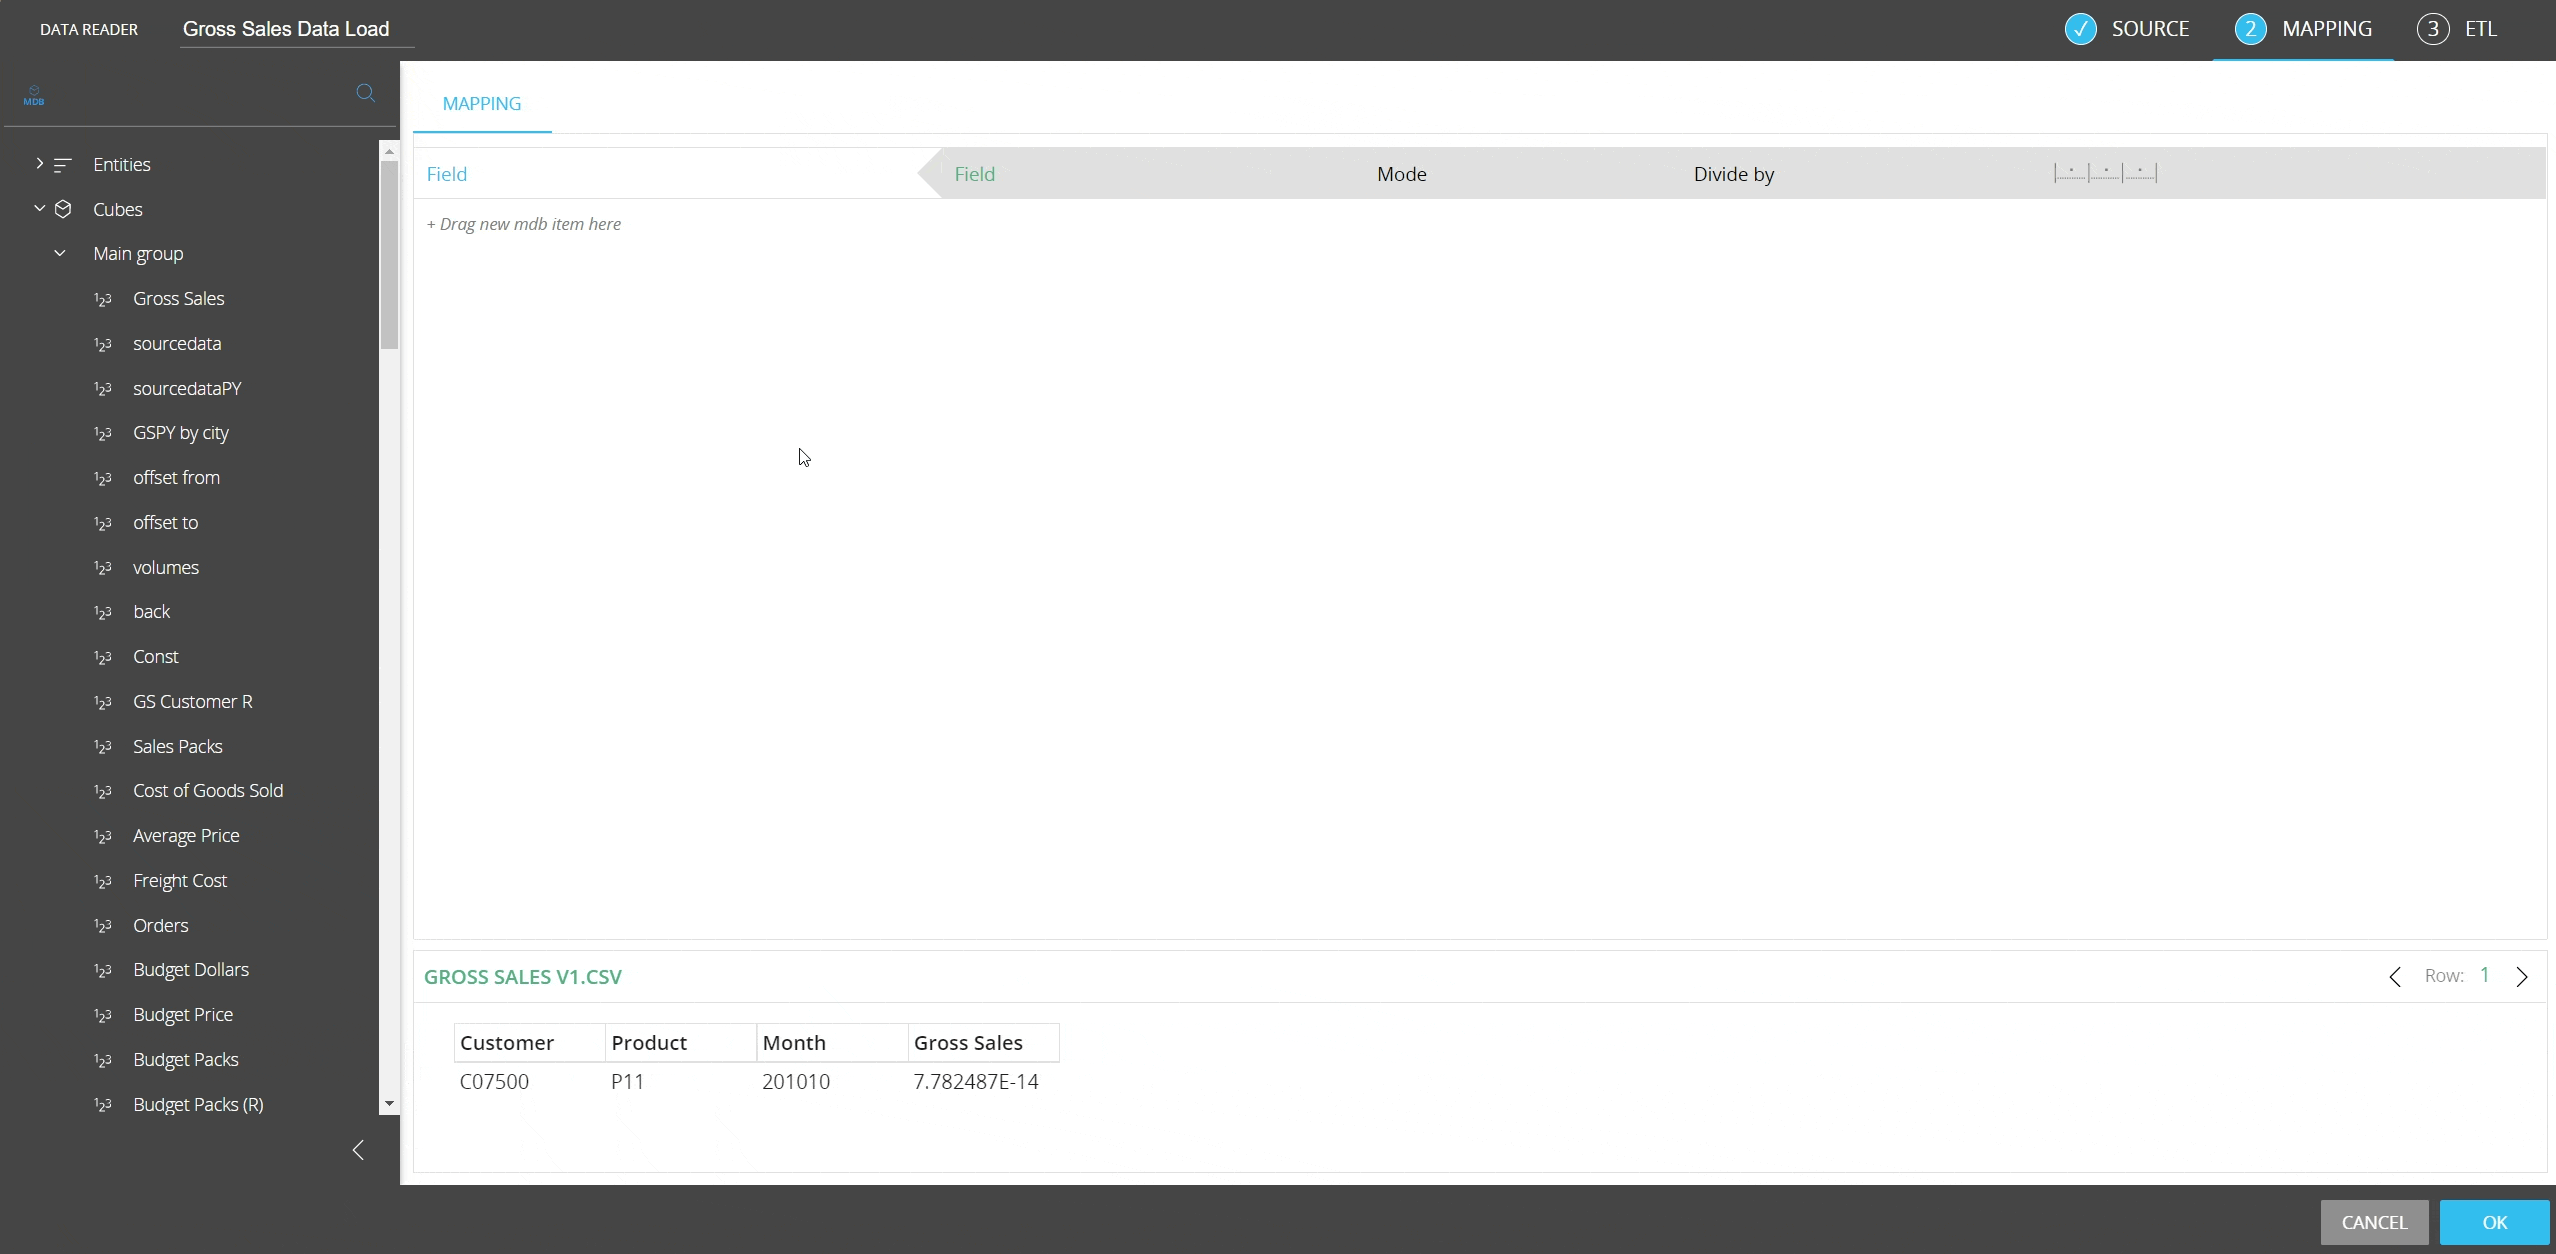
The following image shows an example of a typical mapping.
RDB Cubes
In the case of RDB (Rolap) Cubes, the Data reader is used to retrieve data on the fly from the associated external database and offers a few additional options in the "manual query" area at the bottom of the page. These options are under the WRITEBACK menu and the CREATE TABLE button.

The "WRITEBACK" menu allows you to configure the RDB query so that every time a user enters data into an RDB Cube Board updates the table linked to that RDB Cube.
Two options are available, when write-backs on the relational database are performed by Board:
- Clear Update. This option is suitable when the relational table contains other fields than those which are mapped to the dimensions and the measures of the RDB Cube.
When this option is chosen, the following scenario may occur:
-
When data is saved into a Cube cell corresponding to an existing record then the record is updated through an UPDATE statement
-
When data is saved into a Cube cell which does not correspond to any existing record then a new record is added to the table through an INSERT statement
-
When an existing Cube cell is cleared (or set to zero), the corresponding record is updated by setting the value field to zero.
With this option, Board adds new records or updates existing ones. Board never removes records from the relational table, thus preserving the status of other fields.
-
- Delete Insert (default). This option is to be preferred when the relational table exactly matches the Structure of the RDB Cube: each field of the relational table is mapped to a dimension of the Cube or to a Cube measure, and the table primary key is the set of fields which are mapped to the Cube dimensions.
When this option is chosen, the following scenario may occur:-
When data is saved into a Cube cell corresponding to an existing record then the record is updated through an UPDATE statement
-
When data is saved into a Cube cell which does not correspond to any existing record then a new record is added to the table through an INSERT statement
-
When an existing Cube cell is cleared (or set to zero), the corresponding record is deleted from the table.
-
If the relational table already exists, make sure it has a primary key defined by the combination of all relational columns that match the dimensions of the RDB Cube, otherwise the writeback action from Board to the relational database won't work.
Optimizing the SQL statement: setting the WHERE conditions rules
When an RDB Cube is used in a Screen, in order to retrieve data from the relational table Board generates an SQL statement with a WHERE condition that limits the table records accordingly to the selected Entity members. For example, if the user makes a selection on the Entity Month, then a WHERE condition on the field corresponding to the date dimension is dynamically added to the SQL statement. The way the WHERE conditions are written affects the response time of the SQL queries.
In some cases, the selection made on Entity members may determine a WHERE condition with a very large number of items. For example, if the user sets a selection on an Entity that is in the upper levels of a hierarchy, such as Region=North America, then this selection will propagate down to the CustomerID Entity and embrace a very large number of customers, say several thousands. An SQL statement with a WHERE clause that extracts thousands of records can be inefficient and may easily exceed the maximum command length supported by the ODBC or OLE DB provider driver you are using.
There are two parameters that allow to tune the efficiency of the SQL queries generated by Board.
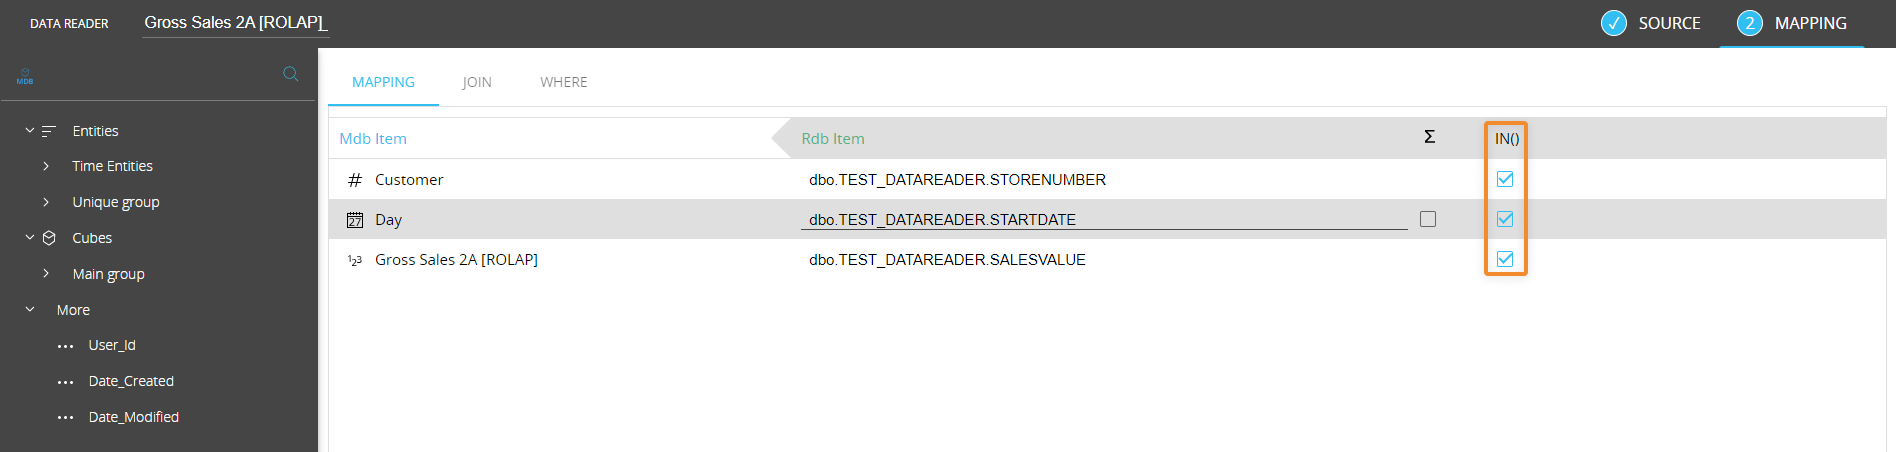
Where IN( ) Buffer size
The "Where IN( ) Buffer size" parameter under the ADDITIONAL OPTIONS area defines the maximum number of items that are added to a WHERE condition of a single SQL command. When this threshold is exceeded, instead of running a single SQL command with a very large WHERE clause, Board runs multiple SQL commands each with subset of conditions; the results of these SQL queries are then merged by the Board Engine and aggregated in the required view.
IN() parameter
The IN( ) parameter allows to completely disable the feature that dynamically adds the WHERE conditions to the SQL statements. This option should be enabled only on the Entities that have a small number of occurrences, or Entities on which the number of selected members is always high in percentage (for example if 70% or more of the total number of occurrences are always embraced by the user's selection).
Creating a new table
To create a new table into the RDBMS engine directly from Board, you can use CREATE TABLE button in the "manual query" area at the bottom of the page.
To allow Board to create a table in the source relational database system, it is required to configure an ODBC or OLE DB user with sufficient privileges to do so.
When you click on the CREATE TABLE button Board will create a new table with all dimension fields of the Cube and a value field. The primary key of the table is the combination of all dimension fields and one index created on each dimension field of the table.
Optionally, and only if the RDB Cube will be utilized for data entry or for Dataflow calculations, you can add up to three additional fields as follows:
- User_ID. This field writes the user ID of the Board user that has created or modified the table record
- Date_Created. This field writes the date and time (time stamp) when the record was created
- Date_Modified. This field writes the date and time (time stamp) of the last record update.
These additional fields are not part of the Cube Structure and are primarily meant for auditing and monitoring purposes.
Unbalanced Hierarchies
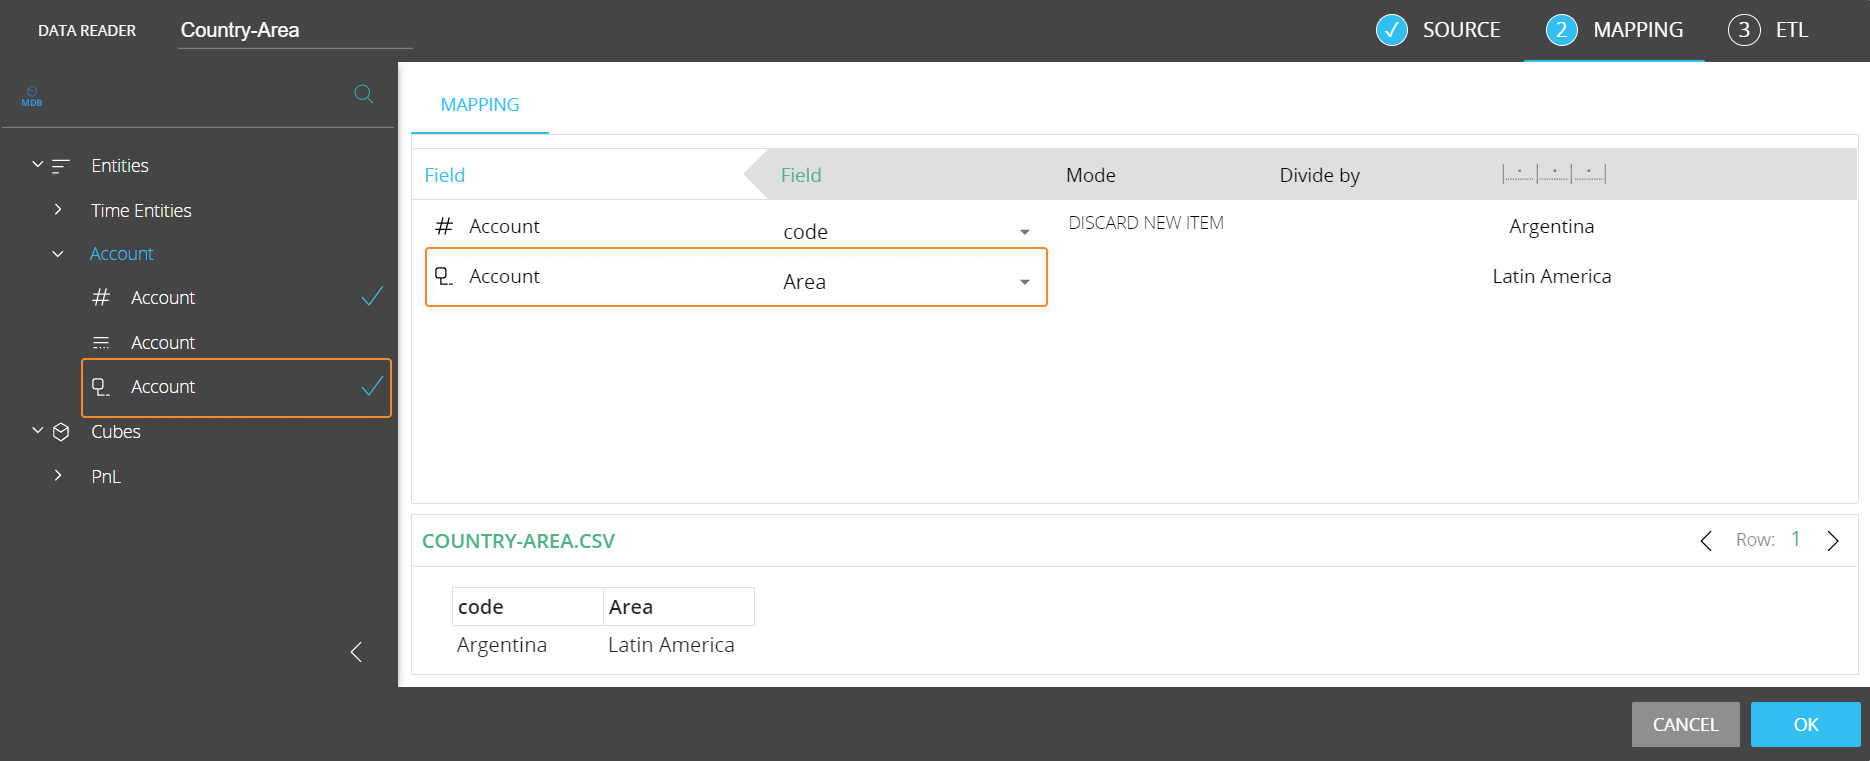
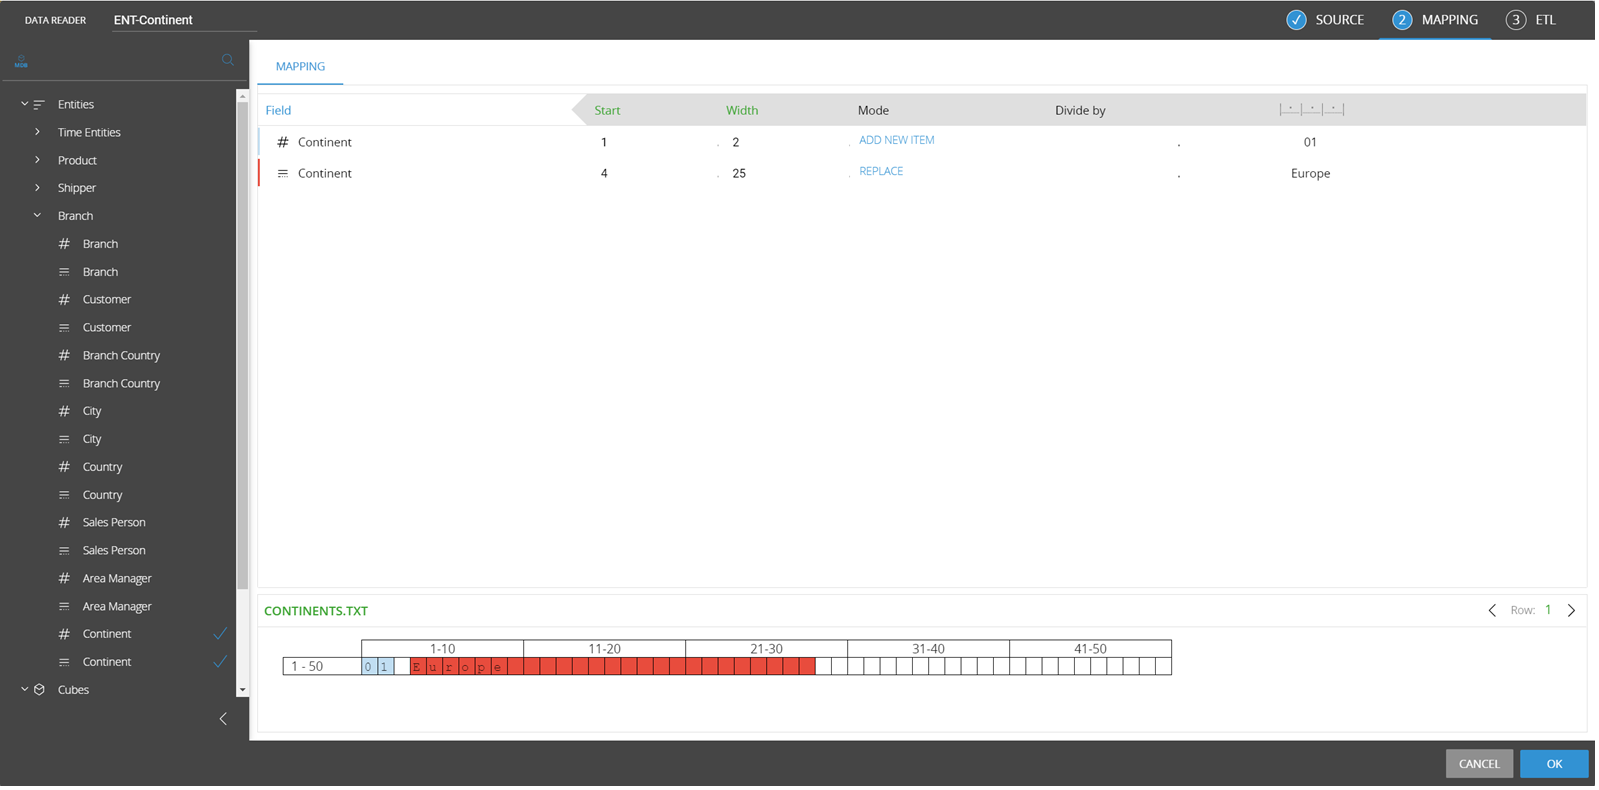
For Unbalanced Hierarchies you can use the Data reader to configure the parent-child relationships. In the mapping table, the Entity that contains the Unbalanced Hierarchy will show an additional “parent” field for its members, in addition to the usual “code” and “description” fields.
You will need to map the child code to the code field and the parent code to the parent field, as shown below.
Creating a Text file Data reader
To create a Text file Data reader (also called ASCII Data reader), begin from the same menu as the SQL reader, but select "Text File" as the Data reader type.
Connection
You will then need to set the path to the folder containing the file you wish to read. This could either be a local file path or a URL pointing directly to a file (to do this, first you must click on the "HTTP File" switch. The file must also not be restricted by either a password or a firewall). A pattern can also be defined to narrow the selection.
Board supports the following cloud storage services:
- Amazon S3
- Azure Blob Storage
- Google Cloud Storage
Those cloud storage services must be configured from the Data sources page under System Administration.
Before connecting to the file, you must also select whether you wish to read a tab delimited file (CSV), or a Fixed Width file. If delimited, you must also select the delimiter that is appropriate to the file, otherwise you will be presented with an error when reading the file.
Once you have configured the reader and connected, you will be presented with a preview of the first line (or second line if you have ticked "First row contains headers" – in this case the headers will be used as the field names). You can preview subsequent rows by using the navigation on the bottom right of the screen.
The Data reader cannot read text files larger than 2GB. This limit applies only to text files, not to tables of a database or other sources.
Mapping
Once you have successfully configured the source for the reader, click "Map" to define the mapping of the fields in the file to the Entities and Cubes in Board.
As with the SQL Reader, to choose the Entities or Cubes that you wish to load, select them by dragging them from the left hand sidebar into the mapping area outlined in blue.
To map fields (columns) from the file, to the Entities/Cubes, you can select the file field by using either the drop down menu next to each Board field, or drag directly from the file preview at the bottom of the screen onto the Board field you wish to map to, in the area outlined in green.
Again, you may define the action (Mode) at this point, as described in the table above. You will also be able to see a preview of the values that are being loaded to each Entity/Cube.
The "Divide by" field is optional and only applies to numeric Cubes: it divides incoming data by the specified value. For example, type 1000 to divide values in the source file by 1000.
Creating an ASCII Data Reader – Fixed Width
Some files are created in a fixed-width format, to read these files select "Fixed Width" within the Options section.
With this type of reader, you must select the starting character (beginning at 1), and define the character width of the fields that you are reading. The preview window at the bottom of the screen will assign a different colour to each of the fields that you have defined to make it easier for you to distinguish between them.
Extracting and reloading Relationship trees through a CSV file
From the Entities home page, the tree for a specific hierarchy can be extracted as a text file: from this text file, modifications can be made to the Relationships as well as additional members added to the Entities. The extracted file will be placed in the default download location as configured in the server configuration: in this case, a CSV file will be generated along with a .cfg file. When reading data from a file that has a corresponding .cfg file, Board will automatically configure the Data reader settings to quickly provide you with a mapping from all of the relevant file fields to the corresponding Board Entities.
Creating a SAP Data reader
To create a SAP Data reader, begin from the same menu as the SQL reader, but select "SAP" as the Data reader type.
By design, each run of the SAP Data reader results in two consecutive requests to the SAP Connector server URL.
Connection
The creation of SAP Data readers requires the configuration of a data source. To do so, click on the "+CONNECTION" button then, in the configuration pop-up, name the new connection and enter the address of the SAP connector Server in the URL field.
If SAP data sources are already available, they are listed in the SOURCE table. To connect with the desired SAP data source, click on the black disconnected plug: if the icon changes to a light blue connected plug, the connection with the SAP database was successful.
The EXTRACTOR table on the right will show all the available tables in SAP database. You can select a table in the tree to see a preview of the data it contains in the preview area at the bottom of the page.
Mapping
Once you have successfully configured the source for the Data reader, click on the "MAP" button to define the mapping of the fields in the file to the Entities and Cubes in Board.
As with the SQL Reader, to choose the Entities or Cubes that you wish to load, select them by dragging them from the left hand sidebar into the mapping area outlined in blue.
To map a position to the Entities/Cubes, select the position by using the drop down menu next to each Board field.
Again, you may define the action (Mode) at this point, as described in the table for the SQL Data reader.
The "Divide by" field is optional and only applies to numeric Cubes: it divides incoming data by the specified value. For example, type 1000 to divide values in the source file by 1000.
The following image shows an example of a typical mapping.
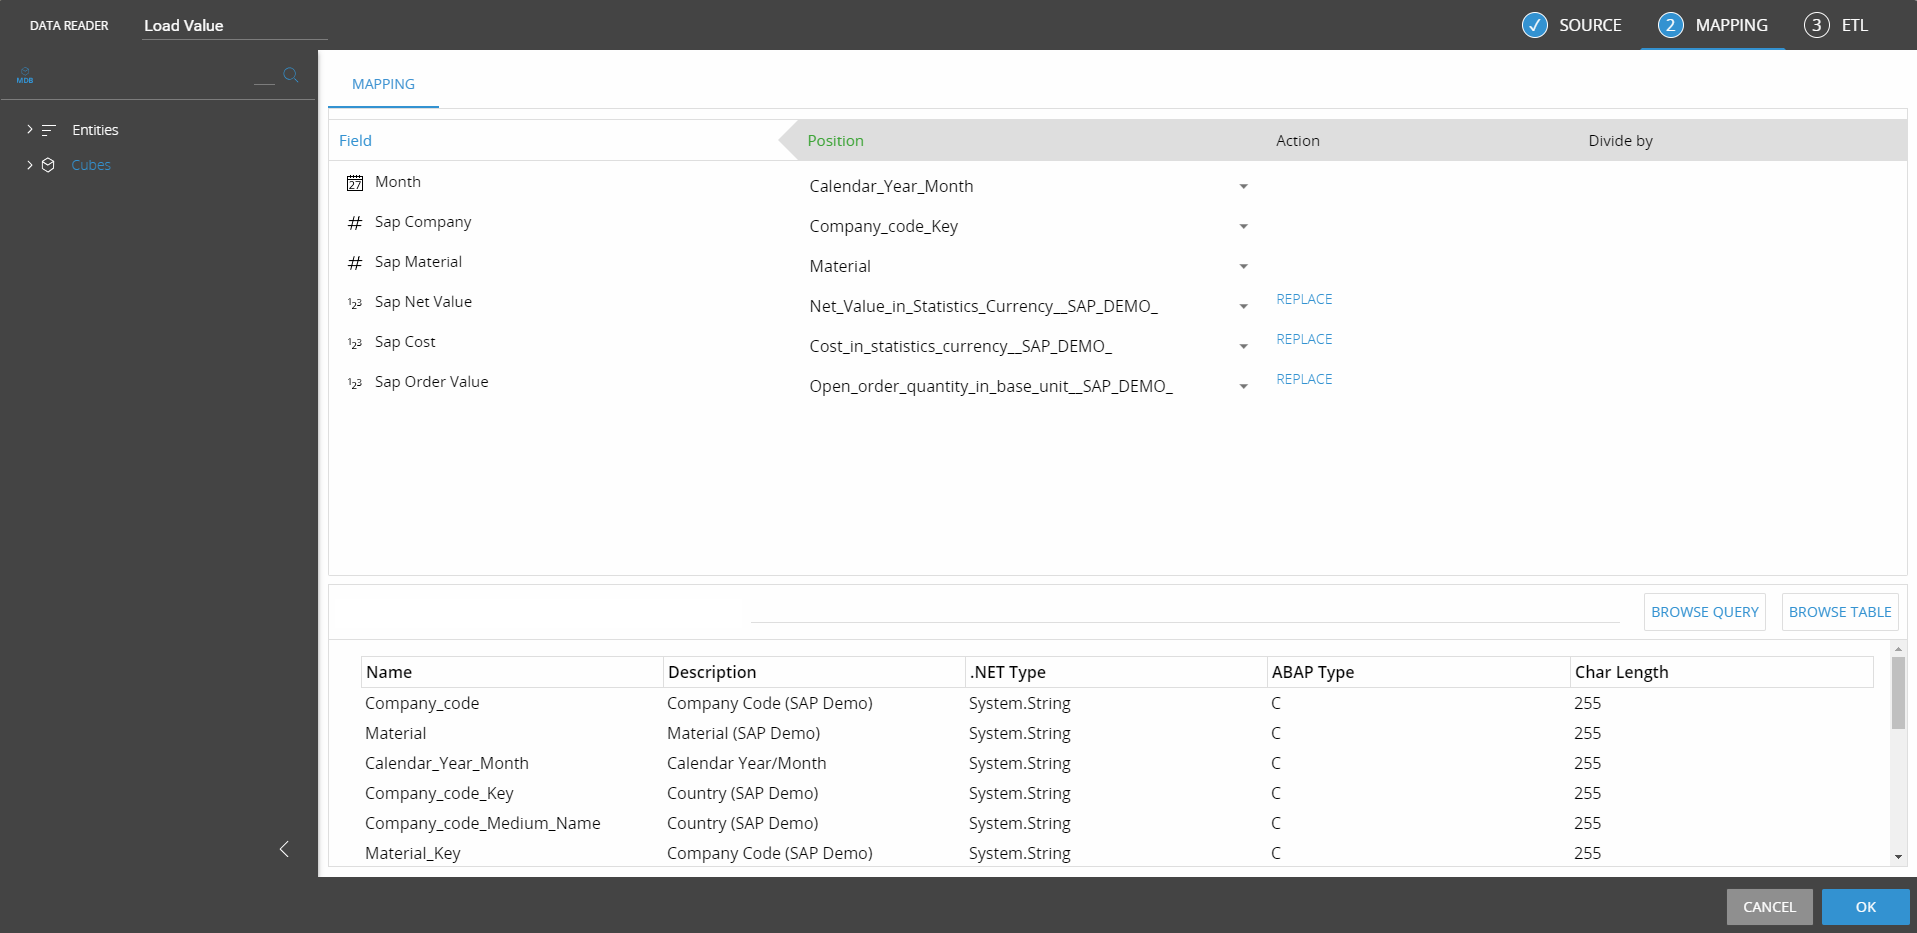
You can use the two "BROWSE" buttons on the right to see a preview of the query execution and its result, and the data in the table, respectively.
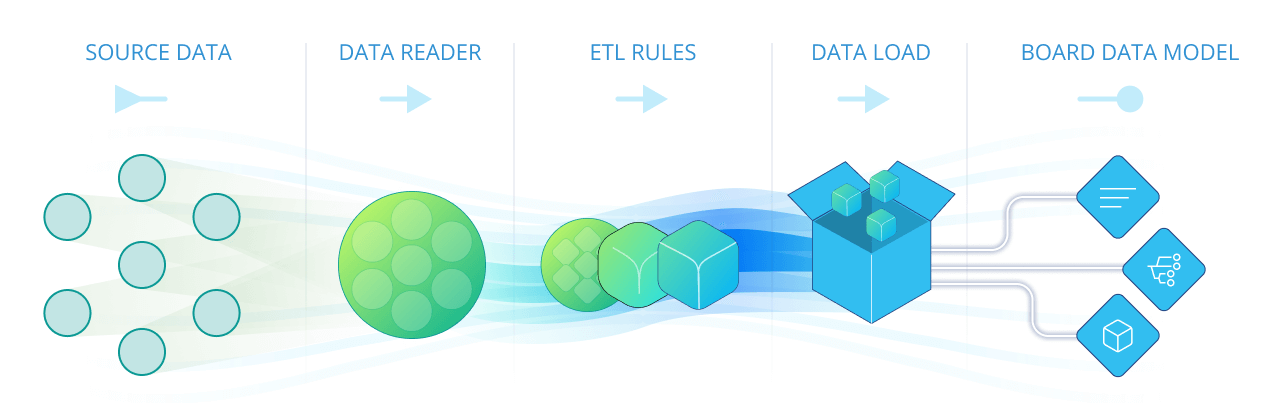
ETL (Extract, transform, load)
After mapping the source file to data model objects, the ETL tab allows for transformations of the source data to be made when loading it.
The flow of incoming data starts with retrieving data from the different data sources through a Data reader protocol, which then applies some validation and transformation formulas (the ETL rules) and then data is loaded into the mapped Entities and Cubes.
The formulas and validation rules defined in the ETL section are calculated record by record on the incoming data. An ETL formula can refer to any field of the record. The transformed record, i.e. the result of the calculation, is the output ETL. This output is the data which is actually loaded into the Board Data model.
The ETL configuration is done in an Excel-like interface.
The Cubes and Entities of the reader protocol are displayed in columns A and B (Type and Field). The ETL input in column C is the incoming external data from the source system. The ETL output, shown in column D, is the transformed data (after applying the formulas) used to feed the corresponding Entities and Cubes.
Records in the source file can be validated with a conditional formula in cell D1. If the result is 0, the entire record will be rejected. The expression can refer to any cell in columns C through G.

After doing so, the first record of the source file or of the source table is shown in the Input column (C). It is possible to view the first 200 records using the previous/next icons (left and right arrows) in the top left.
The toggle in the top right can be used to show the formula or the result. Enable it and enter the desired expression in the output column (D) using the common spreadsheet formula syntax. To return to preview mode, click the toggle again.

No transformation is configured by default, so each cell in the Output column is initially equal to the equivalent cell in the Input column. Columns E through G can be used to write intermediate calculations, thus simplifying the definition of long complex expressions.
The "CLEAR" button next to the toggle resets all ETL changes to default.