Managing relationships
This topic describes various common tasks that administrators can perform on Relationships.
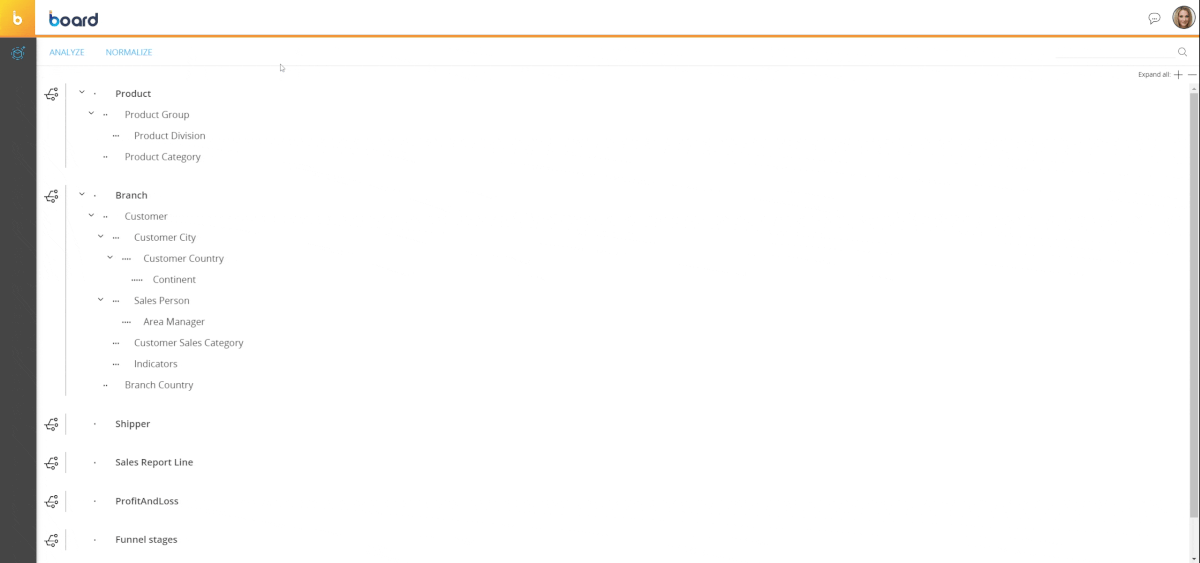
In the Relationships home page, you can see all existing Relationships in a tree view. The first Entity at the top of the tree is the least aggregate (child), while those nested and indented down along the tree are more aggregate (parents).
To manually edit an existing Relationship, drag any Entity (a node of the tree) and drop it anywhere on the desired child Entity, even if it is part of another Relationship.
If you drag and drop an Entity between two Entities in a Relationship, the following scenarios may occur:
- If you drop the Entity between two Entities at the same hierarchical level, it will also be set at that same level
- If you drop the Entity between two Entities that have a parent-child relationship, it will be set as the parent of the child Entity, thus creating a parallel branch in the tree
You can edit one Relationship at a time using this method: if you want to edit multiple Relationships in bulk, you will have to use a Data reader.
To remove a Relationship, drag any Entity (a node of the tree) and drop it anywhere except on other Entities or between them
Moving an Entity will also move all other directly or indirectly related Entities at a more aggregate level.
Changing Relationships directly affects the ability to dynamically aggregate data in Cubes: as Relationships are used to define the structure of Cubes, any modification you make might invalidate their structure. If you change a Relationship, the structure of the affected Cubes will need to be updated manually.
Changing relationships between Entity members
Relationships between members can be changed manually, by selecting a new parent for every child member of two directly or indirectly related Entities.
To do so, proceed as follows:
- Click on the desired child Entity in a Relationship
- Select the parent Entity from the dropdown menu in the details panel. Each row in the details panel shows members of the child Entity paired with members of the parent Entity you have just selected
- Click on a row to define a new parent member for each child member in a dedicated selection window
You can also change the relationship between members via a Data reader that reads hierarchical information from an external data source and applies it to the existing Entities. See Data reader basic concepts for more details.
Analyze and Normalize
In a parent-child relationship, each member of a child Entity must have a parent contained in one or multiple parent Entities. For example, in the Customer→City relationship, each Customer must be related to a City. When an element in a parent-child relationship is missing, the member in the child Entity with no parent is called an orphan.
Since Relationships are what Board uses to aggregate data along the hierarchical tree, orphans should always be avoided as they can cause data inconsistency.
The ANALYZE and the NORMALIZE actions available in the top left corner of the Relationships page allow you to fix missing Relationships, at the member or Entity level.
Click on the ANALYZE button to have Board scan existing relationships for orphan members. If any are found, they will be listed in the sliding panel on the right with some additional details about the missing relationship.
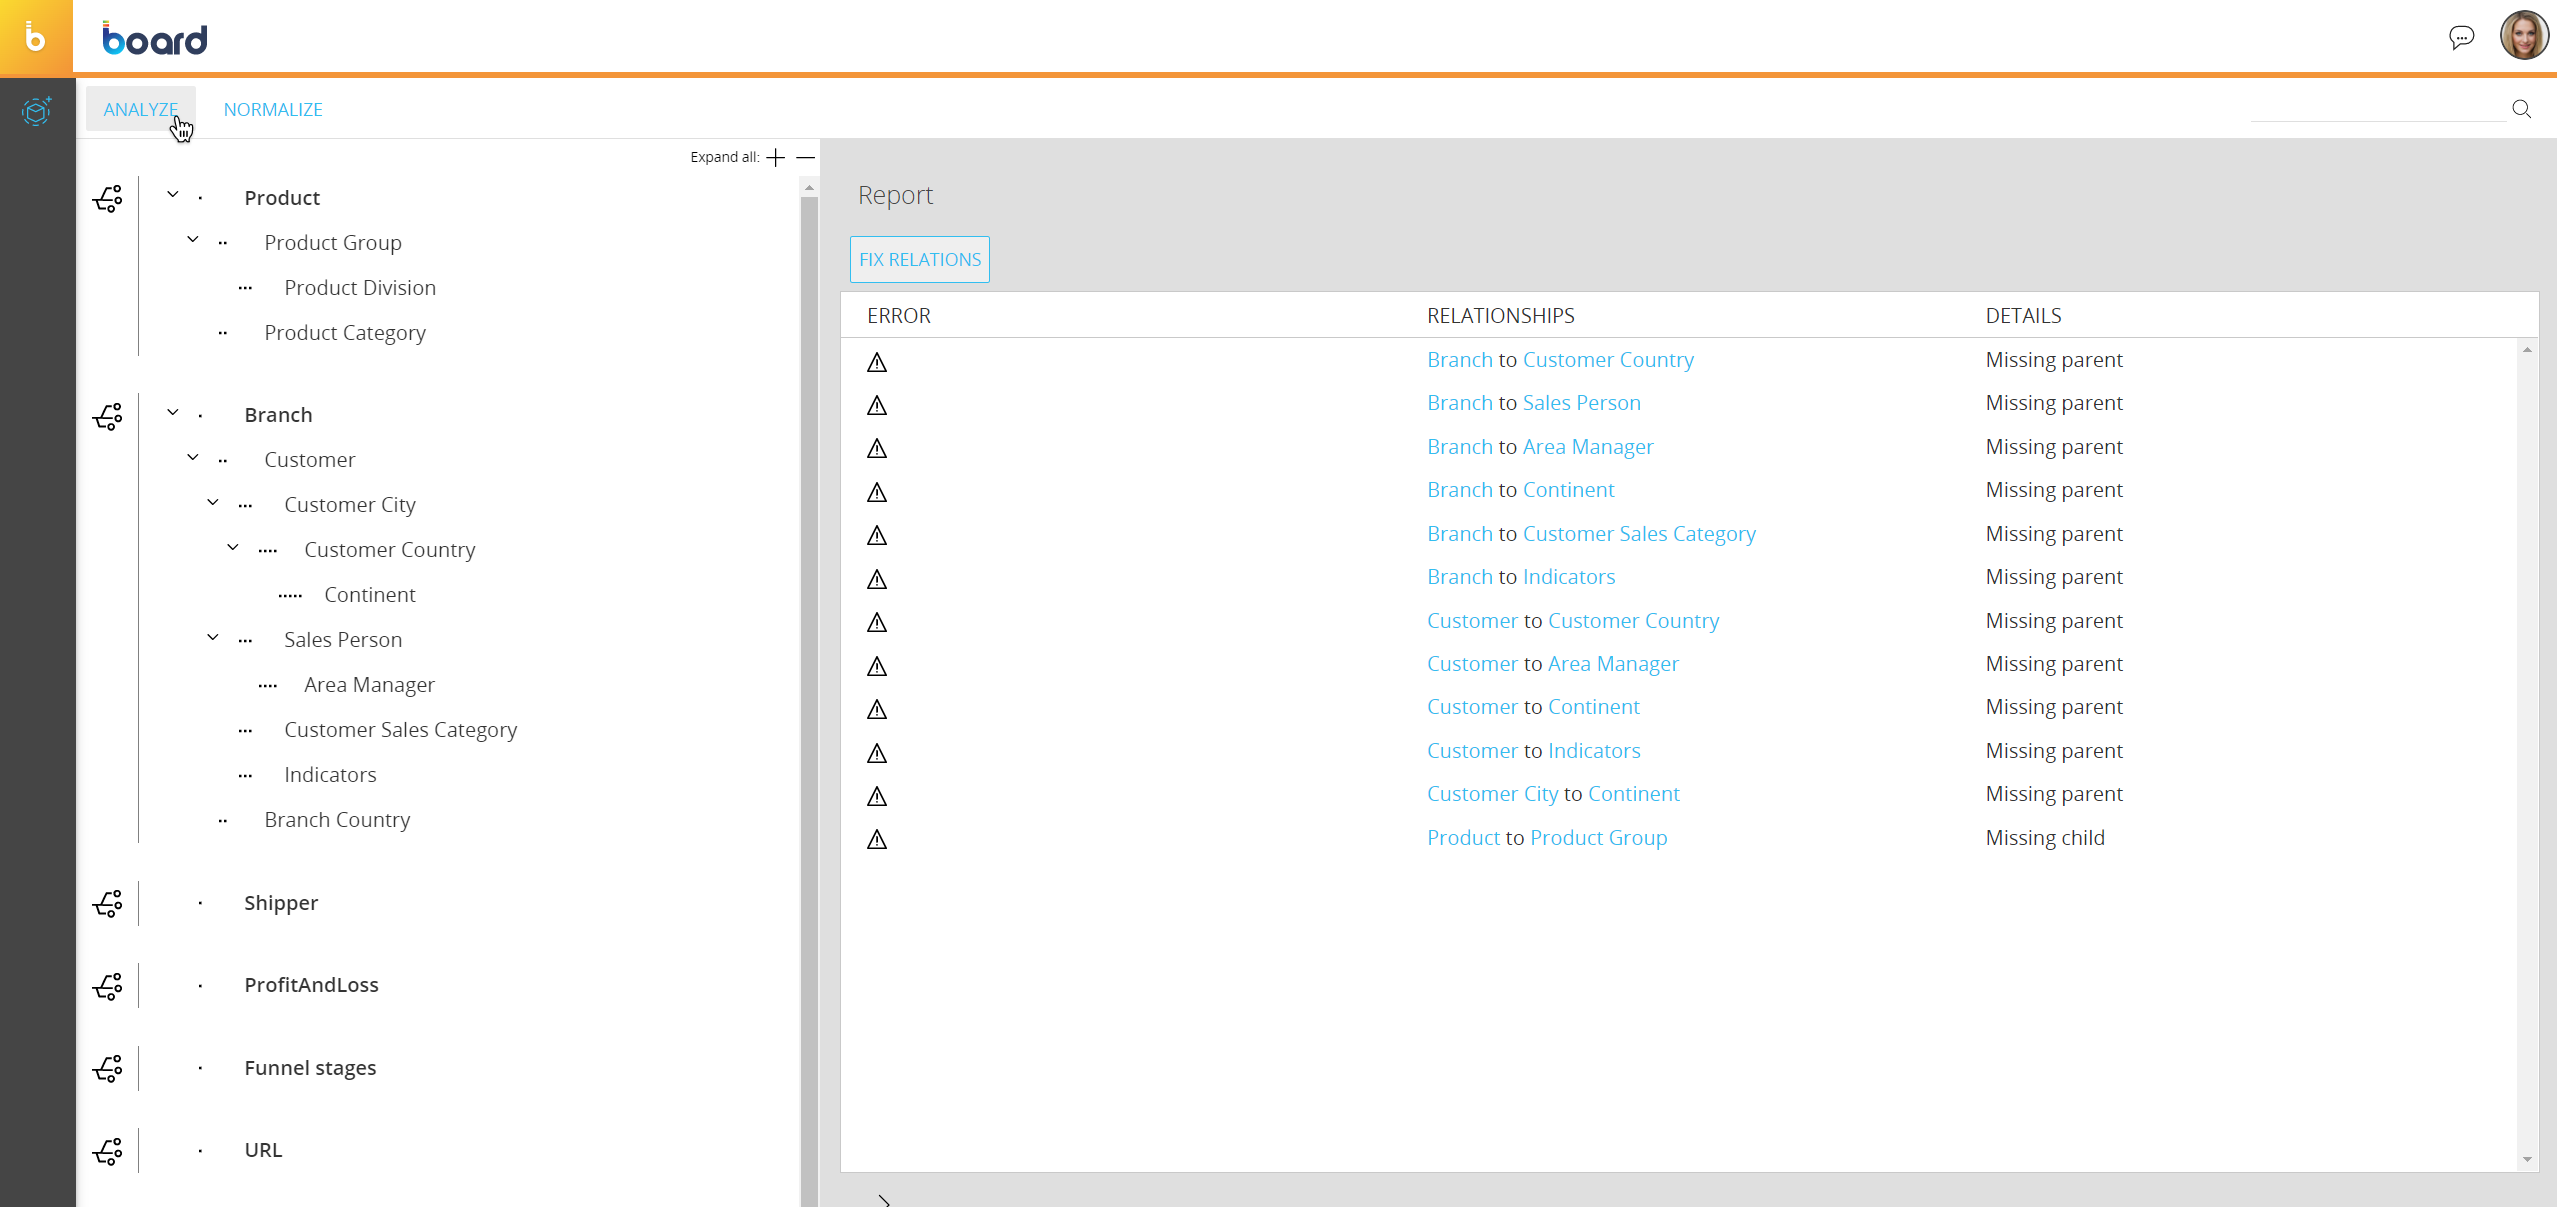
Click on each row to open the details panel: members with a missing relationship will be shown in red, at the top of the list.
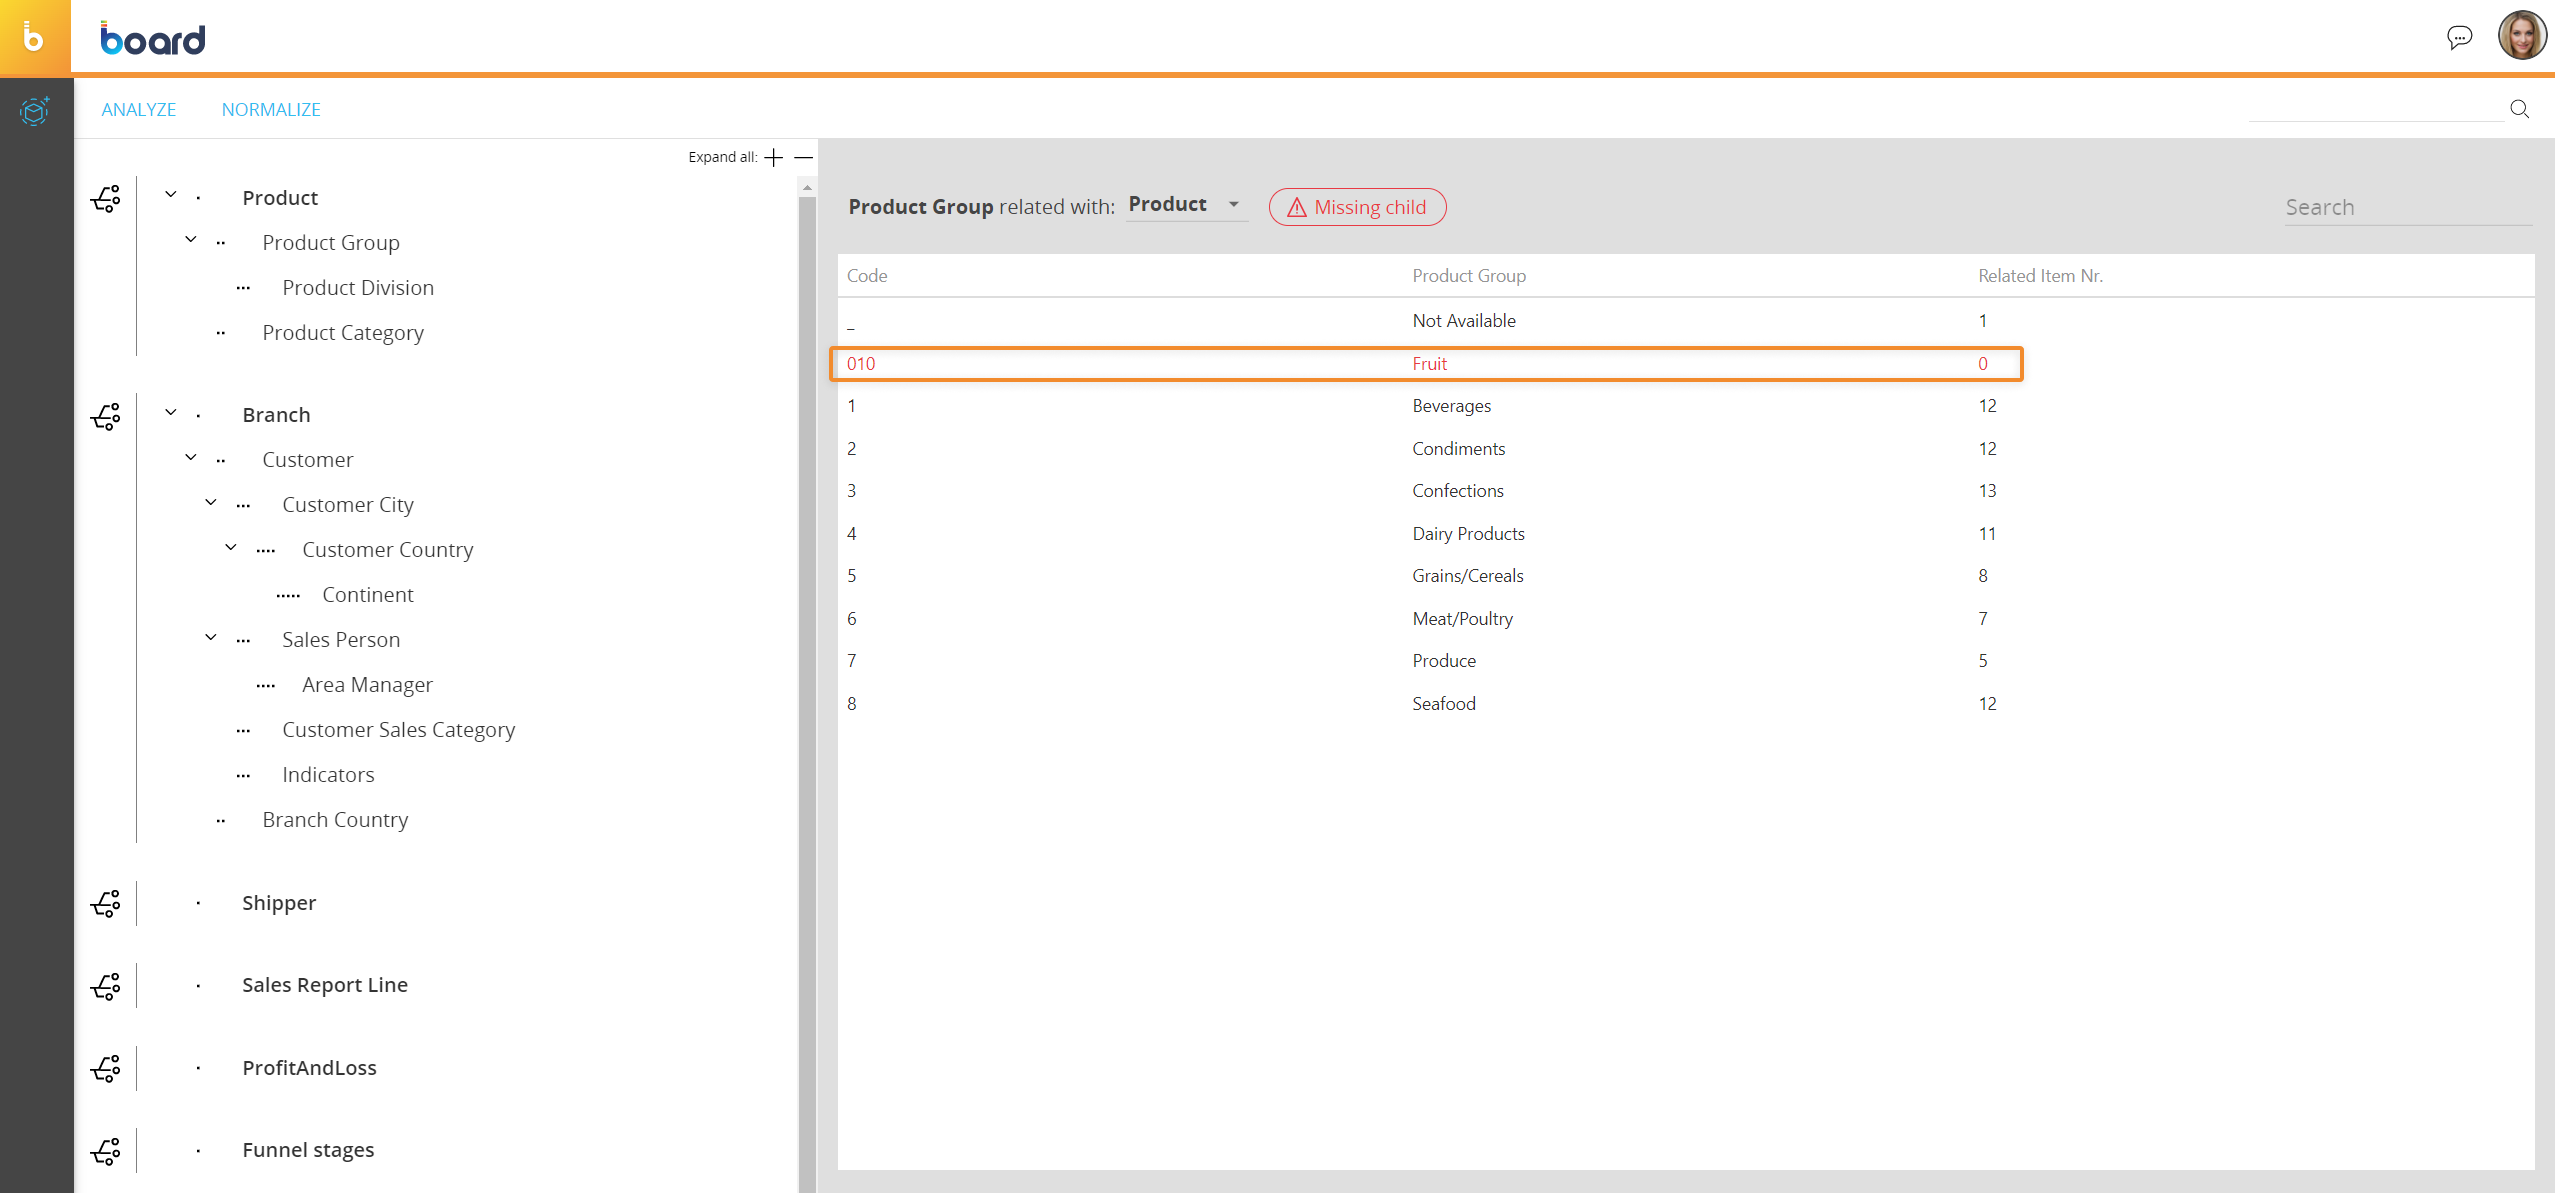
You can use the DEFAULT button to fix all "Missing parent" relationships at once: just click on the button and select the member you want to assign to all incomplete relationships.
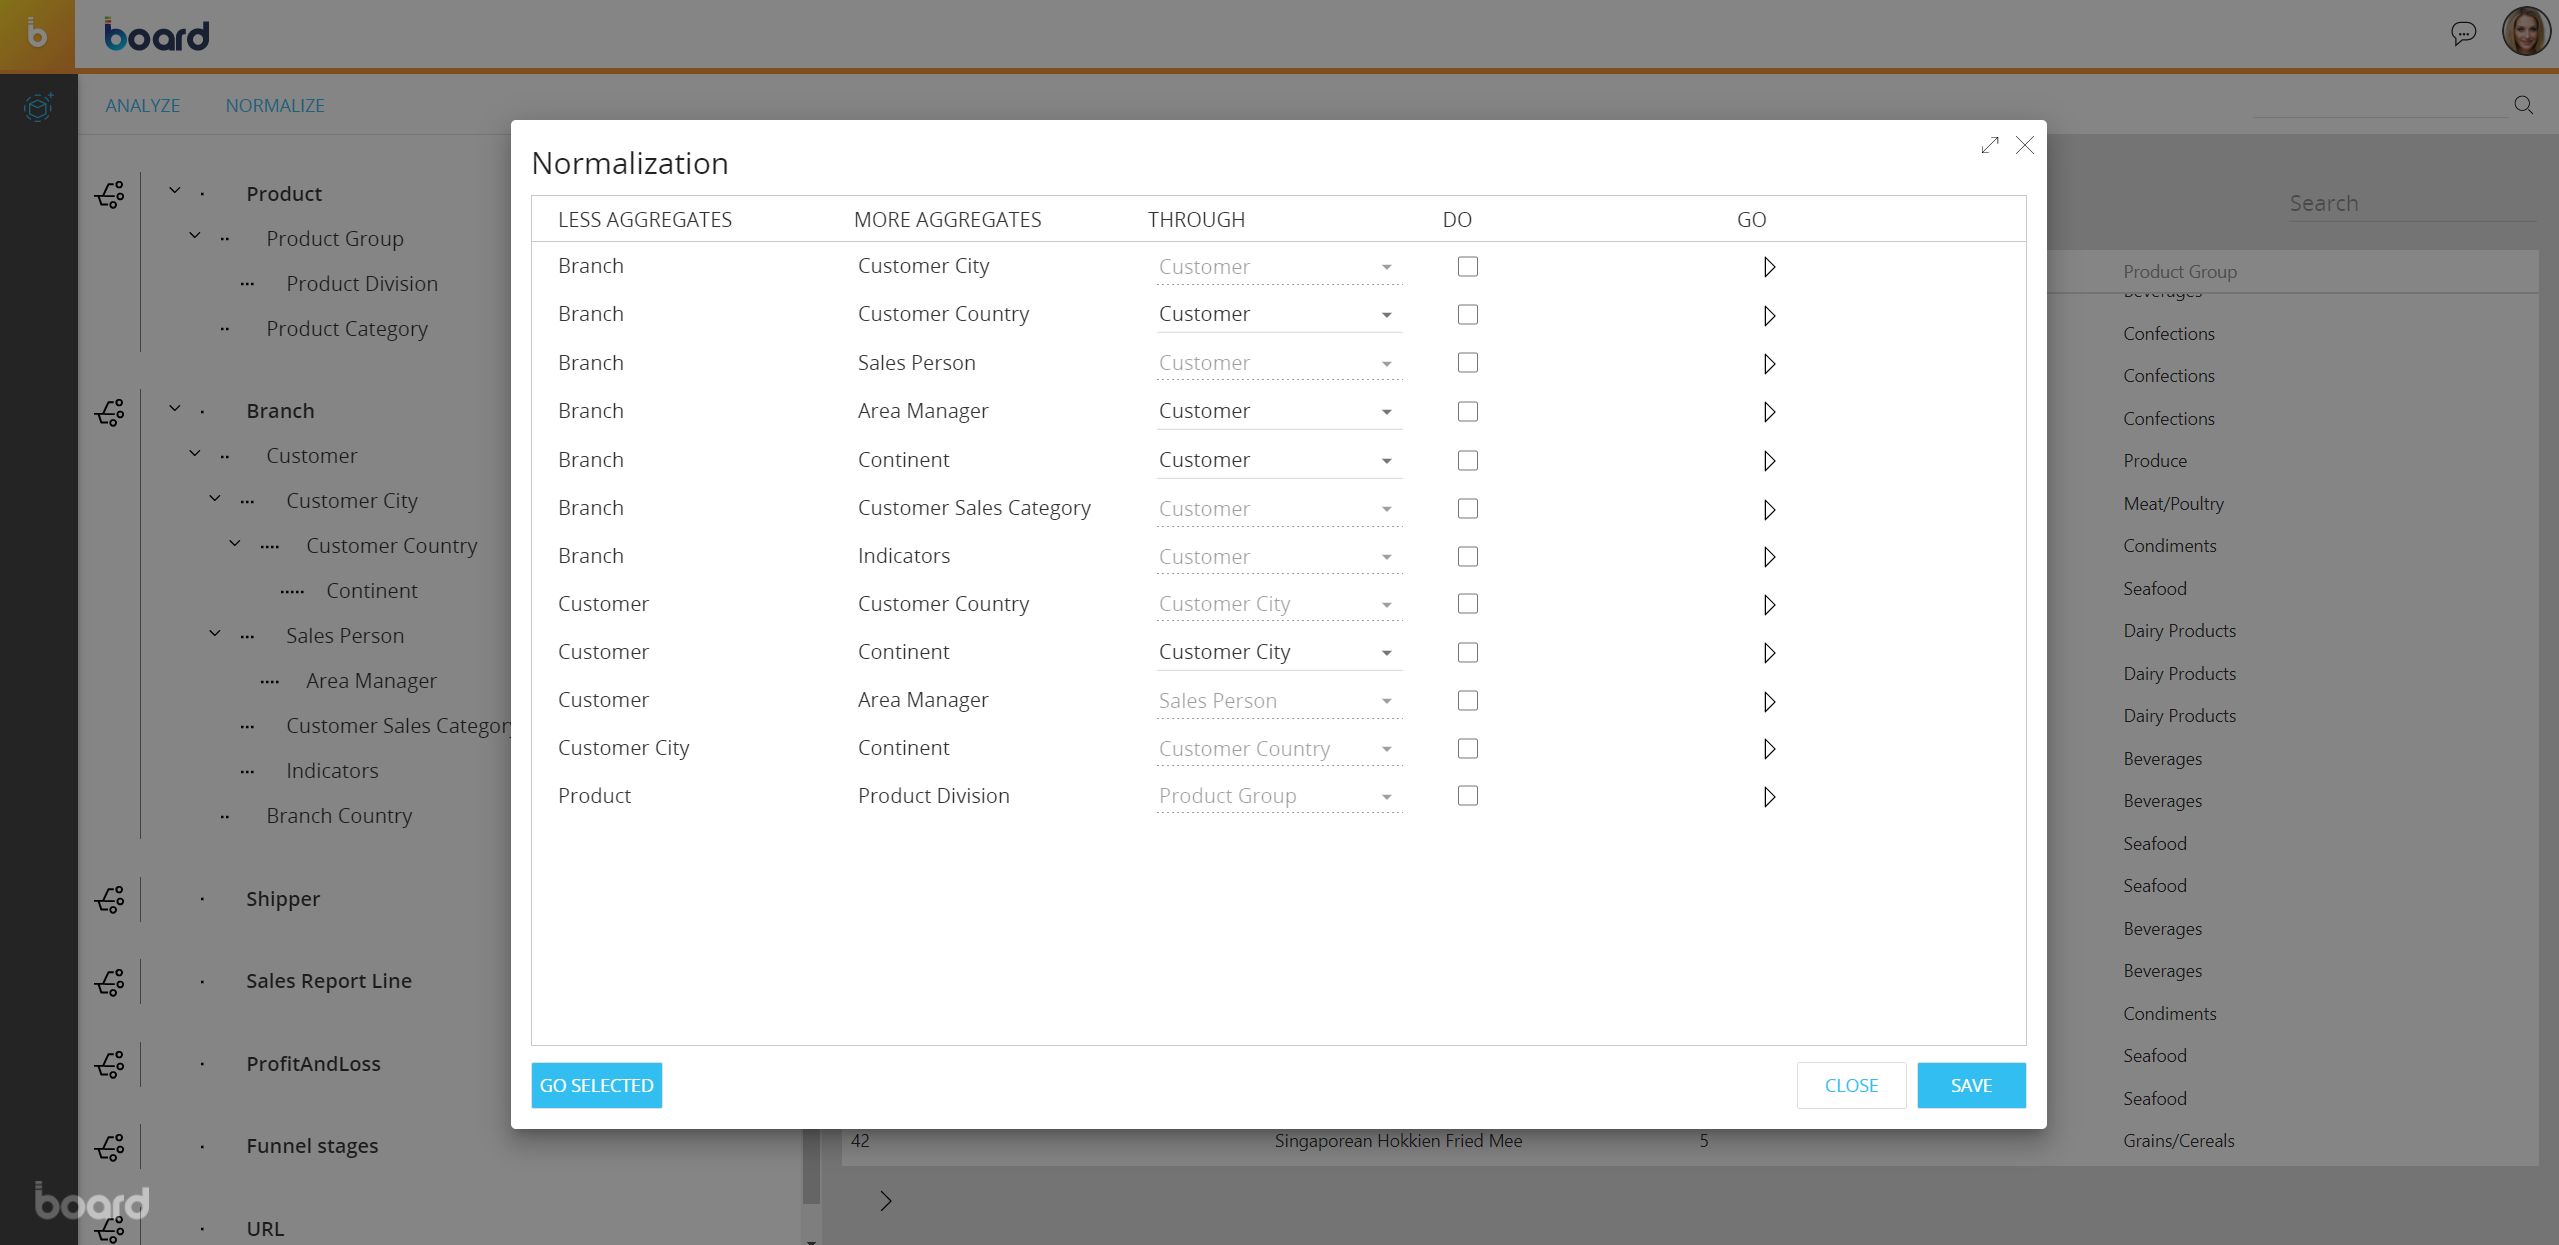
Click on the NORMALIZE button to create indirect relationships using direct relationships as a bridge. For example, in the hierarchy Customer→City→State, after having created the direct relationships Customer→City and City→State, you can use the Normalize function to automatically assign the indirect relationship Customer→State based on the two existing direct relationships.
Click on the NORMALIZE button to access the dedicated configuration window: from there, you can choose the Entity used as a bridge and run normalization processes one by one using the GO arrow at the end of each row. You can also run multiple normalization processes in bulk, by selecting all desired rows and clicking on the GO SELECTED button.
Click on the SAVE button to save the selected normalization options for later or for launching the normalization via a Procedure.