Configure, edit, reset a Select
How to configure a selection
To configure a selection, proceed as follows:
-
Open the Select window by clicking the Select icon (
 ) in the Top Menu, then click on the chosen Entity
The Search feature in the upper right corner of the window will list all available Entities matching the search term as you type it.
-
After clicking on the chosen Entity, a window listing all available Entity members appears
The Search feature in the upper right corner of the window will list all available Entity members matching the search term as you type it.
-
Click on the desired Entity members
You can also select a set of contiguous items by clicking and dragging a rectangle around the items you want to select.
To select a series of items, click on the first and Shift-click on the last. -
Click "APPLY" to select the highlighted items or click "EXCLUDE" to select all non-highlighted items.
Only in a Layout Select window, when you have selected the desired Entity members, you can click on the "TO" button to override the currently active Screen selection on the selected Entity.
This action has an impact on the rest of the hierarchy: the effect of your selection is shown immediately
-
In the Select window, you can apply additional options by hovering over Entities affected by a selection (optional).
See The Focus function and Dynamic selection for more details -
Click "APPLY" once more in the Select window and all Objects defined by a Layout will automatically refresh to show the updated dataset.
Select options for unbalanced hierarchies
The following special Select options can be used on a single Entity member of an unbalanced hierarchy:
- Descendants
- Children
- Leaves
- Ancestors
- Parent
- Siblings
Descendants
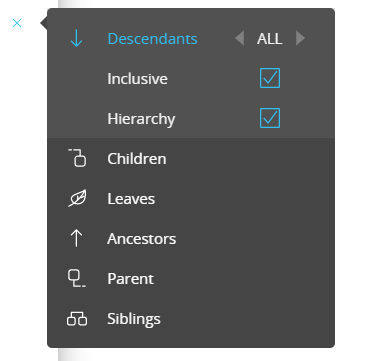
This option selects all descendants (children) of the selected member.
The value next to the option defines the depth of the selection:
- ALL: All descendants on any level will be selected
- 1: All descendants that are 1 level away from the selected member will be selected
- 2: All descendants that are 2 levels away from the selected member will be selected
And so on…
The “Inclusive” checkbox defines whether or not to include the selected member in the selection.
The “Hierarchy” checkbox defines whether or not to include the levels between the selected member and the member at the maximum depth of the selection.
Children
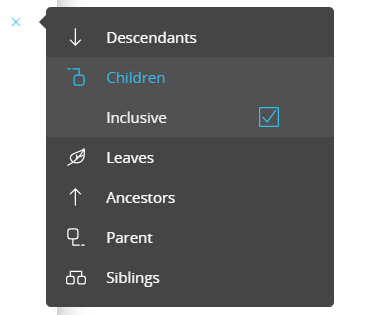
This option selects direct descendants (children) of the selected member. Descendants of the selected member’s descendants won’t be selected.
The “Inclusive” checkbox defines whether or not to include the selected member in the selection.
Leaves
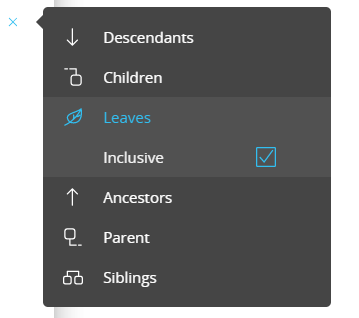
This option selects leaf members that are descendants of the selected member. Nodes are excluded from the selection.
The “Inclusive” checkbox defines whether or not to include the selected member in the selection.
Ancestors
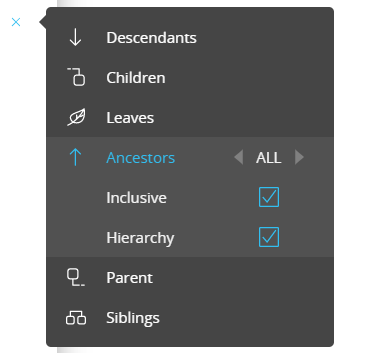
This option selects all parent members of the selected member, up to the root member.
The value next to the option defines the depth of the selection:
- ALL: All ancestors on any level will be selected
- 1: All ancestors that are 1 level above the selected member will be selected
- 2: All ancestors that are 2 levels above the selected member will be selected
And so on…
The “Inclusive” checkbox defines whether or not to include the selected member in the selection.
The “Hierarchy” checkbox defines whether or not to include the levels between the selected member and the root member.
Parent
This option selects the direct parent member of the selected member.
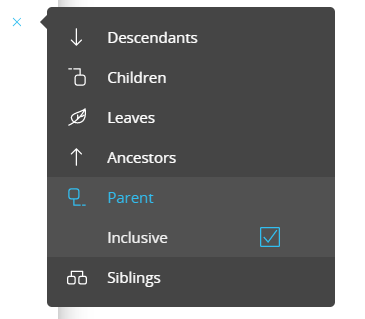
The “Inclusive” checkbox defines whether or not to include the selected member in the selection.
Siblings
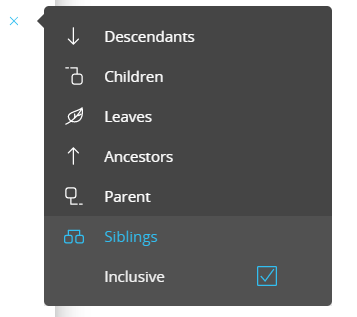
This option selects all siblings of the selected member.
The “Inclusive” checkbox defines whether or not to include the selected member in the selection.
How to edit a selection
To edit an existing selection, proceed as follows:
-
Open the Select window by clicking the Select icon (
) in the Top Menu, then click on a checked Entity -
After clicking on the chosen Entity, a window listing all Entity members appears.
Currently selected members show a blue check mark on their left, while non-selected members are grouped in the grey area at the bottom of the list. -
Click on the Entity members you want to to add or remove from the current selection
You can also select a set of contiguous items by clicking and dragging a rectangle around the items you want to select.
To select a series of items, click on the first and Shift-click on the last.
Click the "CLEAR" button at the bottom left corner of the window to clear all selections and start over. To reset a selection on a single Entity or on all Entities, please refer to the next paragraph. -
Click "APPLY" to select the highlighted items
-
In the Select window, you can apply additional options by hovering over Entities affected by a selection (optional).
See The Focus function and Dynamic selection for more details -
Click "APPLY" once more in the Select window and all Objects defined by a Layout will automatically refresh to show the updated dataset.
To completely reset existing selections on all Entities, click on the "RESET ALL" button in the bottom left corner of the Select window.
To reset a selection made on a single Entity, hover over a checked Entity and click the "Reset" icon, as shown in the image below:

Resetting the selection on an Entity belonging to a hierarchy also automatically resets all selections propagated to all Entities of that same hierarchy. For example, if you select July-2021 from the Month entity, the selection will propagate to the year 2021 of the Year entity. Resetting the selection on the Month entity to all existing months will result in resetting the selection to all years of the Year entity too.
Resetting a selection made on an Object, such as a Selector, a Data View, or a Chart, restores the state of the Select at runtime. In case a Screen is opened through a "Drill-to-Screen" action or includes a triggered procedure which applies a Select, the additional selection criteria are applied to the Select at runtime.